- Currency Code – set the currency code for donations. Find here the full Currency code list.
- PayPal donation – Switch On or OFF;
Log into PayPal and click Profile.
- Click API Access from the Profile menu.
- Click Request API Credentials.
- Check Request API signature and click Agree and Submit.
- Write down your credentials (Name, Password and Signature)
- Click on Done
Learn more how to set the API Signature
- PayPal API Username – add the PayPal API Username;
- PayPal API Password – add PayPal API Password;
- PayPal API Signature – add PayPal API Signature;
- PayPal API Page – add PayPal API Page;
- PayPal Page return – select the page where the user will return back after successful donation.
NOTE: The selected page should use the PayPal Thank You! template.
- PayPal Page Cancel – select the page where the user will return back after he canceled the donation process.
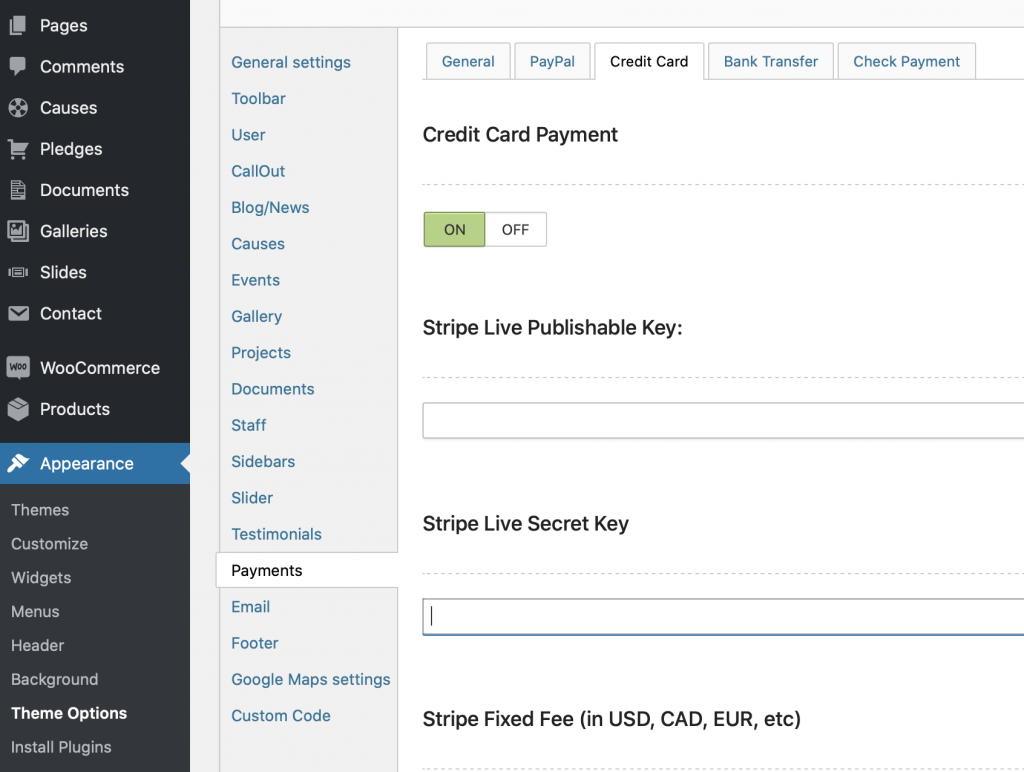
- Credit Card Payment – Switch On or OFF. Read how to set the Stripe
- Stripe Live Secret Key – Stripe Secret Key, Stripe Dashboard
- Stripe Live Publishable Key – Stripe Live Publishable Key, Stripe Dashboard
- Stripe Page Processing – Select the page where the Stripe will be process the donation, (Thank You Stipe page)
- Bank Transfer – Switch On or OFF;
- Direct Bank Transfer Details – add Bank Transfer Details;
- Check Payment – Switch On or OFF;
- Check Payment Details – Add Check payment details;
Set Stripe Webhoocks
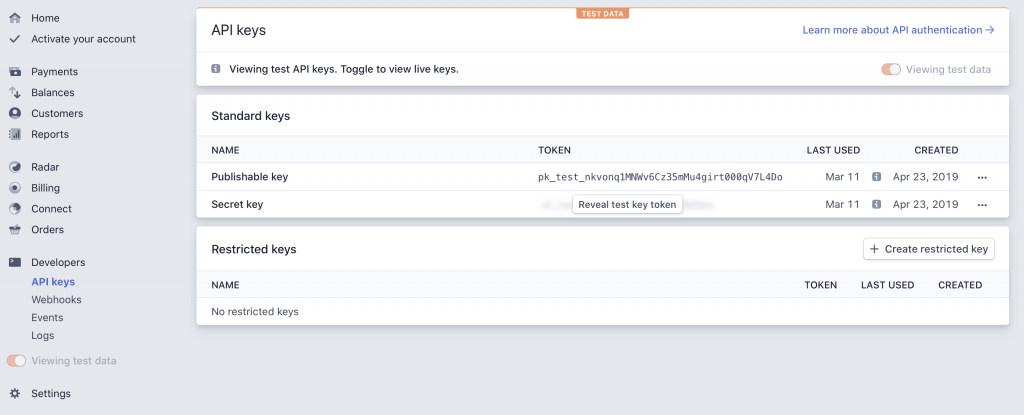
Go to Stripe Dashboard then Developers → API Keys, generate the Secret Key and Publishable Key (for testing you can use Test Secret Key and Test Publishable Key)
Return to your website and go to Appearance → Theme Options → Payments → Credit Cards add your Stripe Secret Key/Publishable Key and click save options.
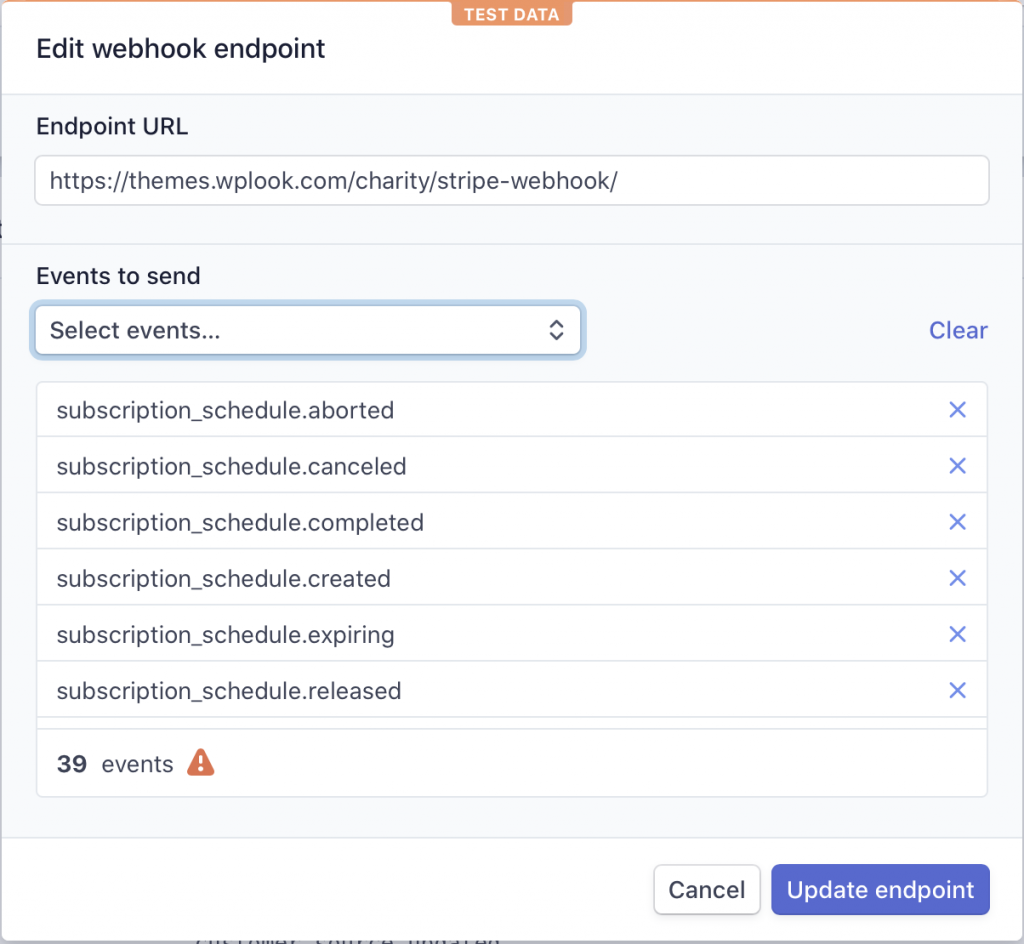
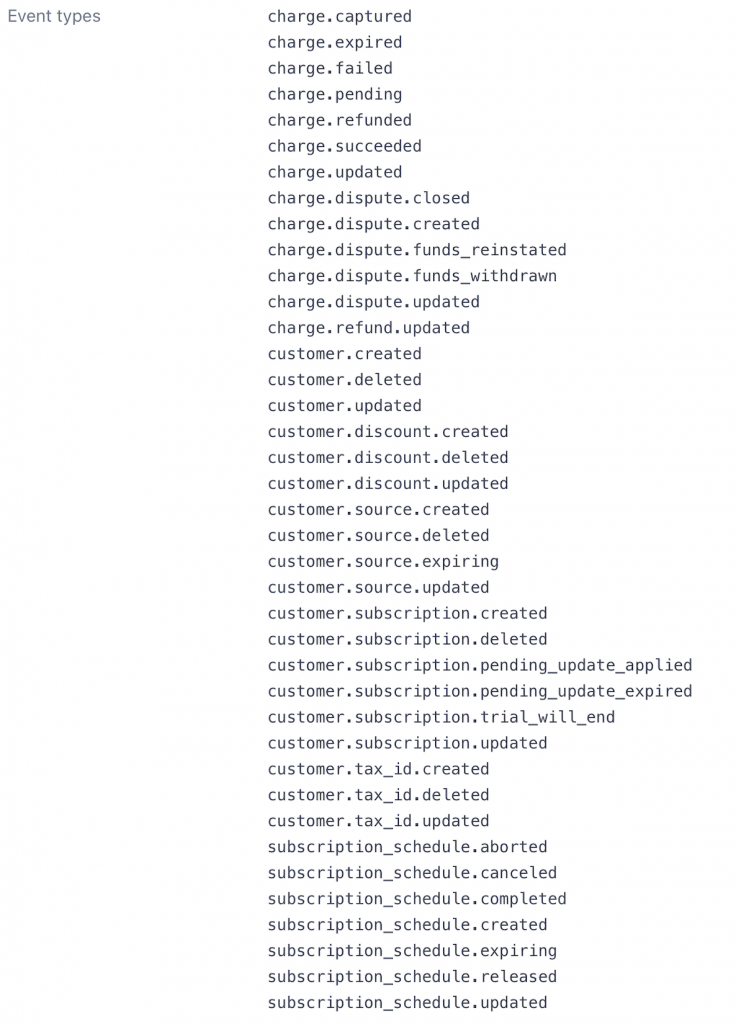
The last step is to activate Stripe Webhook. Go to WordPress Pages and copy Stripe webhook page URL then go to Stripe Dashboard → Developer → Webhooks. Click to Add endpoint… add URL, select The All Events for Charge, Customer and Subscription_scheduled and click Create endpoint.
By necessity, you can add the user pages to the menu.