Pages are very similar to blog posts in the sort of content they accept (text, images, shortcodes etc.), but are meant for more permanent content as opposed to the time-based nature of blog posts.
The pages screen provides the facility to manage all the pages in a blog. Via this screen, pages can be edited, deleted, and viewed. Filtering, and searching, also makes it easy to quickly find pages matching certain criteria.
Several powerful features allow pages to be edited in bulk allowing fields such as Author, Parent, Template, Comments Allowed, Status, and Pings Allowed, to be changed for a whole batch of pages. In addition, a Quick Edit feature provides an easy method to change a multitude of values, such as Title, Slug, Date, and Author, for a given page.
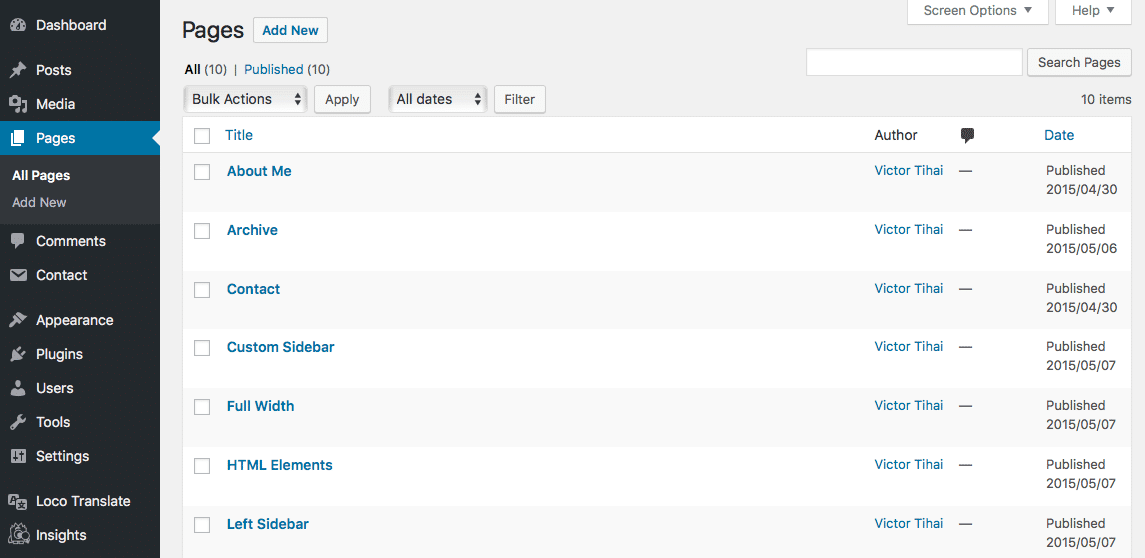
Table of Pages
A table lists all of your pages, by row. The pages are listed with the newest page first.
The table of Pages contains the following columns:
- [ ]: This checkbox, when clicked (checked), ‘selects’ that particular page to be processed by a bulk action.
- Title: This is the page’s title displayed as a link. Click the title link to edit this page. Next to the Title, if a page is of a Draft, Pending, or Password Protected nature, bold text will display showing that. Hovering over the Title displays the unique identifier (ID) of a page.
- Author: Displayed in the form of a link, this is the author who wrote the page. Clicking the author link causes all the pages authored by that user to be displayed in the table of pages (thus allowing a bulk action to be applied to all pages for a given author).
- Comment bubble: A comment bubble is the column heading, and each page row has comment bubble with the number of comments for that page. If a page has any comments, then the number comments is displayed in a blue bubble. Clicking on a blue comment bubble causes the comments screen to be displayed to allow moderation of those comments.
- Date: The date column for each page shows the date ‘Published’ for published pages or the date ‘Last Modified’ for other pages.
Sortable Columns
Some column headings, such as the Title, Author, and Date, can be clicked to sort the table of pages in ascending or descending order. Hover over the column title, for example Title, to see the up-arrow or down-arrow. Click the heading to change the sort order.
Page Navigation
Above the pages table, the pagination is displayed. If more then one page of pages is available, two double-arrow boxes to move to the first and last page are provided. Also two single-arrow boxes are displayed to move one page backward or forward. Finally, a box showing the current page number can be used to enter a page to directly display.
Screen Options
The screen options area is located at the top right of the screen. Activate it by clicking the Screen Options button.
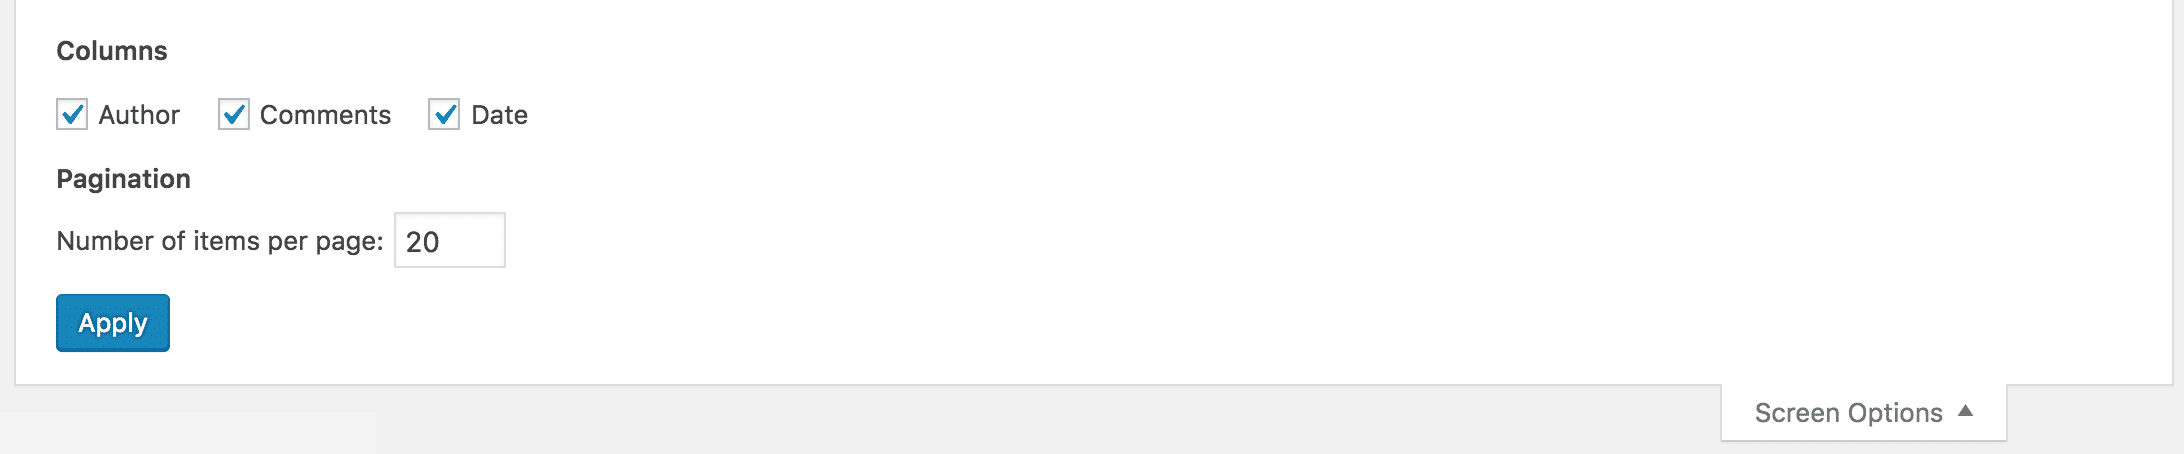
The Columns section allows you to choose which columns to display in the pages table.
The Pagination section allows you to change how many items are displayed per page in the pages table.
Modify any of these options and click Apply to save them. These preferences are saved to your account, so will remain the same even if you change devices, but will not affect the display of the pages table for any other users.
Search and Filtering
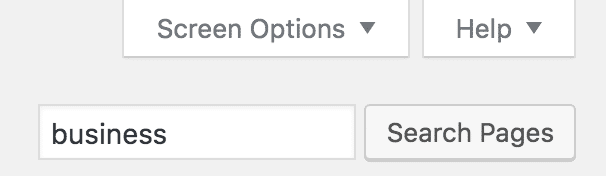
Search
Above the pages table, to the right, is a search box where you can enter a word, or series of words, and click the Search Pages button to search and display all the pages meeting your search words.
Filtering Options
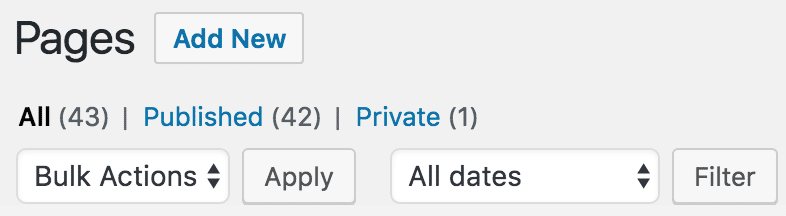
At the top of this screen are links such as All, Published, Pending Review, Draft, Private, that when clicked, will cause just the pages of that type to be displayed in the underlying table.
The All dates dropdown allows you to select, by date, which pages are displayed in the table of pages. By default, “All dates” is selected and all of your pages are displayed.
Click Filter to apply the settings selected in the dropdowns.
Bulk Edit
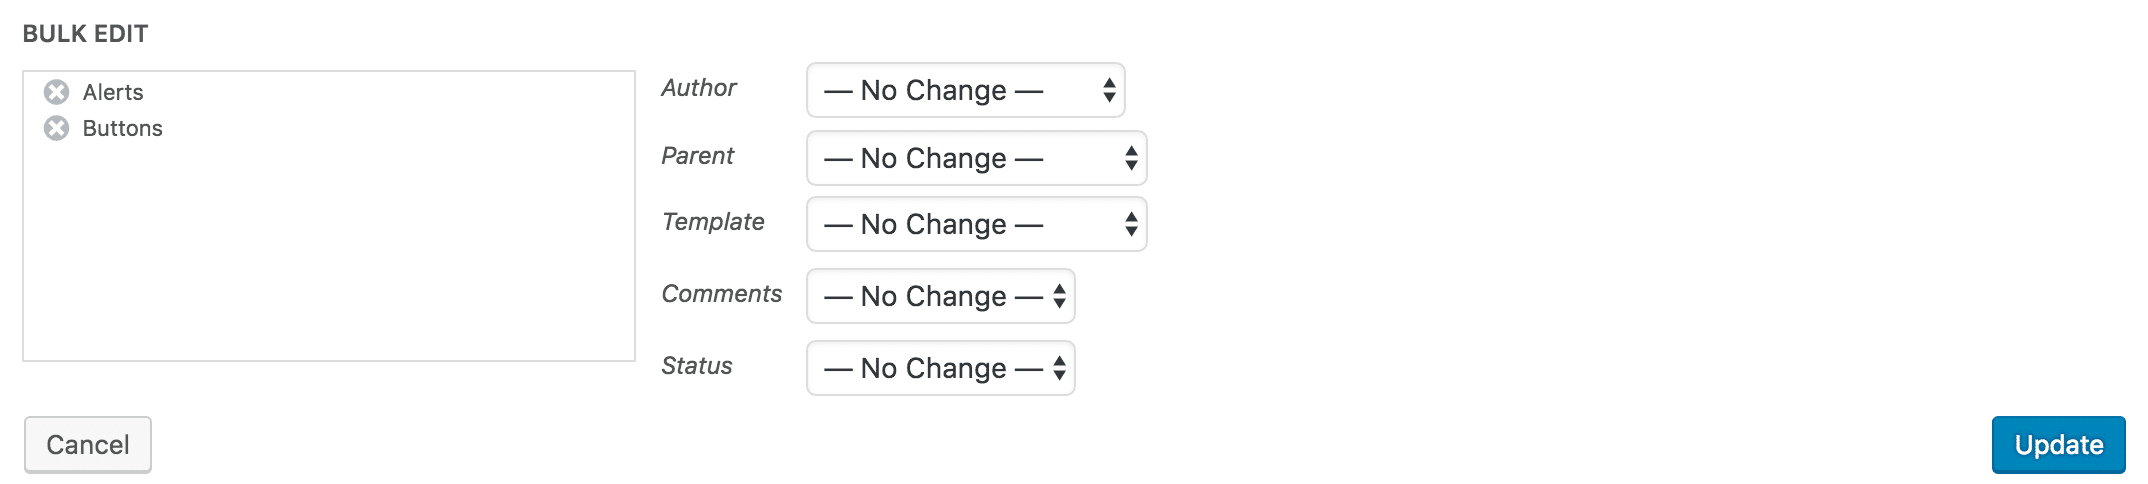
The bulk edit area is displayed below the table of pages header once, one, or more, pages have been selected, and the bulk action of Edit is applied. Bulk edit allows the fields Author, Parent, Template, Comments Allowed, Status, and Pings Allowed, to be changed for all the selected pages.
Once you have made the desired changes, click Update to save them or Cancel to abandon them.
Quick Edit
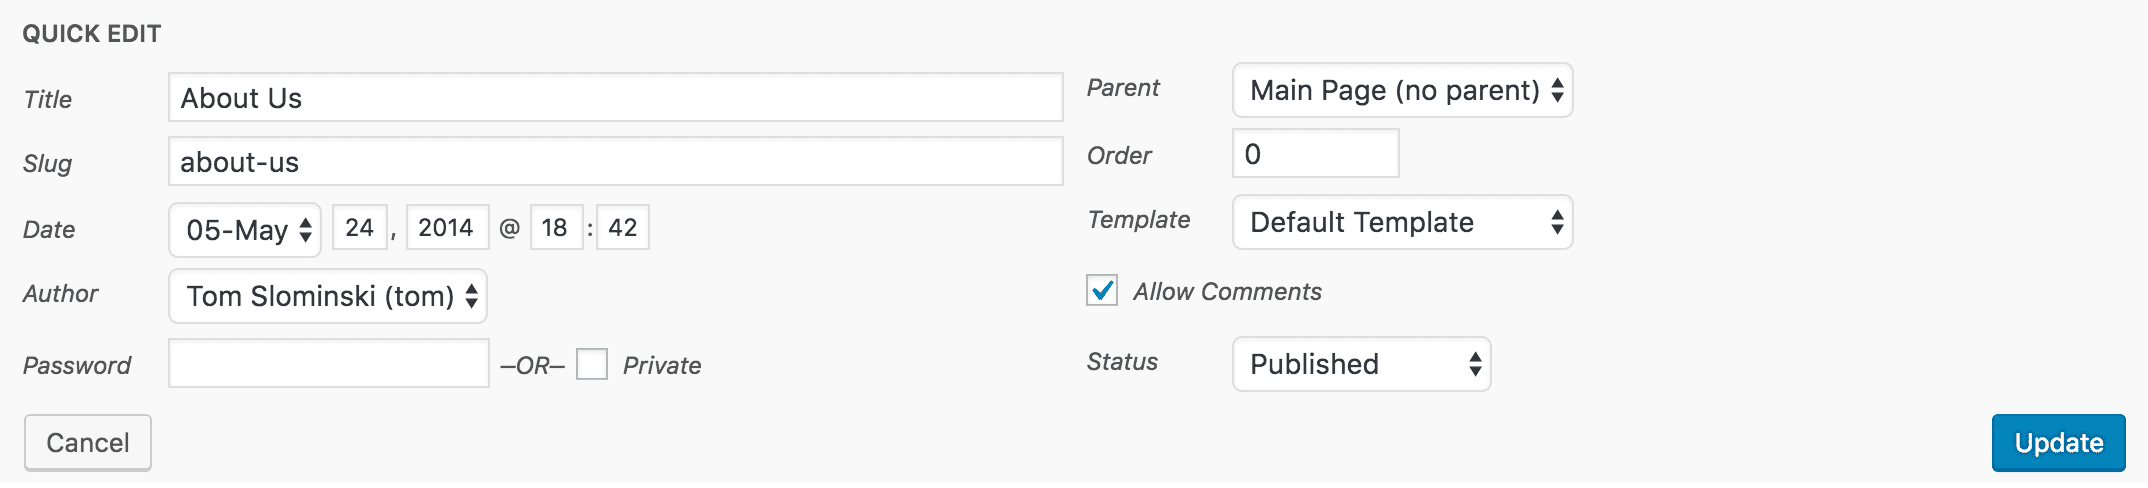
Quick Edit is an immediate action performed on one page by clicking the Quick Edit link under the page title in the table of pages. Quick edit is just an in-line edit that allows you to change the following items: Title, Slug, Date, Author, Password or Private page box, Parent, Order, Template, Allow Comments, Allow Pings, Status.
Once you have made the desired changes, click Update to save them or Cancel to abandon them.
Editing Individual Pages
This mode is essentially the same as the add new page screen so see the Add New Page article for the specific details of writing a post.