You can add new causes through Causes → Add New Cause in the WordPress Administration Panel.

Causes contain most of the same options as standard posts. You can read about these in the Add New Post chapter. Additionally, they contain post options specific to causes.
Cause Options
Cause Options are found below the editor on the Edit Cause page. If the Cause Options are not visible, make sure they are checked inside the Screen Options area at the top.
If you are adding a new cause, make sure you have saved the post before editing cause options. Otherwise, the cause options will not be visible.
Header image
The header image is displayed behind the title at the top of the single cause page in the front-end. Select a wide but short image, around 1680px x 275px. Click the + button to upload an image.
If you don’t add a header image, the default background color will be displayed.
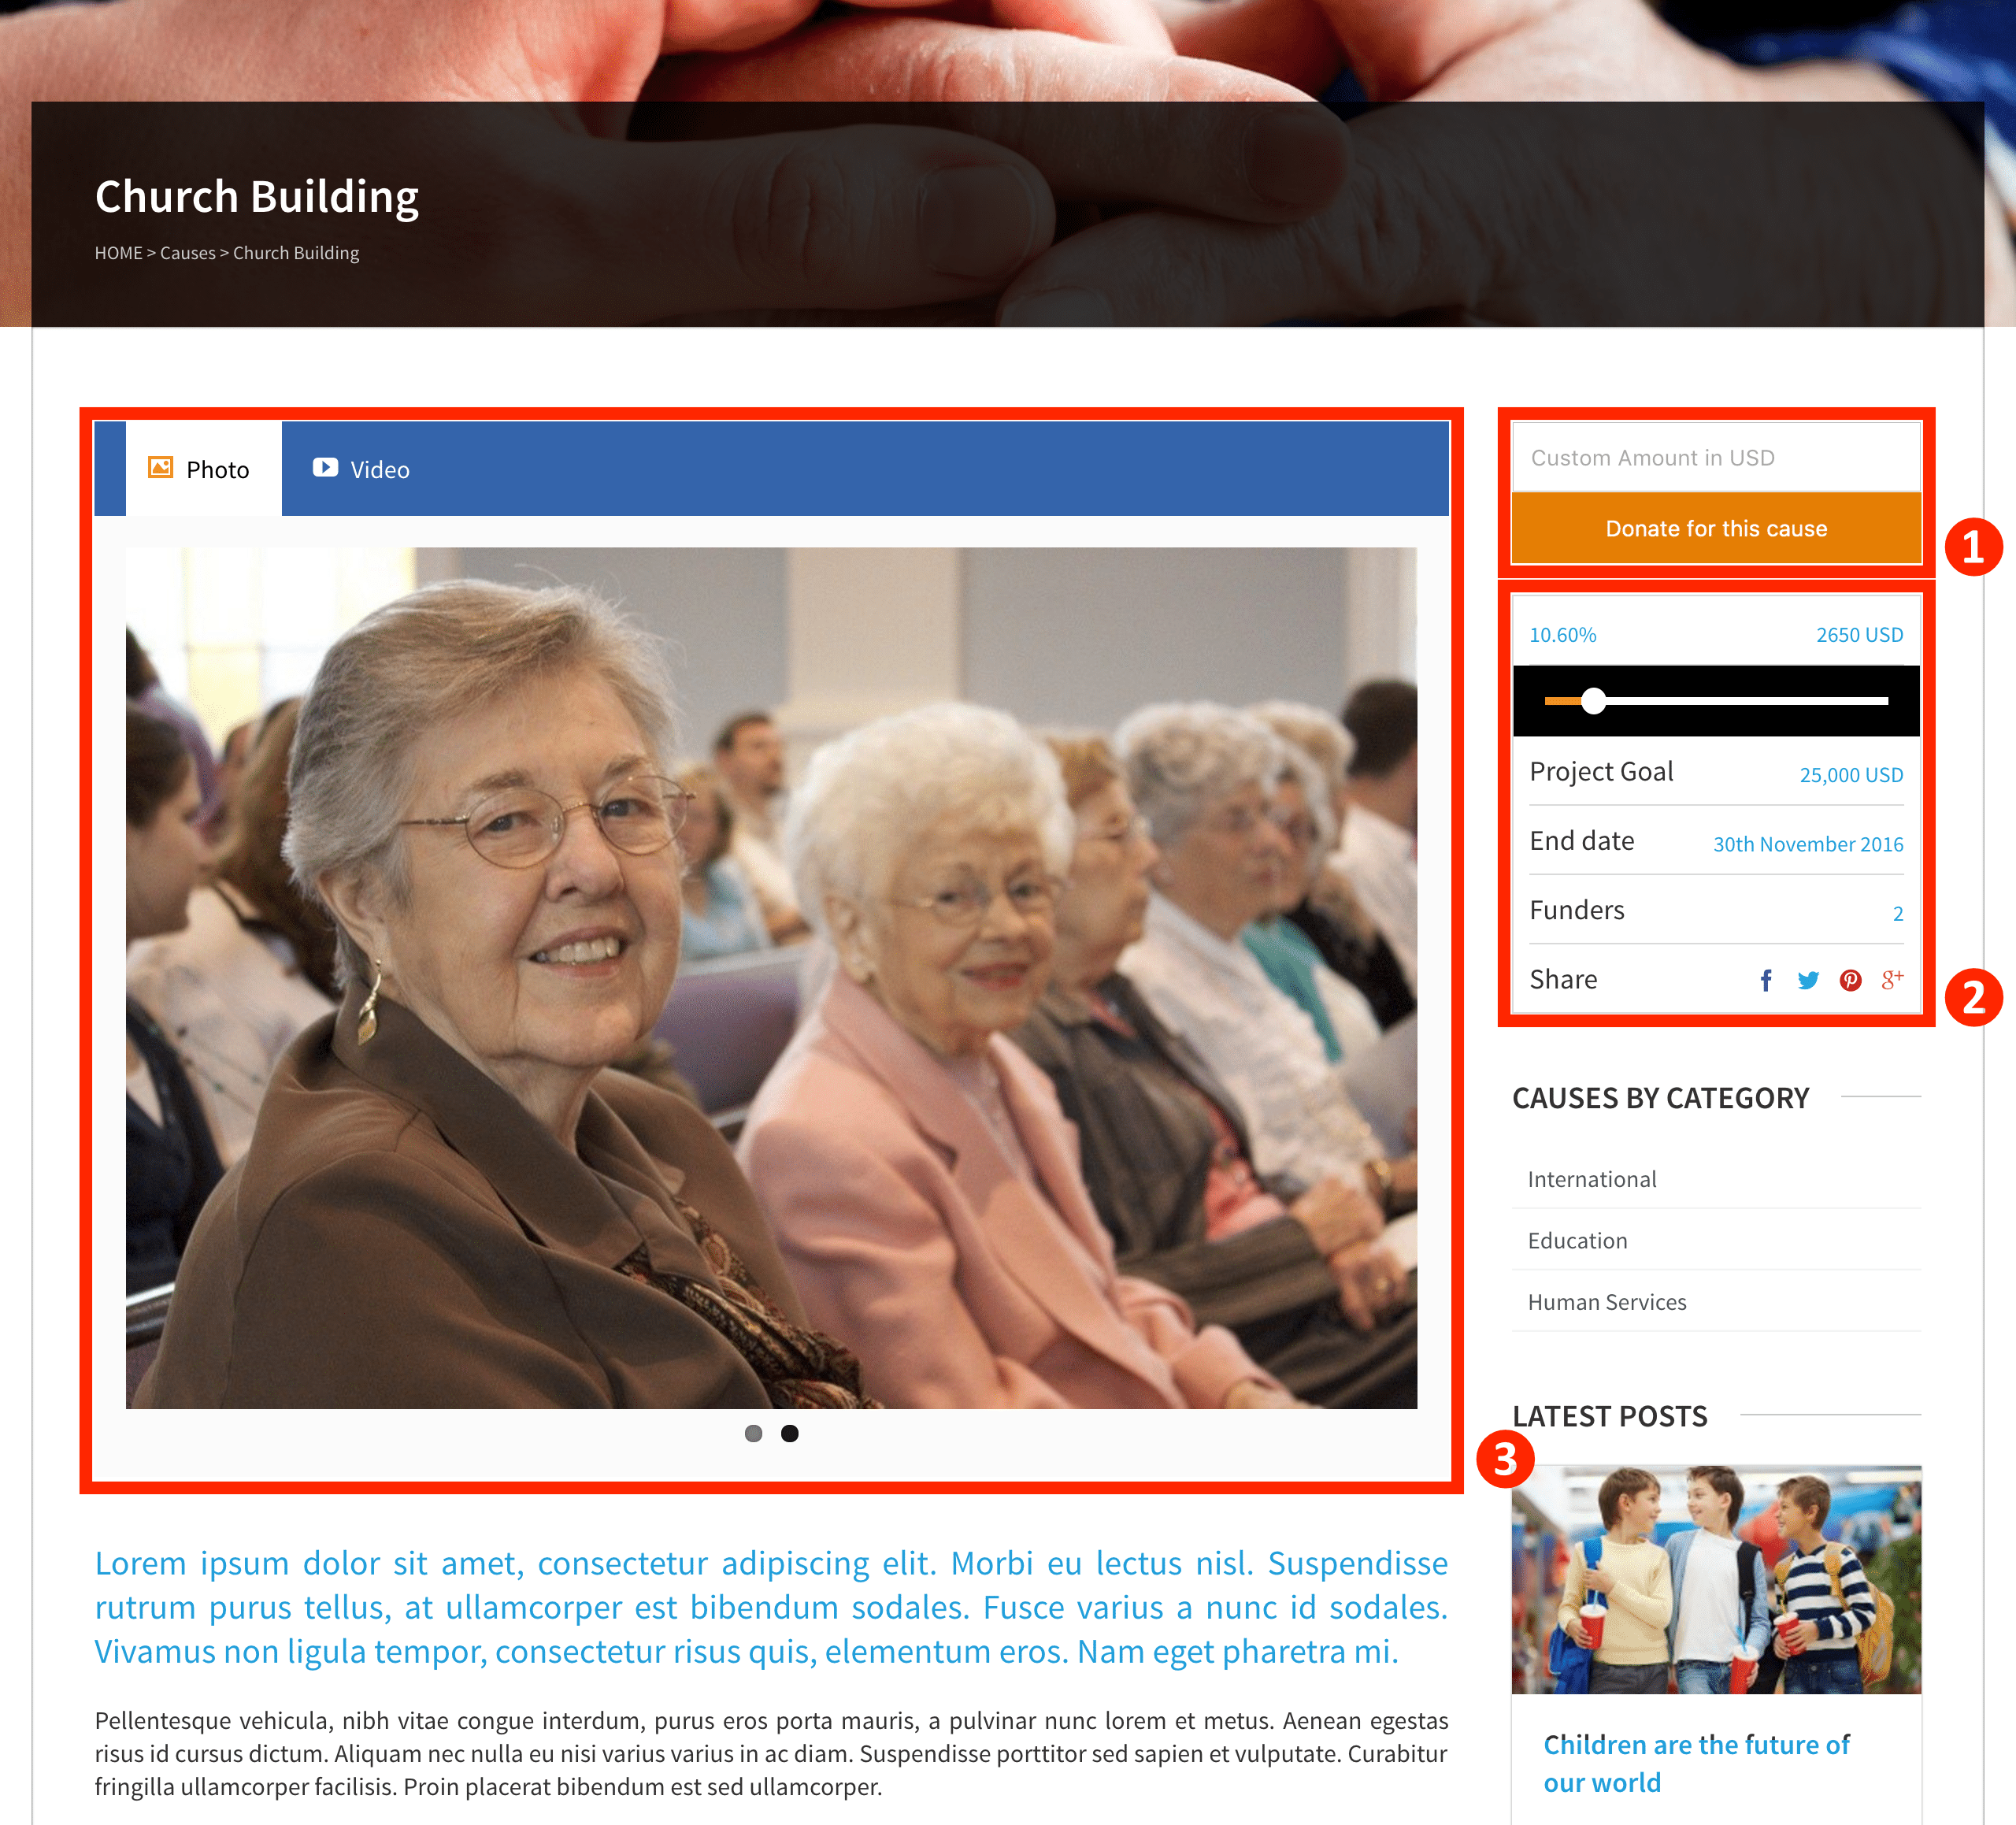
Donation button
Switch to On to display the donation button in the single cause sidebar.
Information box
Switch to On to display the cause information box in the single cause sidebar.
This includes progress towards the monetary goal, the cause end date, the amount of funders and sharing buttons (if they are enabled in the Media Options section).
Cause status
The cause status determines whether your organisation is still collecting money for this cause (Active) or whether it has been archived (Complete).
Goal amount
The amount of money you are raising for this cause. Keep this field empty if you do not want to display a progress bar on the single cause page. The currency used here can be set in Theme Options → Payment Settings → Currency Code.
End date
The date on which you are no longer collecting money for this cause.
Media Options
The media options determine the display of any pictures or videos at the top of the post.
Gallery
The gallery section is used to create a slideshow of images to be displayed at the top of the post. Click Add New to add a new image. You can also click the pencil icon on an existing image to edit it, or the bin icon to delete this image.
The Title is used to help you identify the image, and is not displayed in the front-end. The Caption is the text displayed at the bottom of the image – you can leave this field empty. Finally, the Gallery Image is the image displayed for this slide. Click + to select or upload an image. The recommended size is 1200px x 800px, but any size will be displayed correctly.
Video
The video is displayed in the media area, in separate tab to the photos set up above. The theme supports YouTube and Vimeo as sources of video. Find the video you want to display on one of the supported sites, copy the URL from your browser, and paste it here.
Share buttons
Set to On to display the sharing buttons for Twitter, Facebook, Pinterest and Google+.