You can add new events through Events → Add New Event in the WordPress Administration Panel.
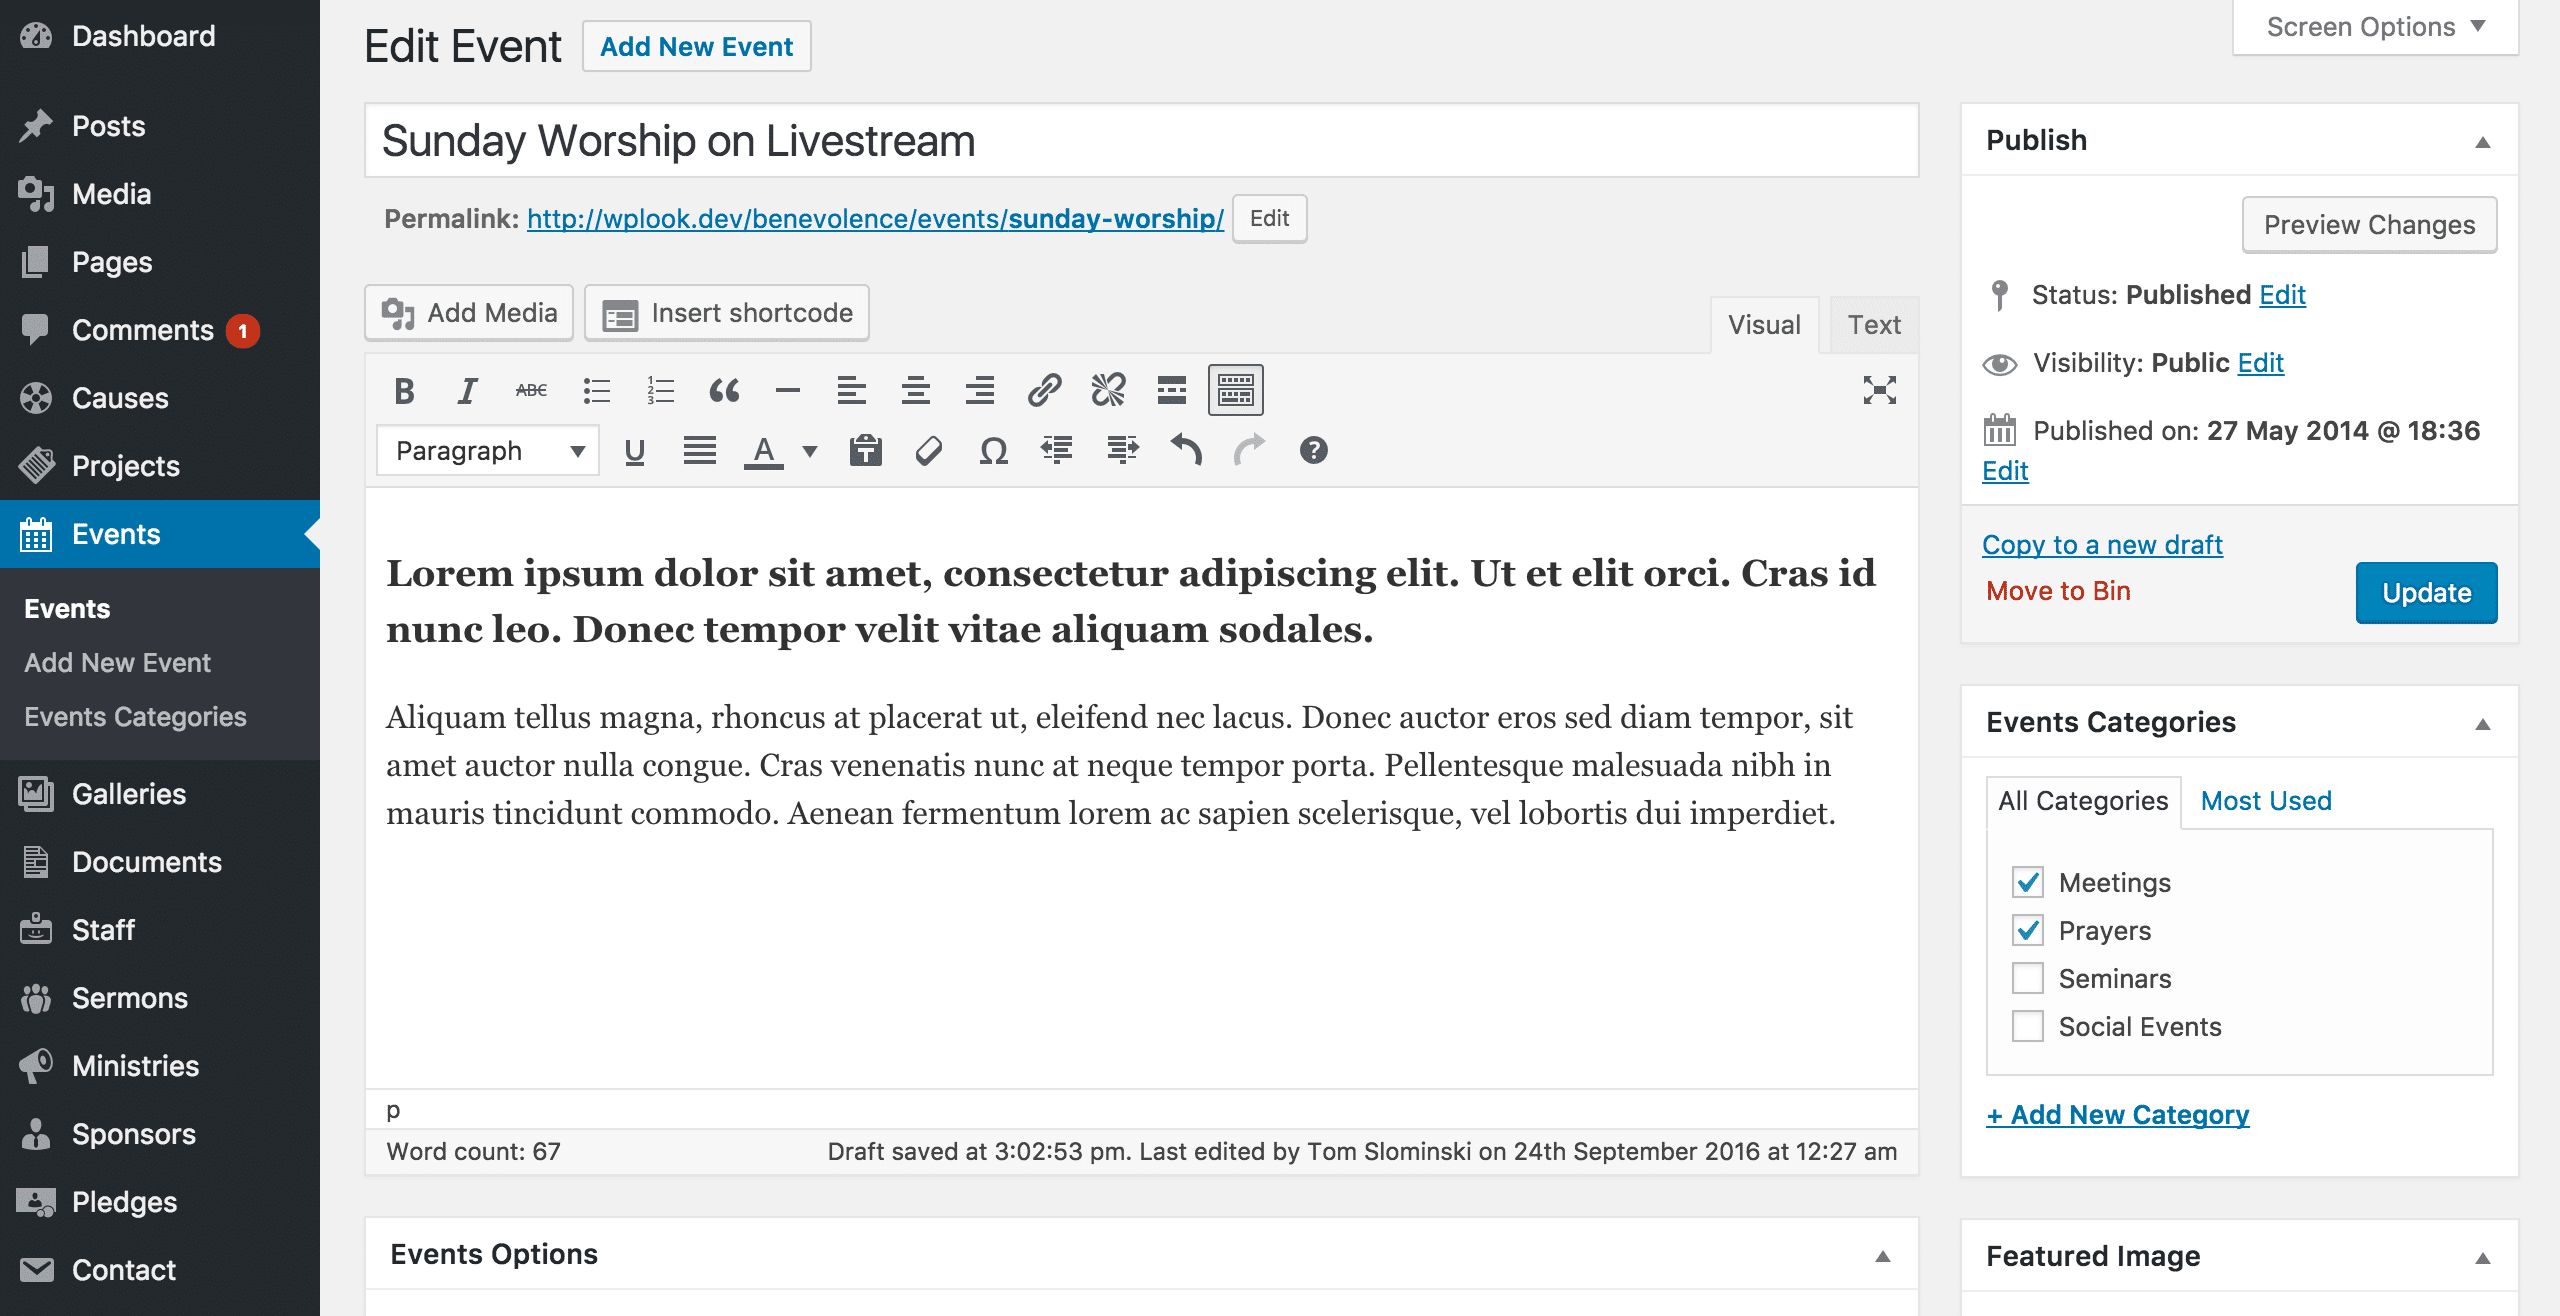
The Events → Add New Event screen.
Events contain most of the same options as standard posts. You can read about these in the Add New Post chapter. Additionally, they contain post options specific to events.
Event Options
Event Options are found below the editor on the Edit Event page. If the Event Options are not visible, make sure they are checked inside the Screen Options area at the top.
[wpls_alert alert_shape=”alert-shape-rectangular” alert_type=”alert-type-info” alert_width=”100%”]If you are adding a new event, make sure you have saved the post before editing event options. Otherwise, the event options will not be visible.[/wpls_alert]
Header image
The header image is displayed behind the title at the top of the single event page in the front-end. Select a wide but short image, around 1680px x 275px. Click the + button to upload an image.
If you don’t add a header image, the default background color will be displayed.
Start date and time
This field denotes the start date and time of this event. In the case of repeating events, please enter the start of the first occurrence of this event.
End date and time
This field denotes the end date and time of this event. In the case of repeating events, please enter the end of the first occurrence of this event.
Recurring event
Switch to On to enable this event to repeat. This will enable the following three options.
Repeat every x days
Enter every how many days you want this event to repeat. For example, if you set the event to Begin repeating from Tuesday 16/02/2016, to repeat every 2 days, it will repeat on Tuesday 16th, Thursday 18th, Saturday 20th and so on, until and including your Repeat until date.
The date set in Start date and time will also be displayed as a separate event, so you do not need to include it in Begin repeating from.
Begin repeating from
The first day on which this repeating event should occur. The date set in Start date and time will also be displayed as a separate event, so you do not need to include here.
Repeat until
The last day on which this event should occur.
Event ticket service
The name of the ticketing service used for this event, such as Eventbrite or Facebook.
Event ticket service URL
The URL of the ticketing service used for this event.
Event color
The event color is used by the Events: Calendar page template. This is the color which this event (including repeats) will be displayed in on the calendar.
Event location
A user-friendly name of the location or building where the event will take place, such as Notman House.
Event address
User-friendly address of the event which will be displayed above the map in the information panel. Consider including some directions or a description of your event location to make it easier to find.
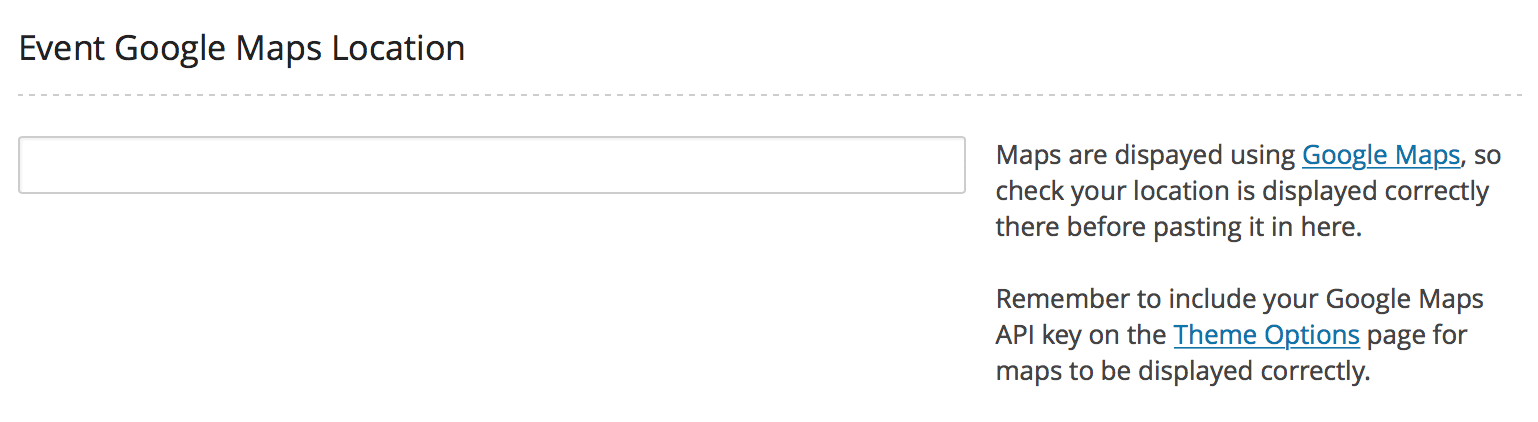
Event Google Maps location
Maps are dispayed using Google Maps, so check your location is displayed correctly there before pasting it in here. These fields can accept any address, such as “51 Sherbrooke W., Montreal, QC“, as well as coordinates in the format latitude,longitude (such as “45.511892,-73.569732“) if you need something more precise. They cannot accept business names or landmark names, such as “Notman House“.
Setting a Google Maps location inside the theme.
If you’ve already entered latitude and longitude values separately before upgrading to versions of themes which accept addresses, these will continue to be used, but will no longer appear in the admin interface.
Remember to include your Google Maps API key on the Theme Options page for maps to be displayed correctly.
Pin map icon
The pin to be placed on the map in the location you set in Event Google Maps location. The recommended size for this is 64px x 64px, but any other size will also be handled correctly.
Media Options
The media options determine the display of any pictures or videos at the top of the post.
Gallery
The gallery section is used to create a slideshow of images to be displayed at the top of the post. Click Add New to add a new image. You can also click the pencil icon on an existing image to edit it, or the bin icon to delete this image.
The Title is used to help you identify the image, and is not displayed in the front-end. The Caption is the text displayed at the bottom of the image – you can leave this field empty. Finally, the Gallery Image is the image displayed for this slide. Click + to select or upload an image. The recommended size is 1200px x 800px, but any size will be displayed correctly.
Video
The video is displayed in the media area, in separate tab to the photos set up above. The theme supports YouTube and Vimeo as sources of video. Find the video you want to display on one of the supported sites, copy the URL from your browser, and paste it here.
Share buttons
Set to On to display the sharing buttons for Twitter, Facebook, Pinterest and Google+.