Posts are entries that display in reverse order on your home page. This results in the latest post always being displayed first. Posts usually have comments fields beneath them and are included in your site’s RSS feed.
Writing a Post
- Log in to the WordPress Administration Panel.
- Select Posts → Add New from the main menu.
- Start filling in the blanks: enter your post title in the upper field, and enter your post body content in the main post editing box below it.
- As needed, select a category, add tags, and make other selections from the sections below or next to the post editing box. (Each of these sections is explained below.)
- When you are ready, click Publish.
Screen Options
There are more editing fields available to you than you see on first login. The Screen Options area allows you to choose which post fields are displayed or hidden from your editing area, which allows you to minimize clutter and customize the post editing screen according to your needs.
You’ll find the Screen Options tab at the very top of your screen, and if you click on it, you’ll see a list of options you can change. Click the Screen Options tab again to close the tab.
The Boxes section lists what you can change about your posts. If you want to change any of these options, check the box and a box will appear in the post editing area. You can drag these boxes around to create a layout which works for you.
The Layout section controls how many columns are displayed on the screen. Think of it as a main content area and a sidebar. The 2 column layout is the default, with a sidebar, while the 1 column area disables the sidebar and makes the content full width.
The Enable full-height editor and distraction-free functionality option enables the editor which scrolls along with the page, as well as a button in the editor which allows you to go full screen, removing distractions.
Once you’ve customized how your editing screen works, your options are automatically saved. These preferences are saved to your account, so will remain the same even if you change devices, but will not affect the display of the posts table for any other users.
You can set basic options for writing content, such as how smiley tags are converted, the default post category and the default post format by going to Settings → Writing from the main menu.
Main Writing Area
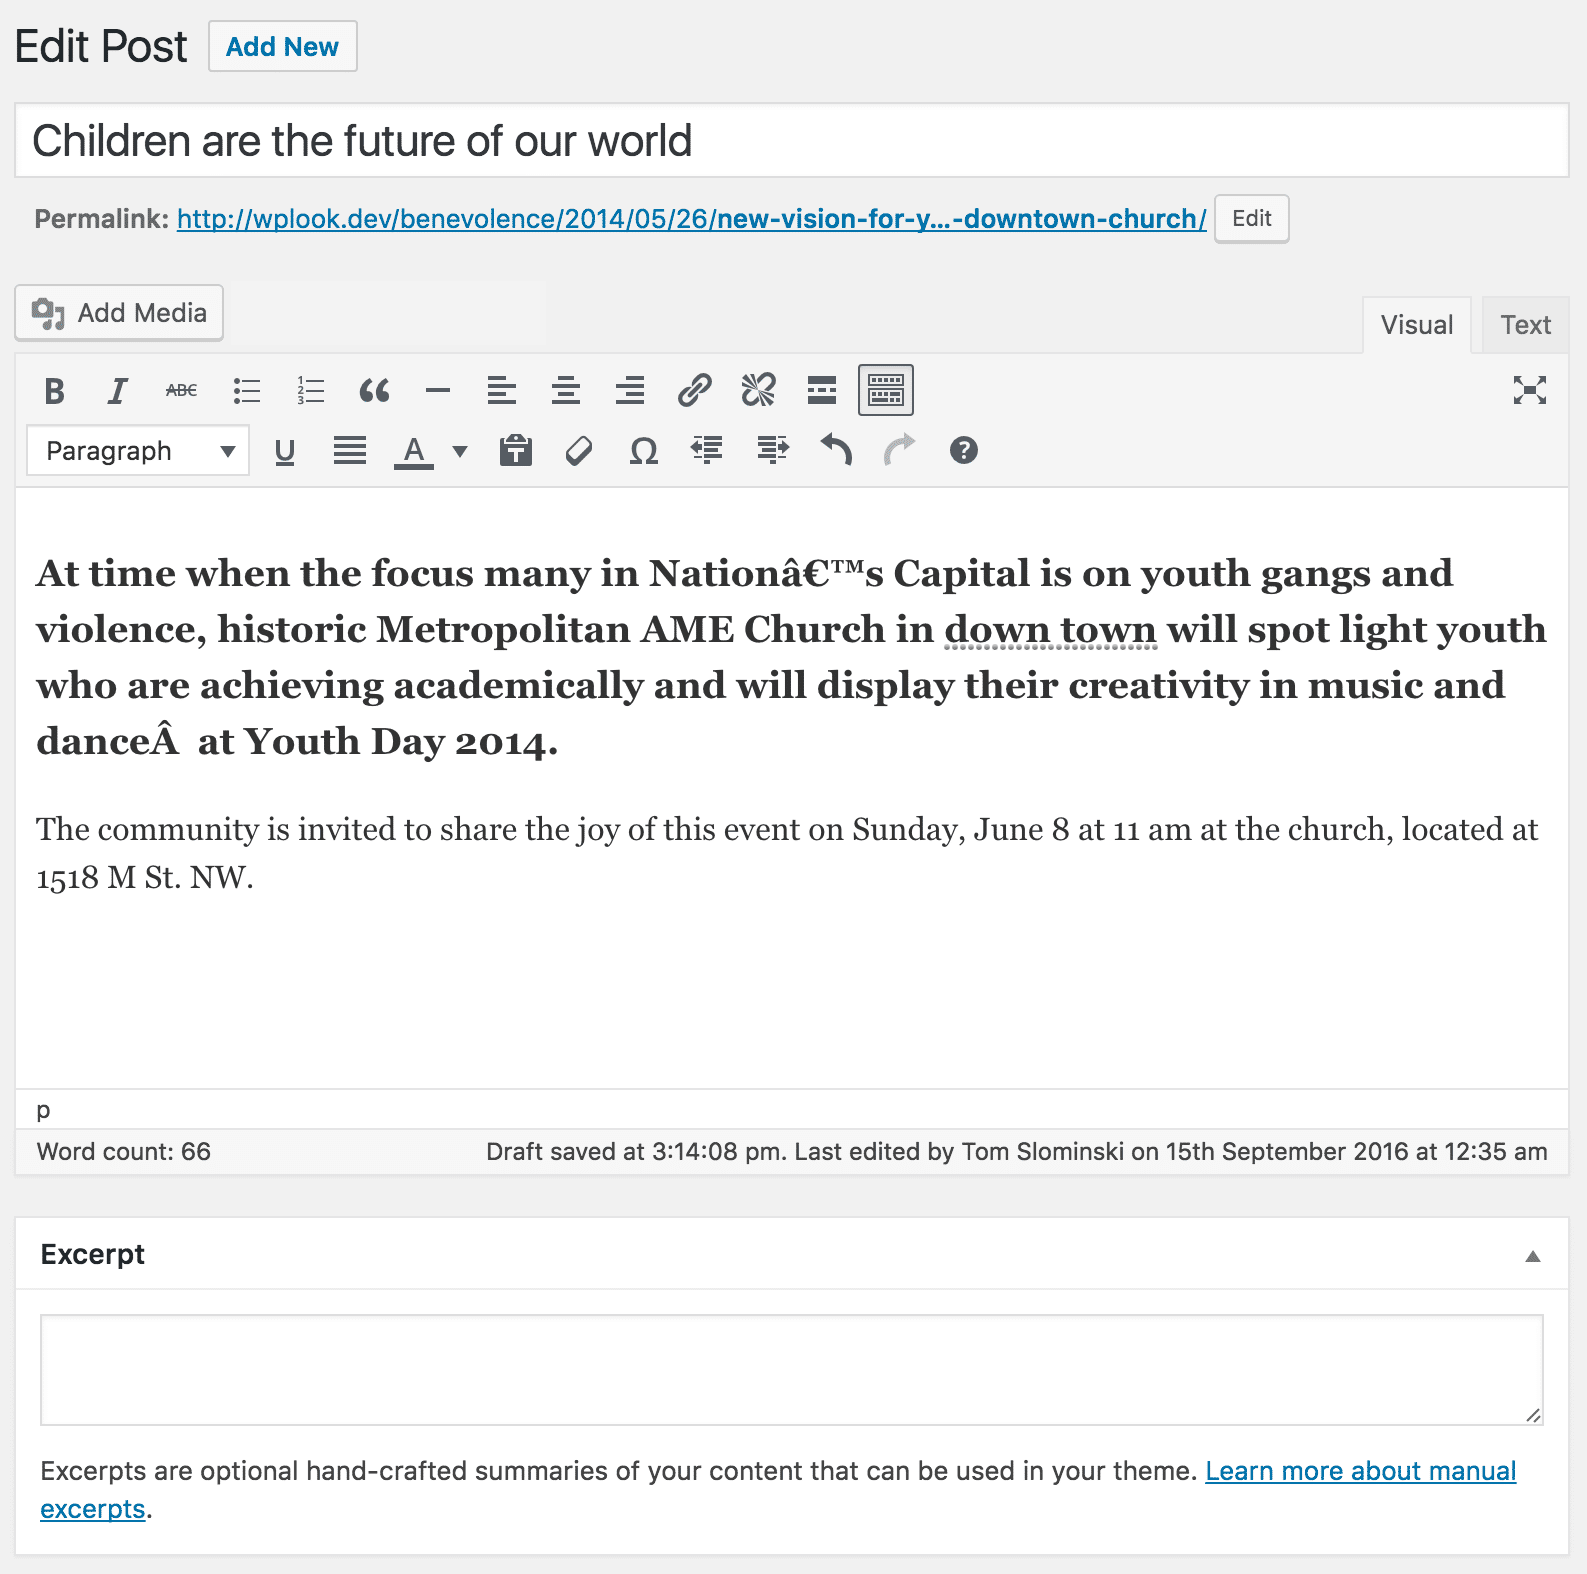
Title
The title of your post. You can use any words or phrases. Avoid using the same title twice. You can use commas, apostrophes, quotes, hyphens/dashes, and other typical symbols like “About My Site – Here’s Lookin’ at You, Kid.”
Permalink
After you save your post, the permalink below the title shows the potential URL for the post, as long as you have permalinks enabled. (To enable permalinks, go to Settings → Permalinks.) The URL is generated from your title. In previous versions of WordPress, this was referred to as the “page-slug.” The commas, quotes, apostrophes, and other non-HTML favorable characters are changed and a dash is put between each word. If your title is My Site – Here’s Lookin’ at You, Kid, it will be cleaned up to be my-site-heres-lookin-at-you-kid as the title. You can manually change this, maybe shortening it to my-site-lookin-at-you-kid.
Editor
The blank box where you enter your writing, links, images, videos and any information you want to display in the post. You can use either the Visual view to write your content with the help of the formatting tools in the top toolbar, or the Text view to edit the raw HTML code of the post.
You can also paste in links to content from external websites. Find out more on the Embeds page of the WordPress Codex.
Excerpt
The excerpt is a short teaser or blurb of a post which is displayed in certain places on the site, like on post listing pages. If you do not enter a custom teaser, the first few words of a post will be used.
Post Options
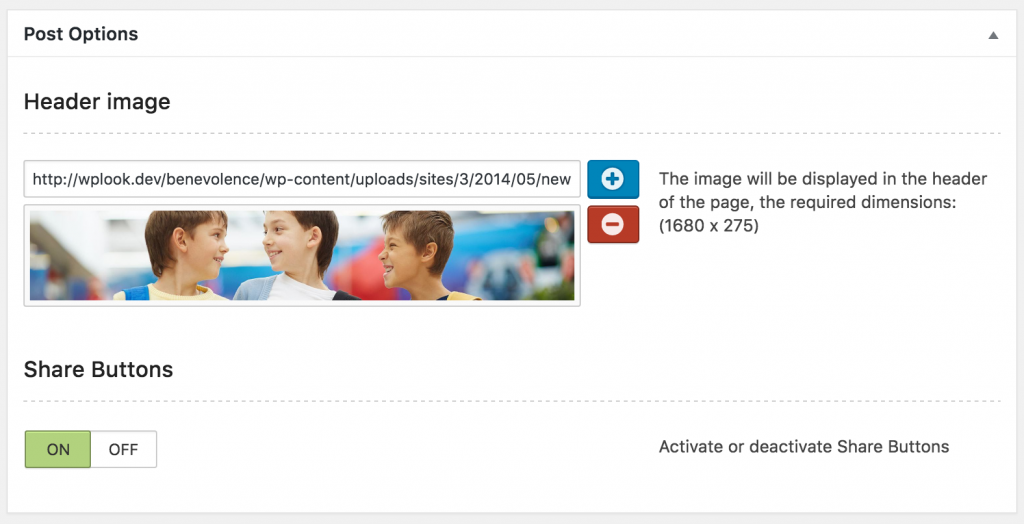
The post options are specific to different post types and contain settings specific to this theme.
Header Image
The header image is displayed behind the title at the top of the single post page in the front-end. Select a wide but short image, around 1680px x 275px. Click the + button to upload an image.
Share Buttons
The sharing buttons for Twitter, Facebook, Pinterest and Google+ are displayed in the sidebar. Disable this option to hide them.
Sidebar
Publish Box
The publish box is found at the top of the page, next to the main writing area.
Preview Button
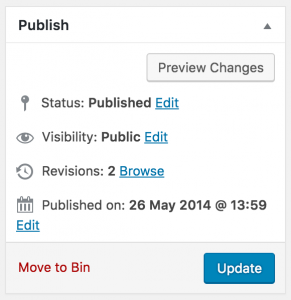
The Preview Changes button allows you to view the post before officially publishing it for everyone to see.
Status
The status describes whether the post is publicly visible or not. The main states are Published, Pending Review, and Draft. A Published status means the post has been published on your blog for all to see. Pending Review means the draft is waiting for review by an editor prior to publication. Draft means the post has not been published and remains a draft for you. If you select a specific publish status and click the OK or Publish button, that status is applied to the post.
For example, to save a post in the Pending Review status, click Edit next to the status field and select Pending Review from the drop-down box, click OK to close the drop-down box and click Save As Pending button.
Visibility
The visibility setting determines how your post appears to the world. Public posts will be visible by all website visitors once published. Password Protected posts are published to all, but visitors must know the password to view the post content. Private posts are visible only to you (and to other editors or admins within your site).
Public posts have the additional option of Stick this post to the front page. Check this to make this post appear at the top of the posts page, regardless of where it lies in the chronological order.
Revisions
Revisions allow you to browse and compare previous versions of the post. This option is only available for posts which have previously been saved. This is particularly useful if you have made a mistake and accidentally save the post, or want to redo the changes made by another editor on your site. Click Browse to launch the revisions browser.
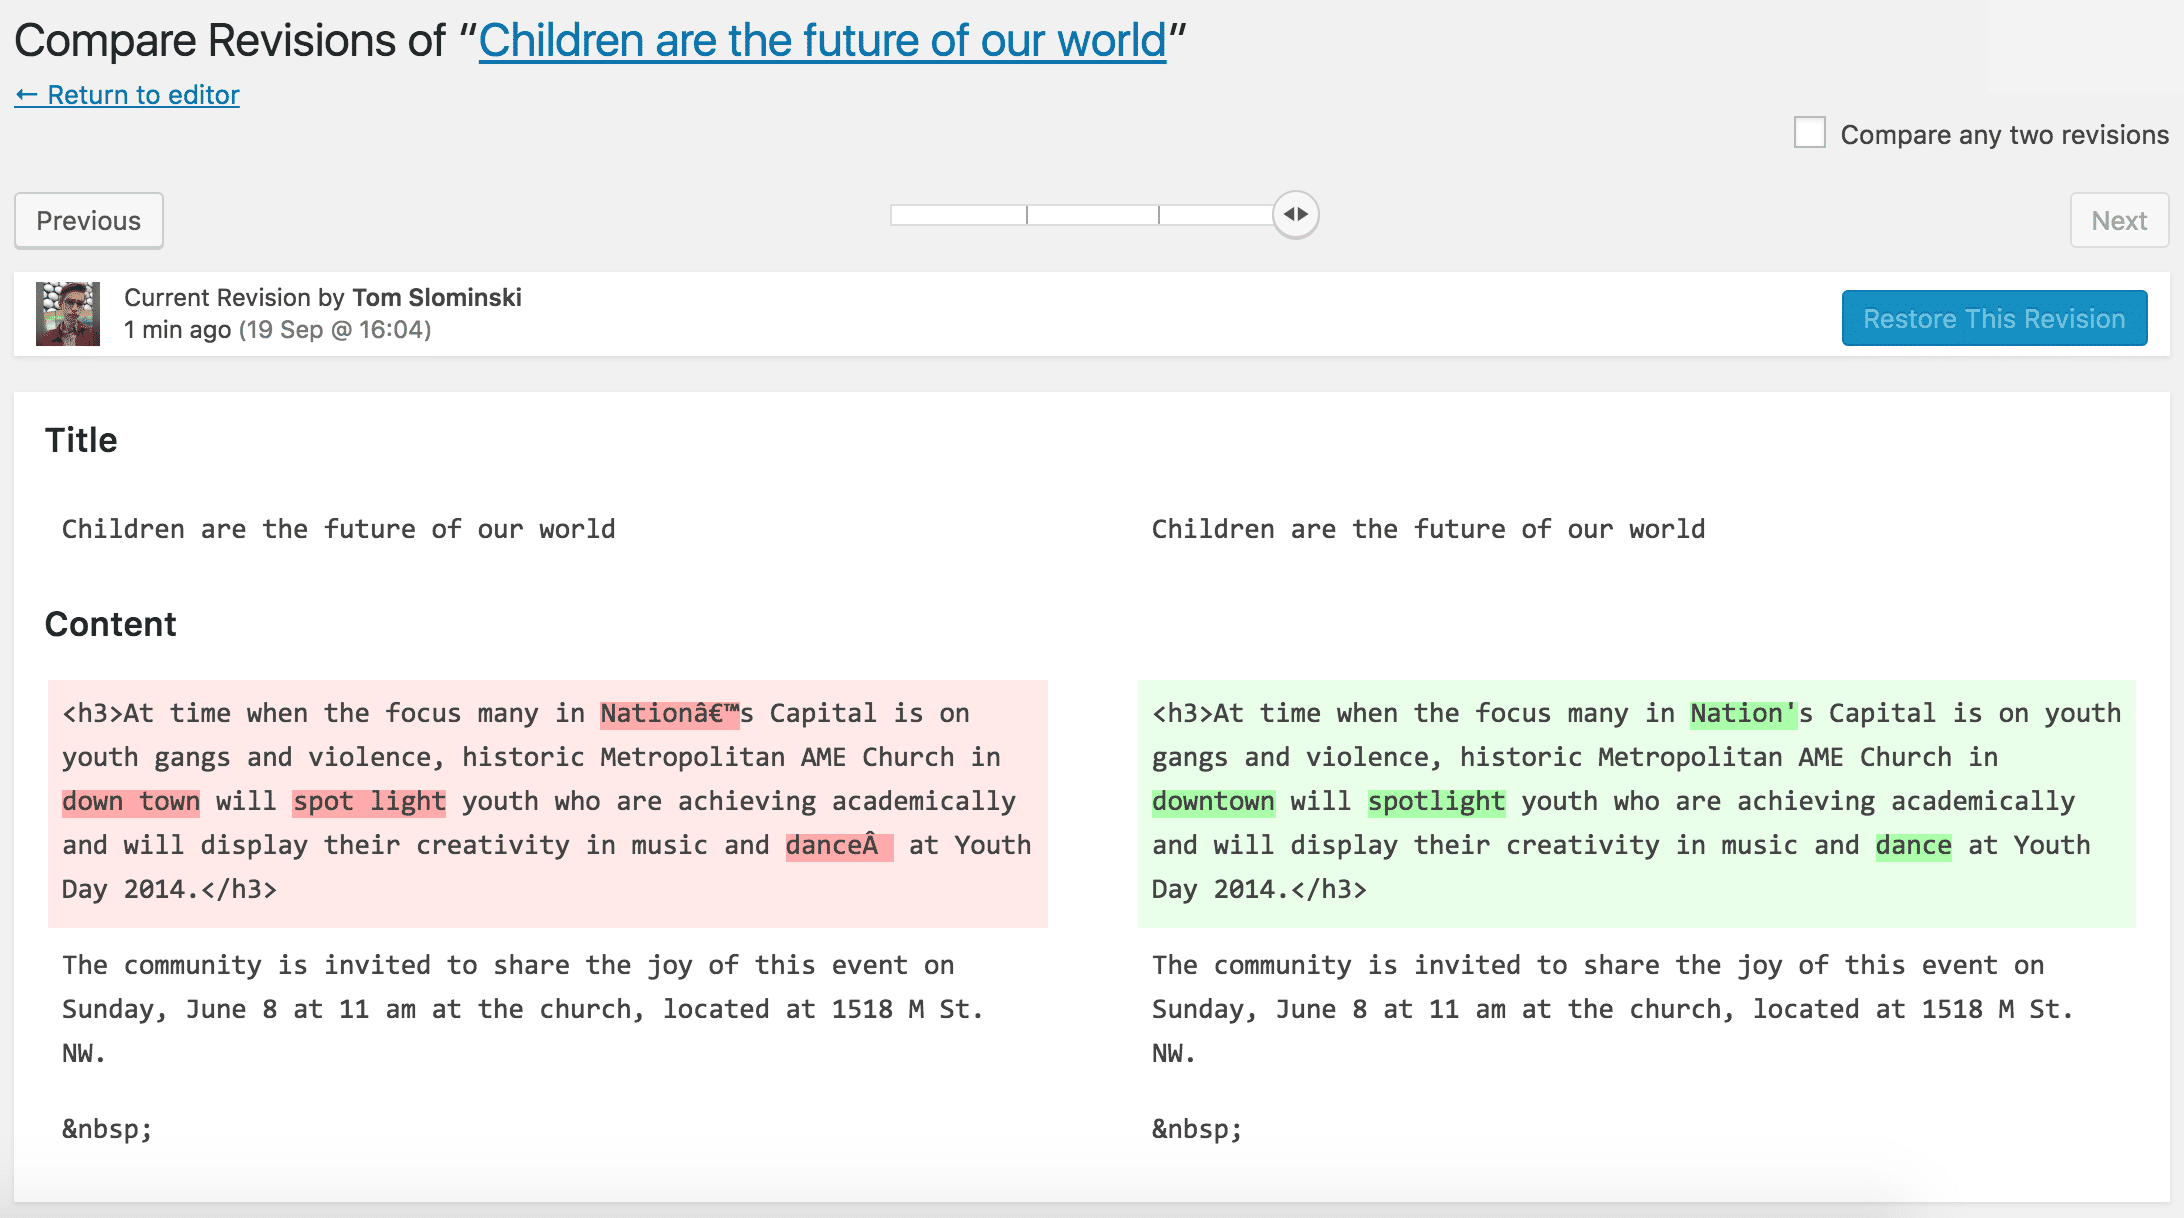
Revisions are created automatically as you edit (called autosaves) and every time you update the post (called revisions). On the following page, use the slider at the top to select a version of the post to view. The text highlighted in red on the left represents what has been removed from this revision, whereas the text highlighted in green on the right represents what has been added in this revision.
Check the Compare any two revisions checkbox at the top of the page to compare two revisions. Another button will appear in the slider at the top, allowing you to select two revisions to compare, from which changes are displayed similarly to a single revision, as described above.
Use the Restore This Revision or Restore This Autosave button to restore the version of the post you’re viewing to the editor.
Click Return to editor to safely return to the post you were editing.
Publish Immediately
To change the publication date of a post, click Edit in the publish are next to the words Publish immediately. You can move the date forward to schedule the post for publication in the future, or change it to a date in the past to back-date posts. By default, at the time the post is first auto-saved, that will be the date and time of the post within the database. Click OK once you are done editing the publication date.
Save
The Save Draft or Save as Pending buttons allow you to save your post as a draft or a pending post rather than immediately publishing it. These buttons are not always available, depending on the status of the post. To return to your drafts later, visit Pages → All Pages from dashboard, then click your post title from the list.
Move to Bin
The Move to Bin link allows you to move your post to a bin before permanently deleting it. Binned posts can be found in the main menu under Posts → All Posts and Trash from the status menu.
Publish
The Publish button pushes your post on the site. This can also become the Schedule button if the post date has been changed to a date in the future.
Format
The format of the post changes how it is displayed in the front-end of the site. For example, select the Quote custom post format if the post is focusing on a quote with an author, and the way the post is displayed will also focus on the content of the quote.
Categories
Select the general topics the post can be classified in. You can read more about how this works in the Categories chapter.
Tags
Use tags to group posts of a similar topic or content. You can read more about how this works in the Tags chapter.
Featured Image
The featured image is used alongside the post across the front-end of the site to make it more attractive. Click Set featured image, upload any image and it will be resized and cropped to the appropriate size automatically.


