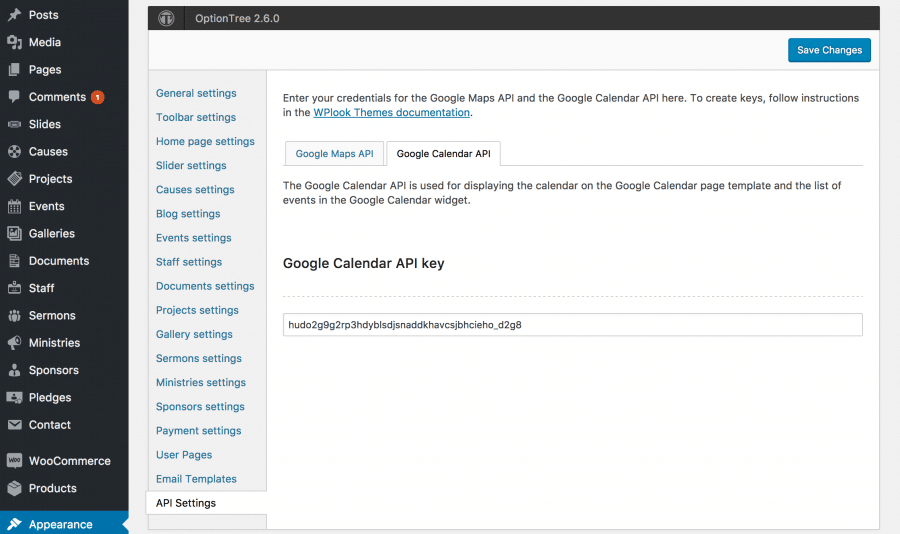
This page describes how to obtain API keys for Google Maps (for displaying maps on events pages) and Google Calendar (for displaying Google Calendar events in the theme).
API keys are credentials which websites can use to connect to external services and obtain data from them. Our themes use two types of API keys: browser keys and server keys.
To progress through this guide, you need to log in to your Google account. If you don’t have one, you can sign up for one.
Since June 2016, Google requires all sites displaying Google Maps to supply an API key.
Google Maps API
Obtaining a browser API key
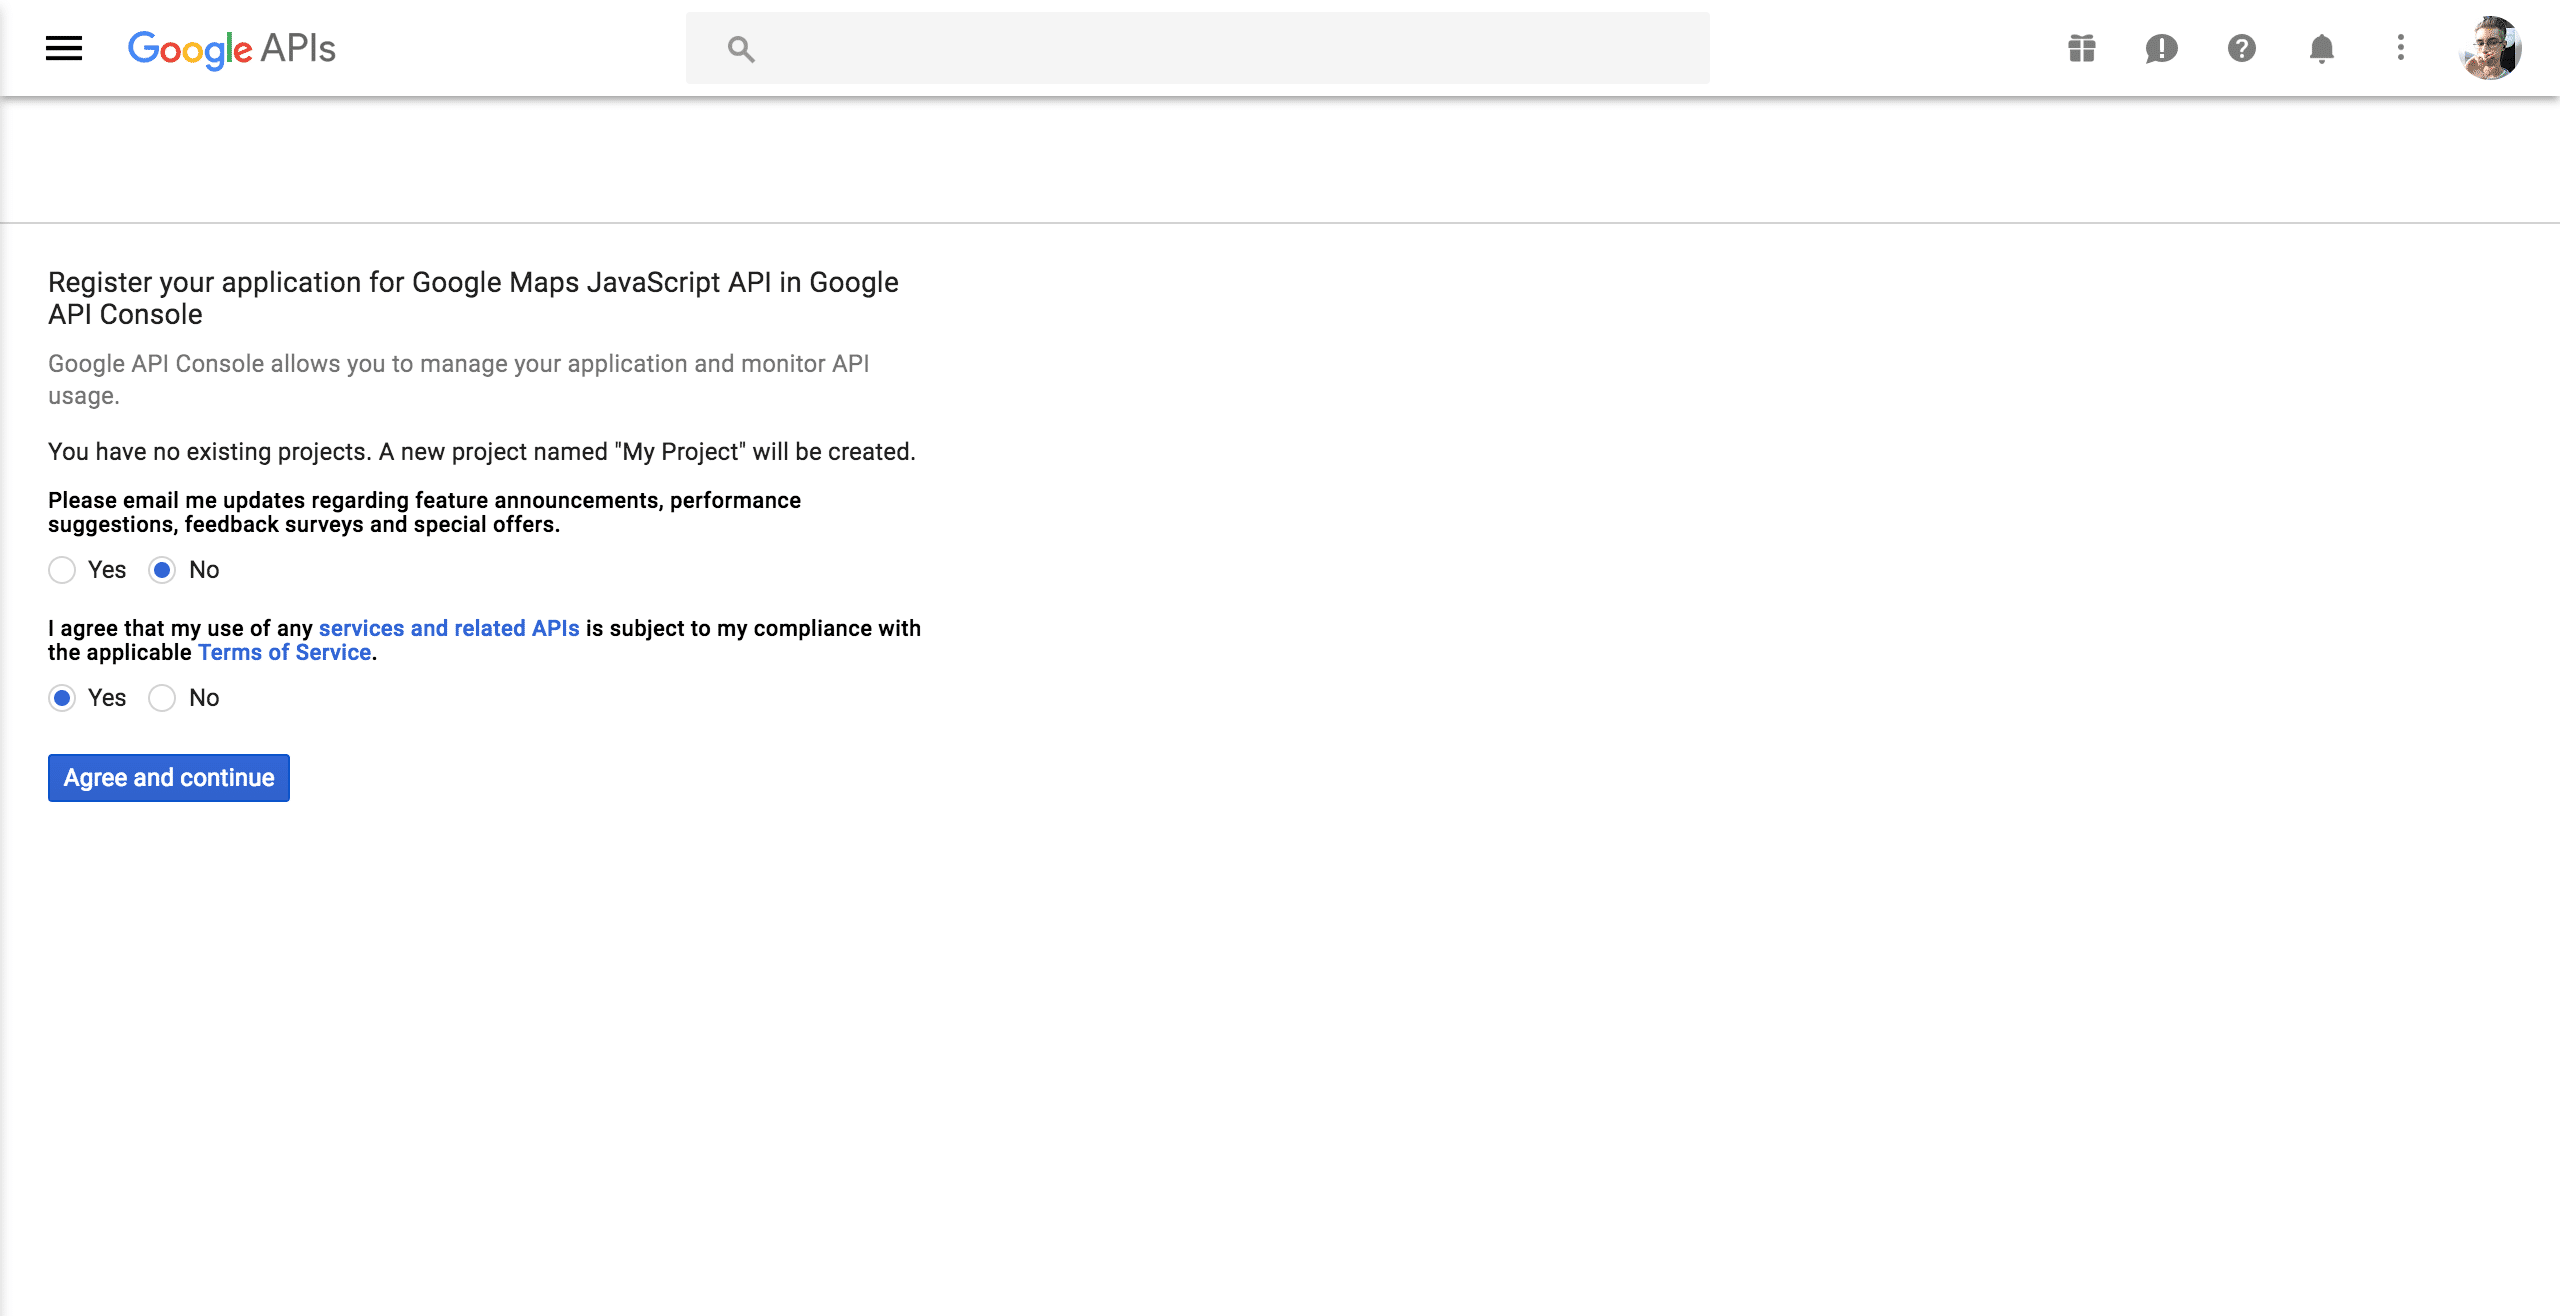
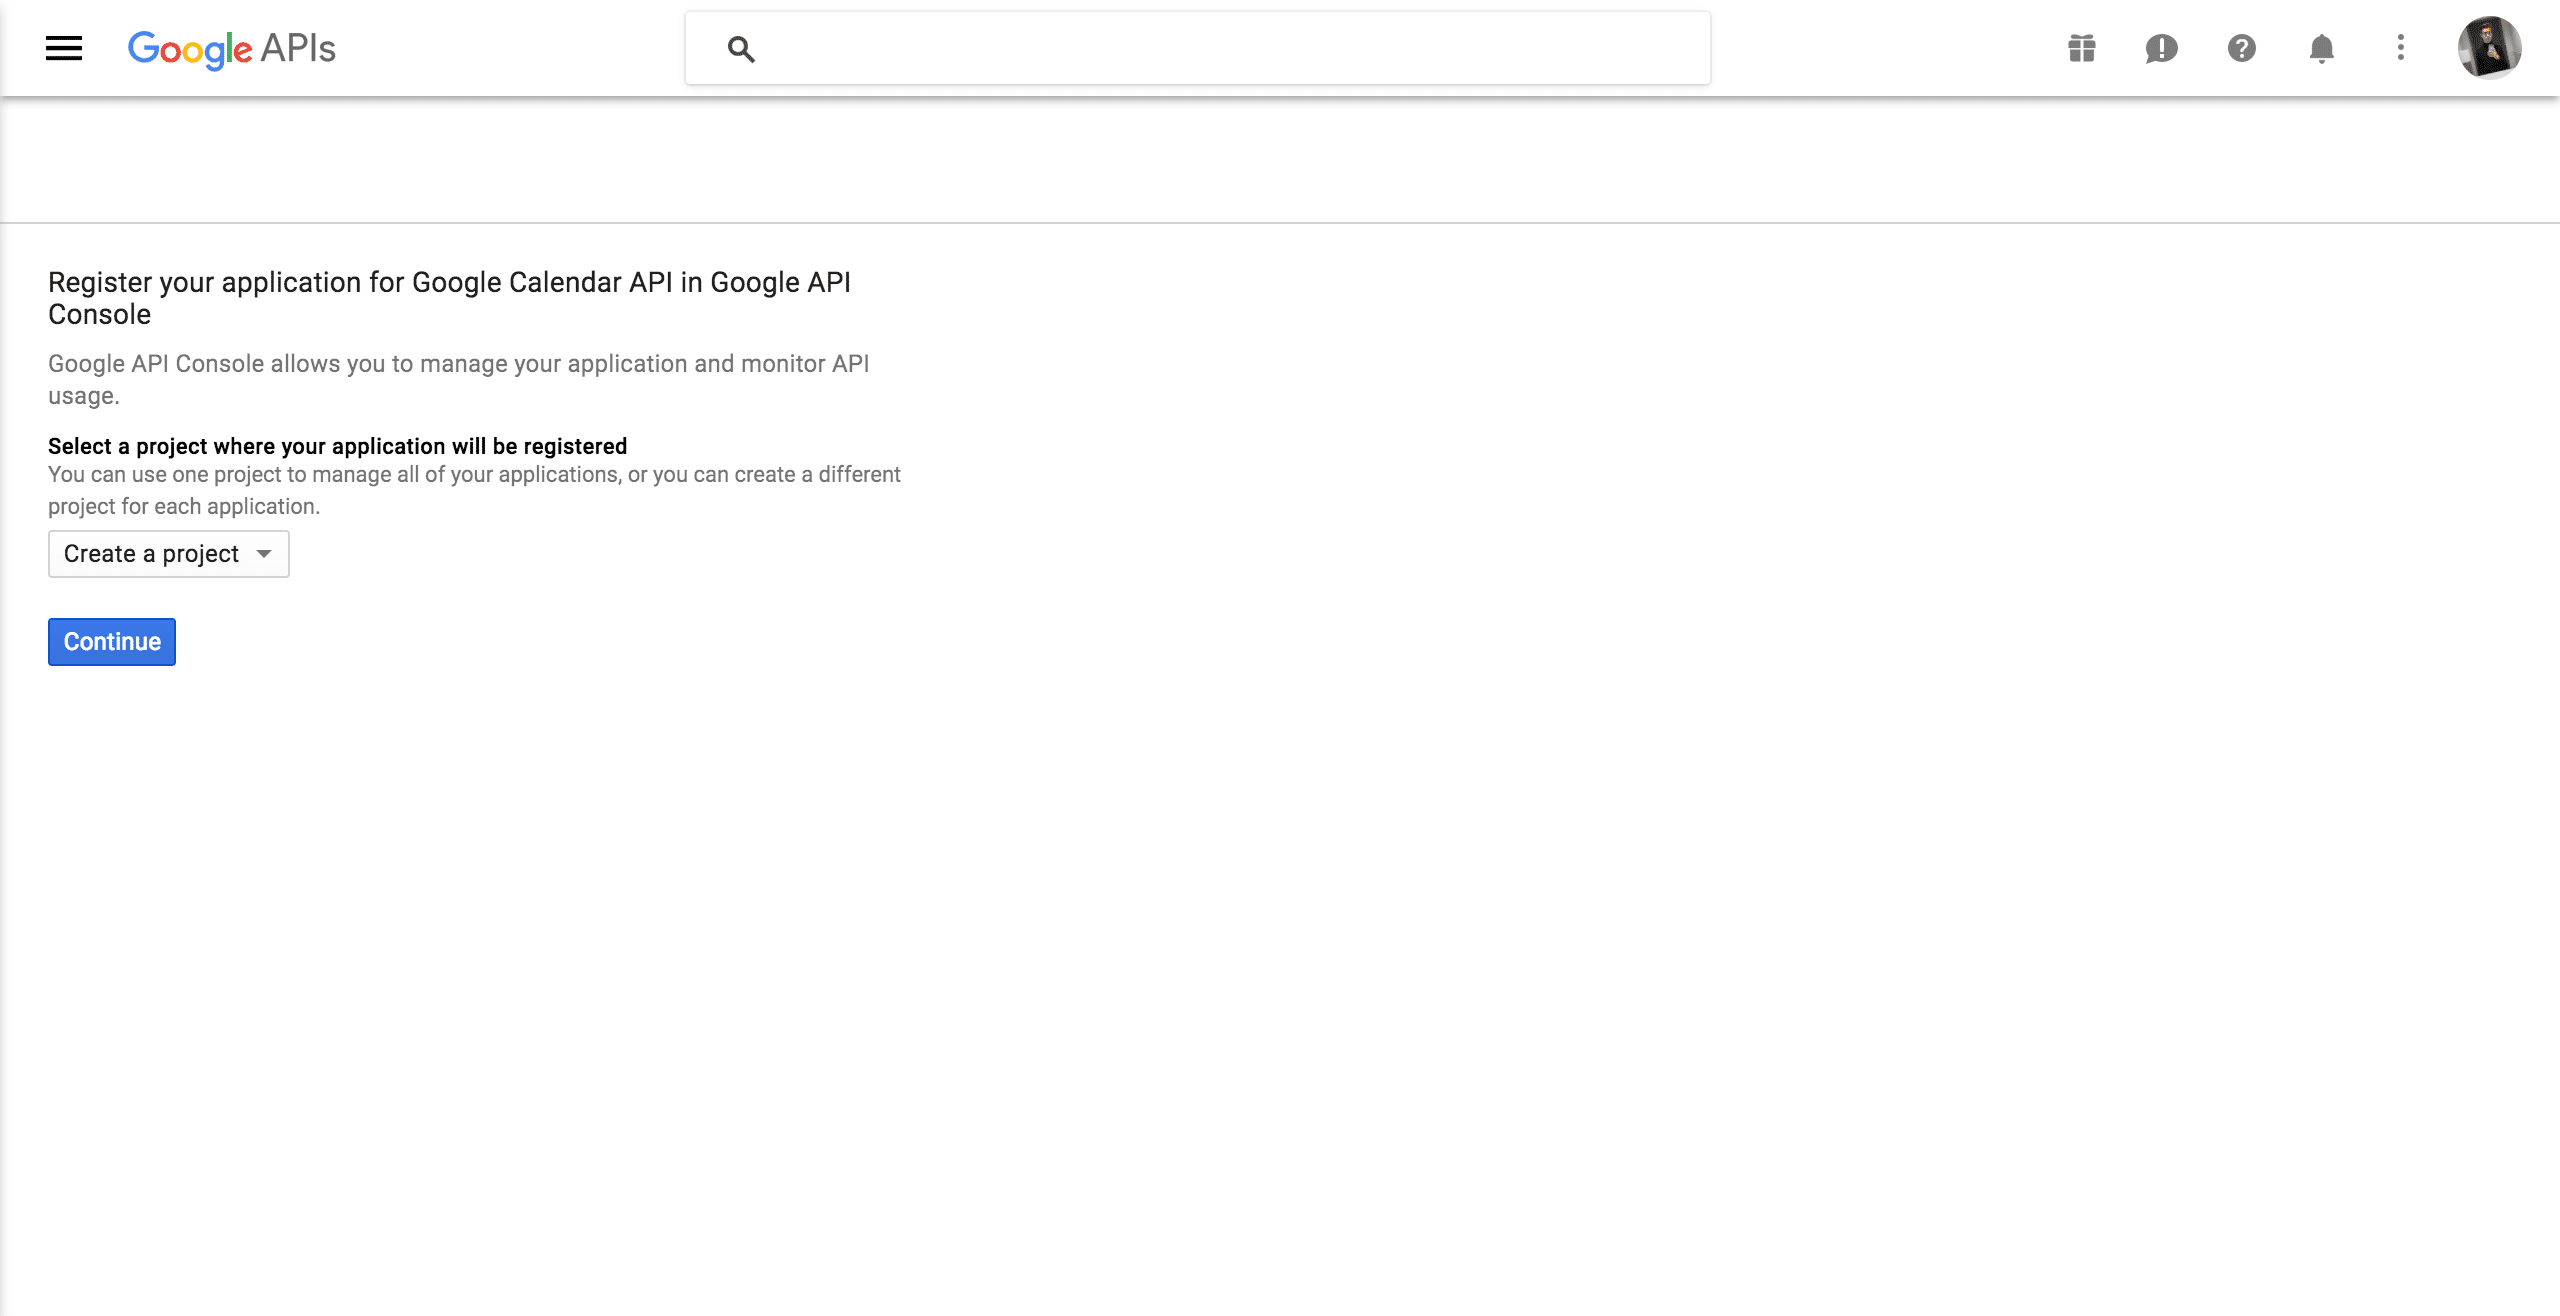
First, go to Get a key. If this is the first time you’re using the Google API Console, you will be asked to agree to its’ Terms of Service and a new project will be automatically created once you do. Otherwise, choose to Create a project and Continue.
Wait a few seconds, creating a project might take a while. Once done, you will be redirected to the Credentials page.
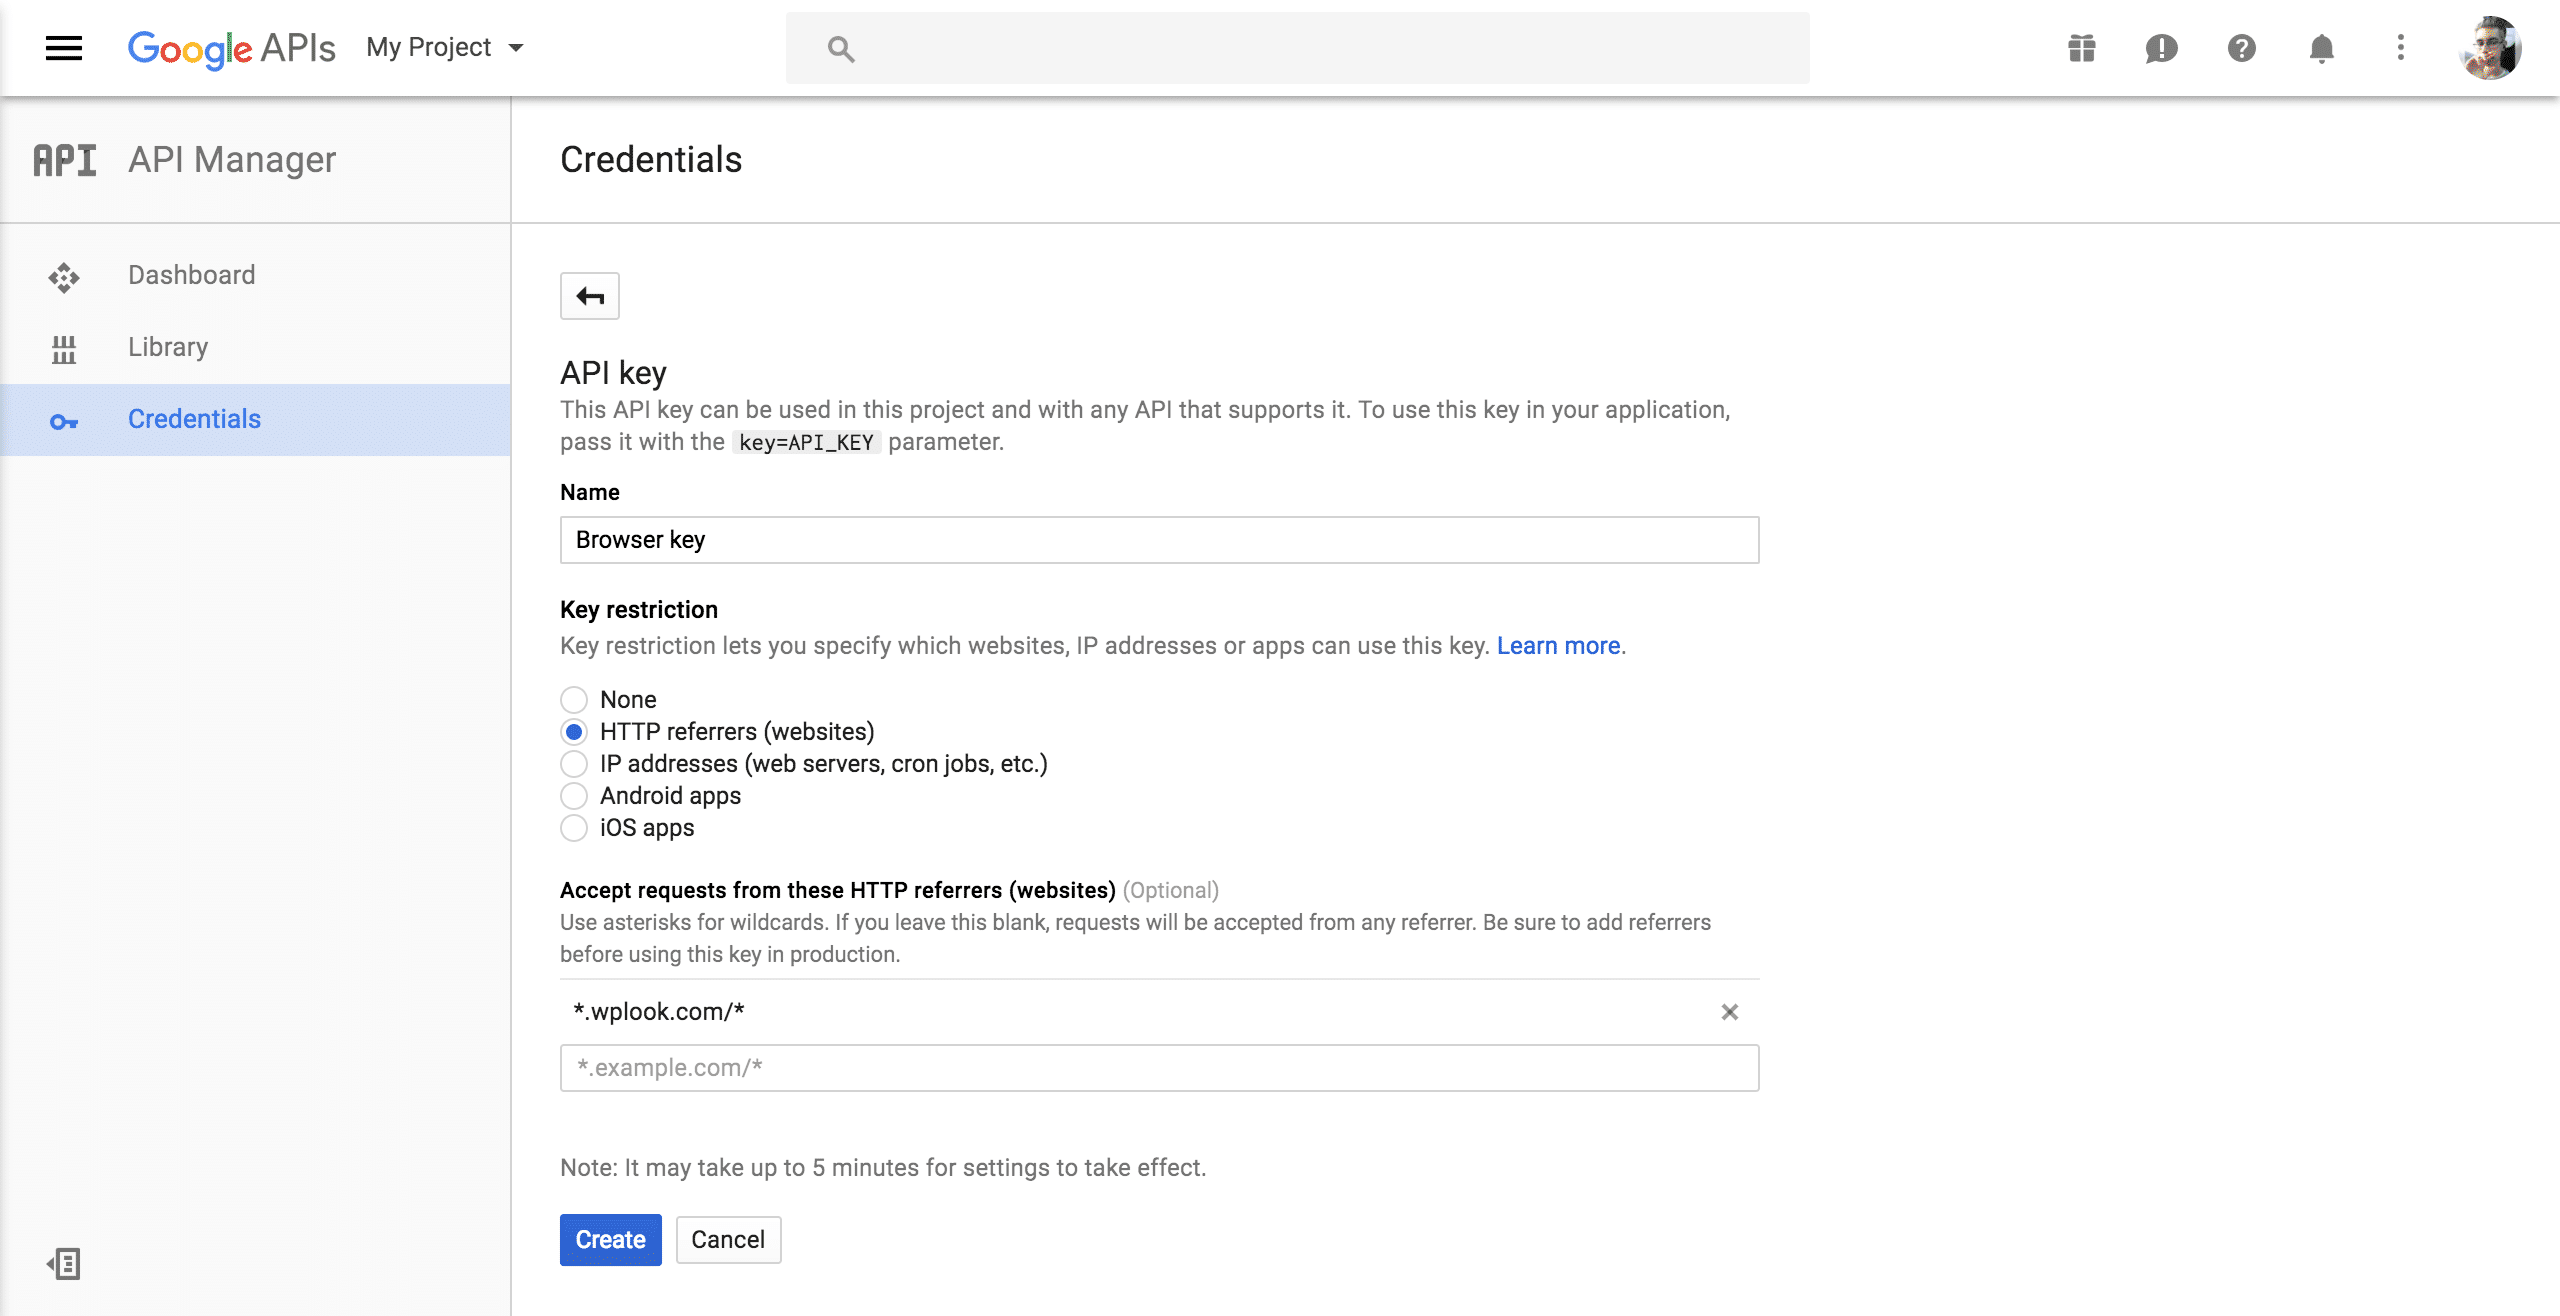
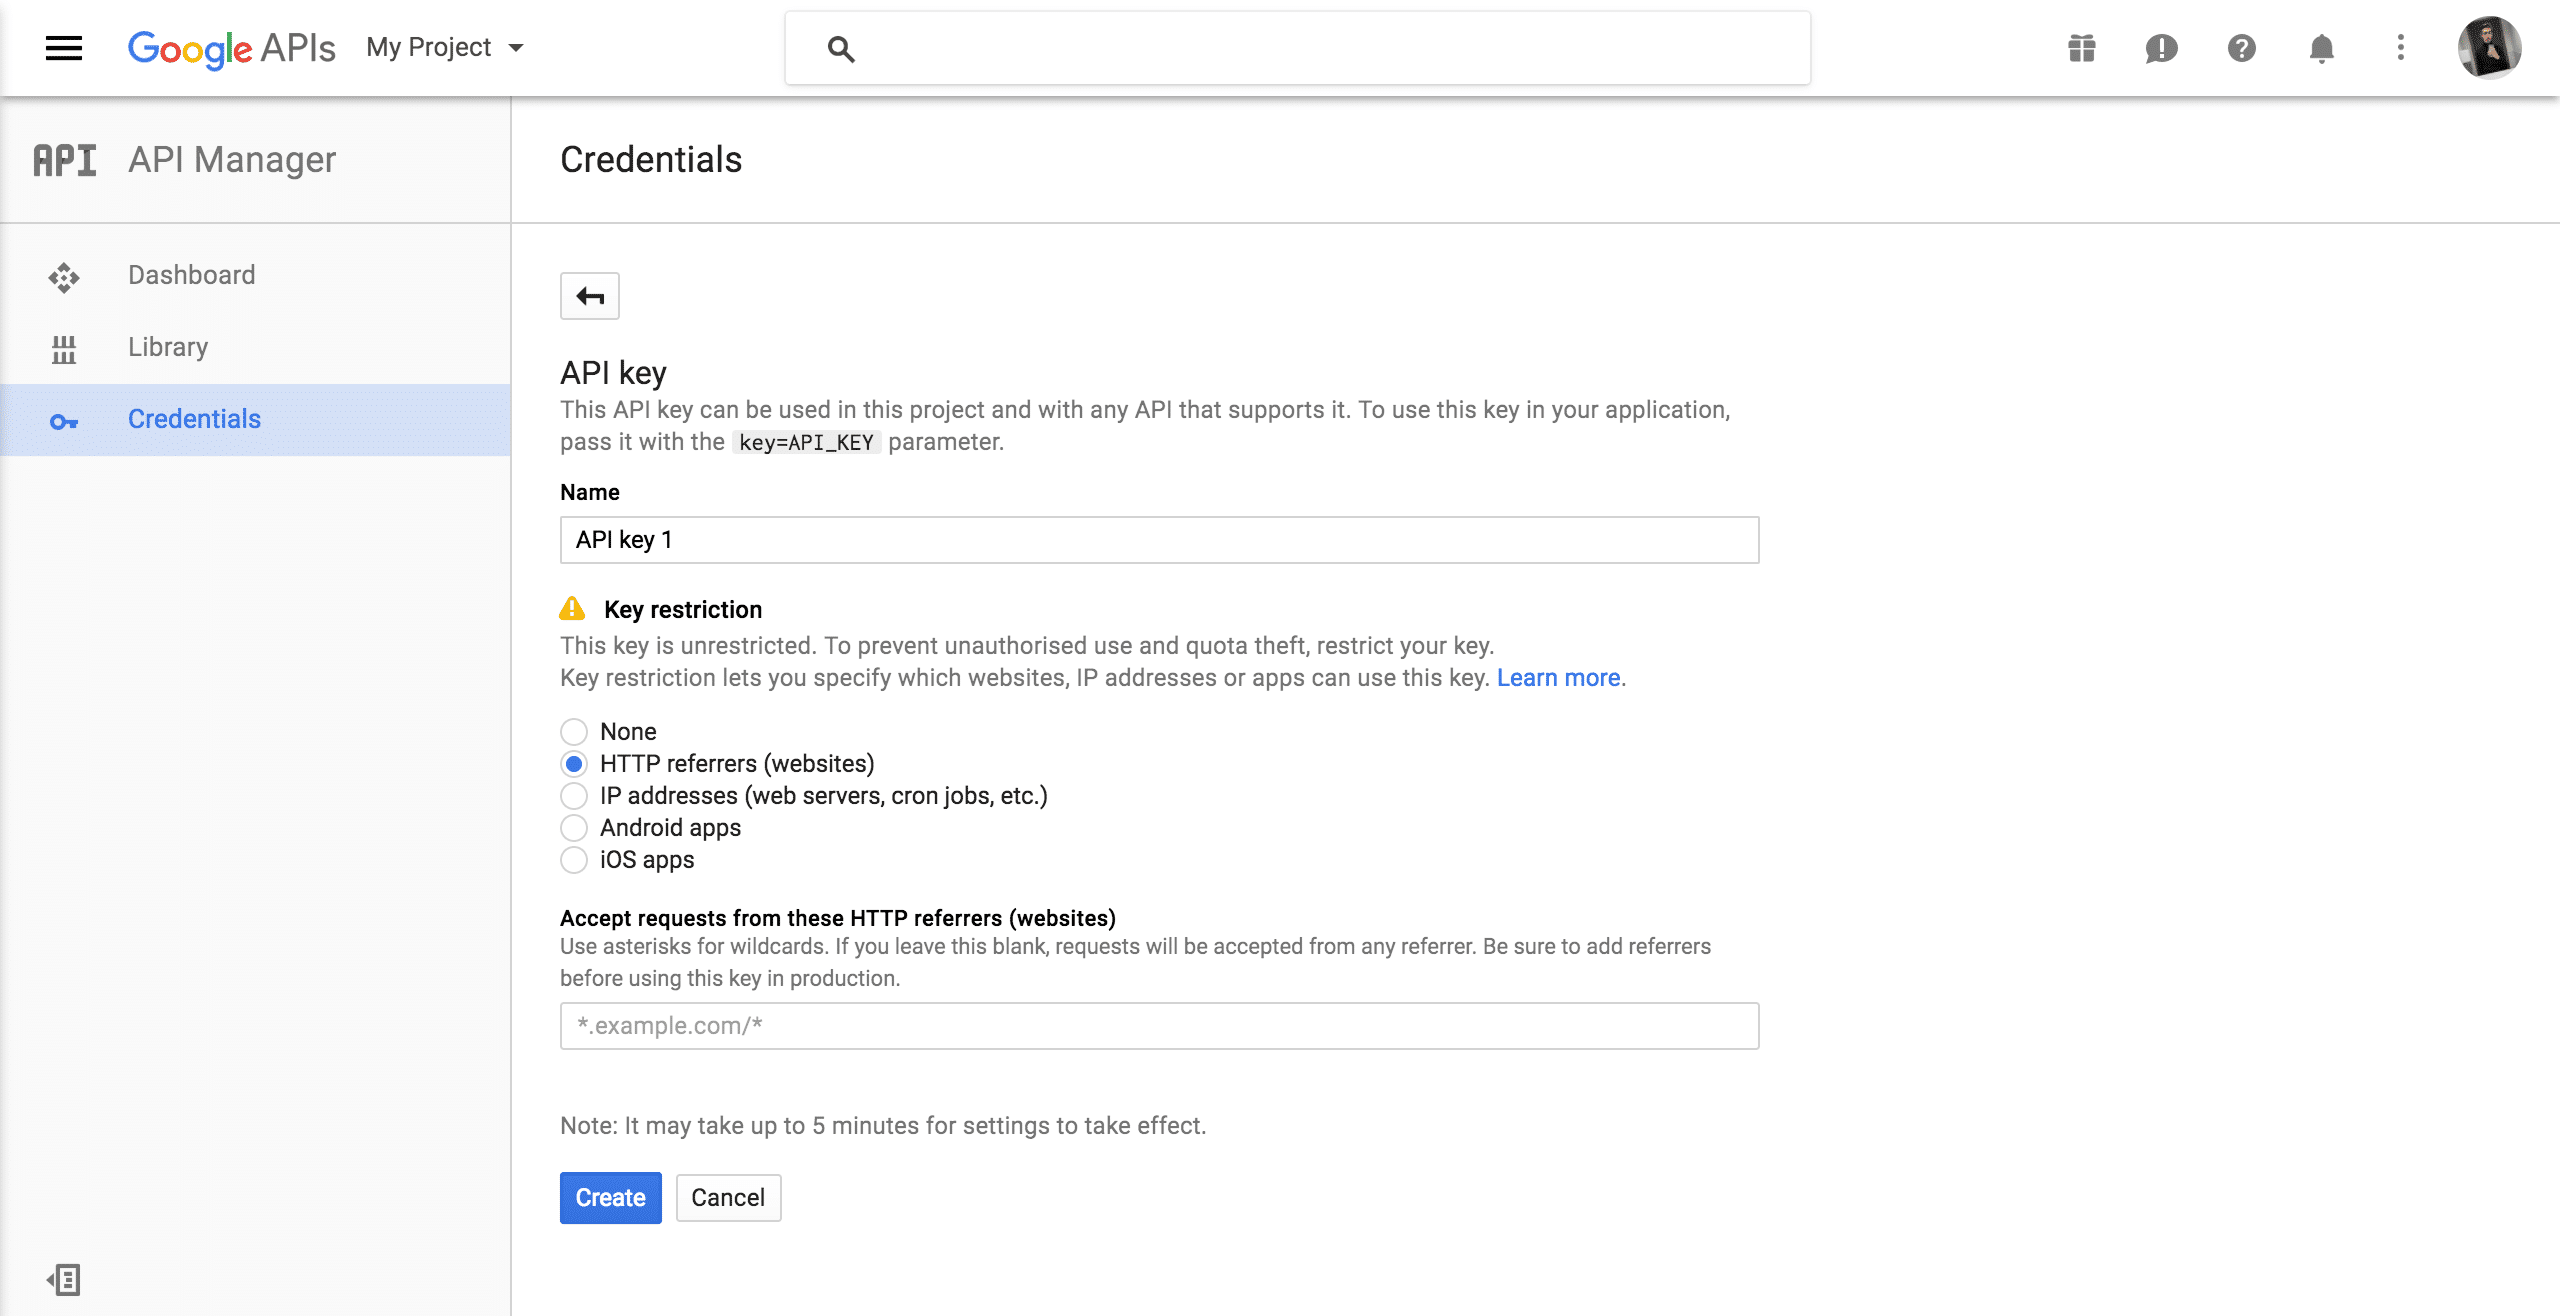
Give your API key a relevant name, like Browser key, select HTTP referrers (web sites) from the Key restriction section and in the Accept requests from these HTTP referrers (web sites) field, enter the URL of your site, in a format like http://wplook.com/*, and additionally https://wplook.com/* if your site is set up to use HTTPS. This will ensure that only your site can use this API key, and is an additional security measure. Remember to change this field if your site URL changes in the future. Click Create.
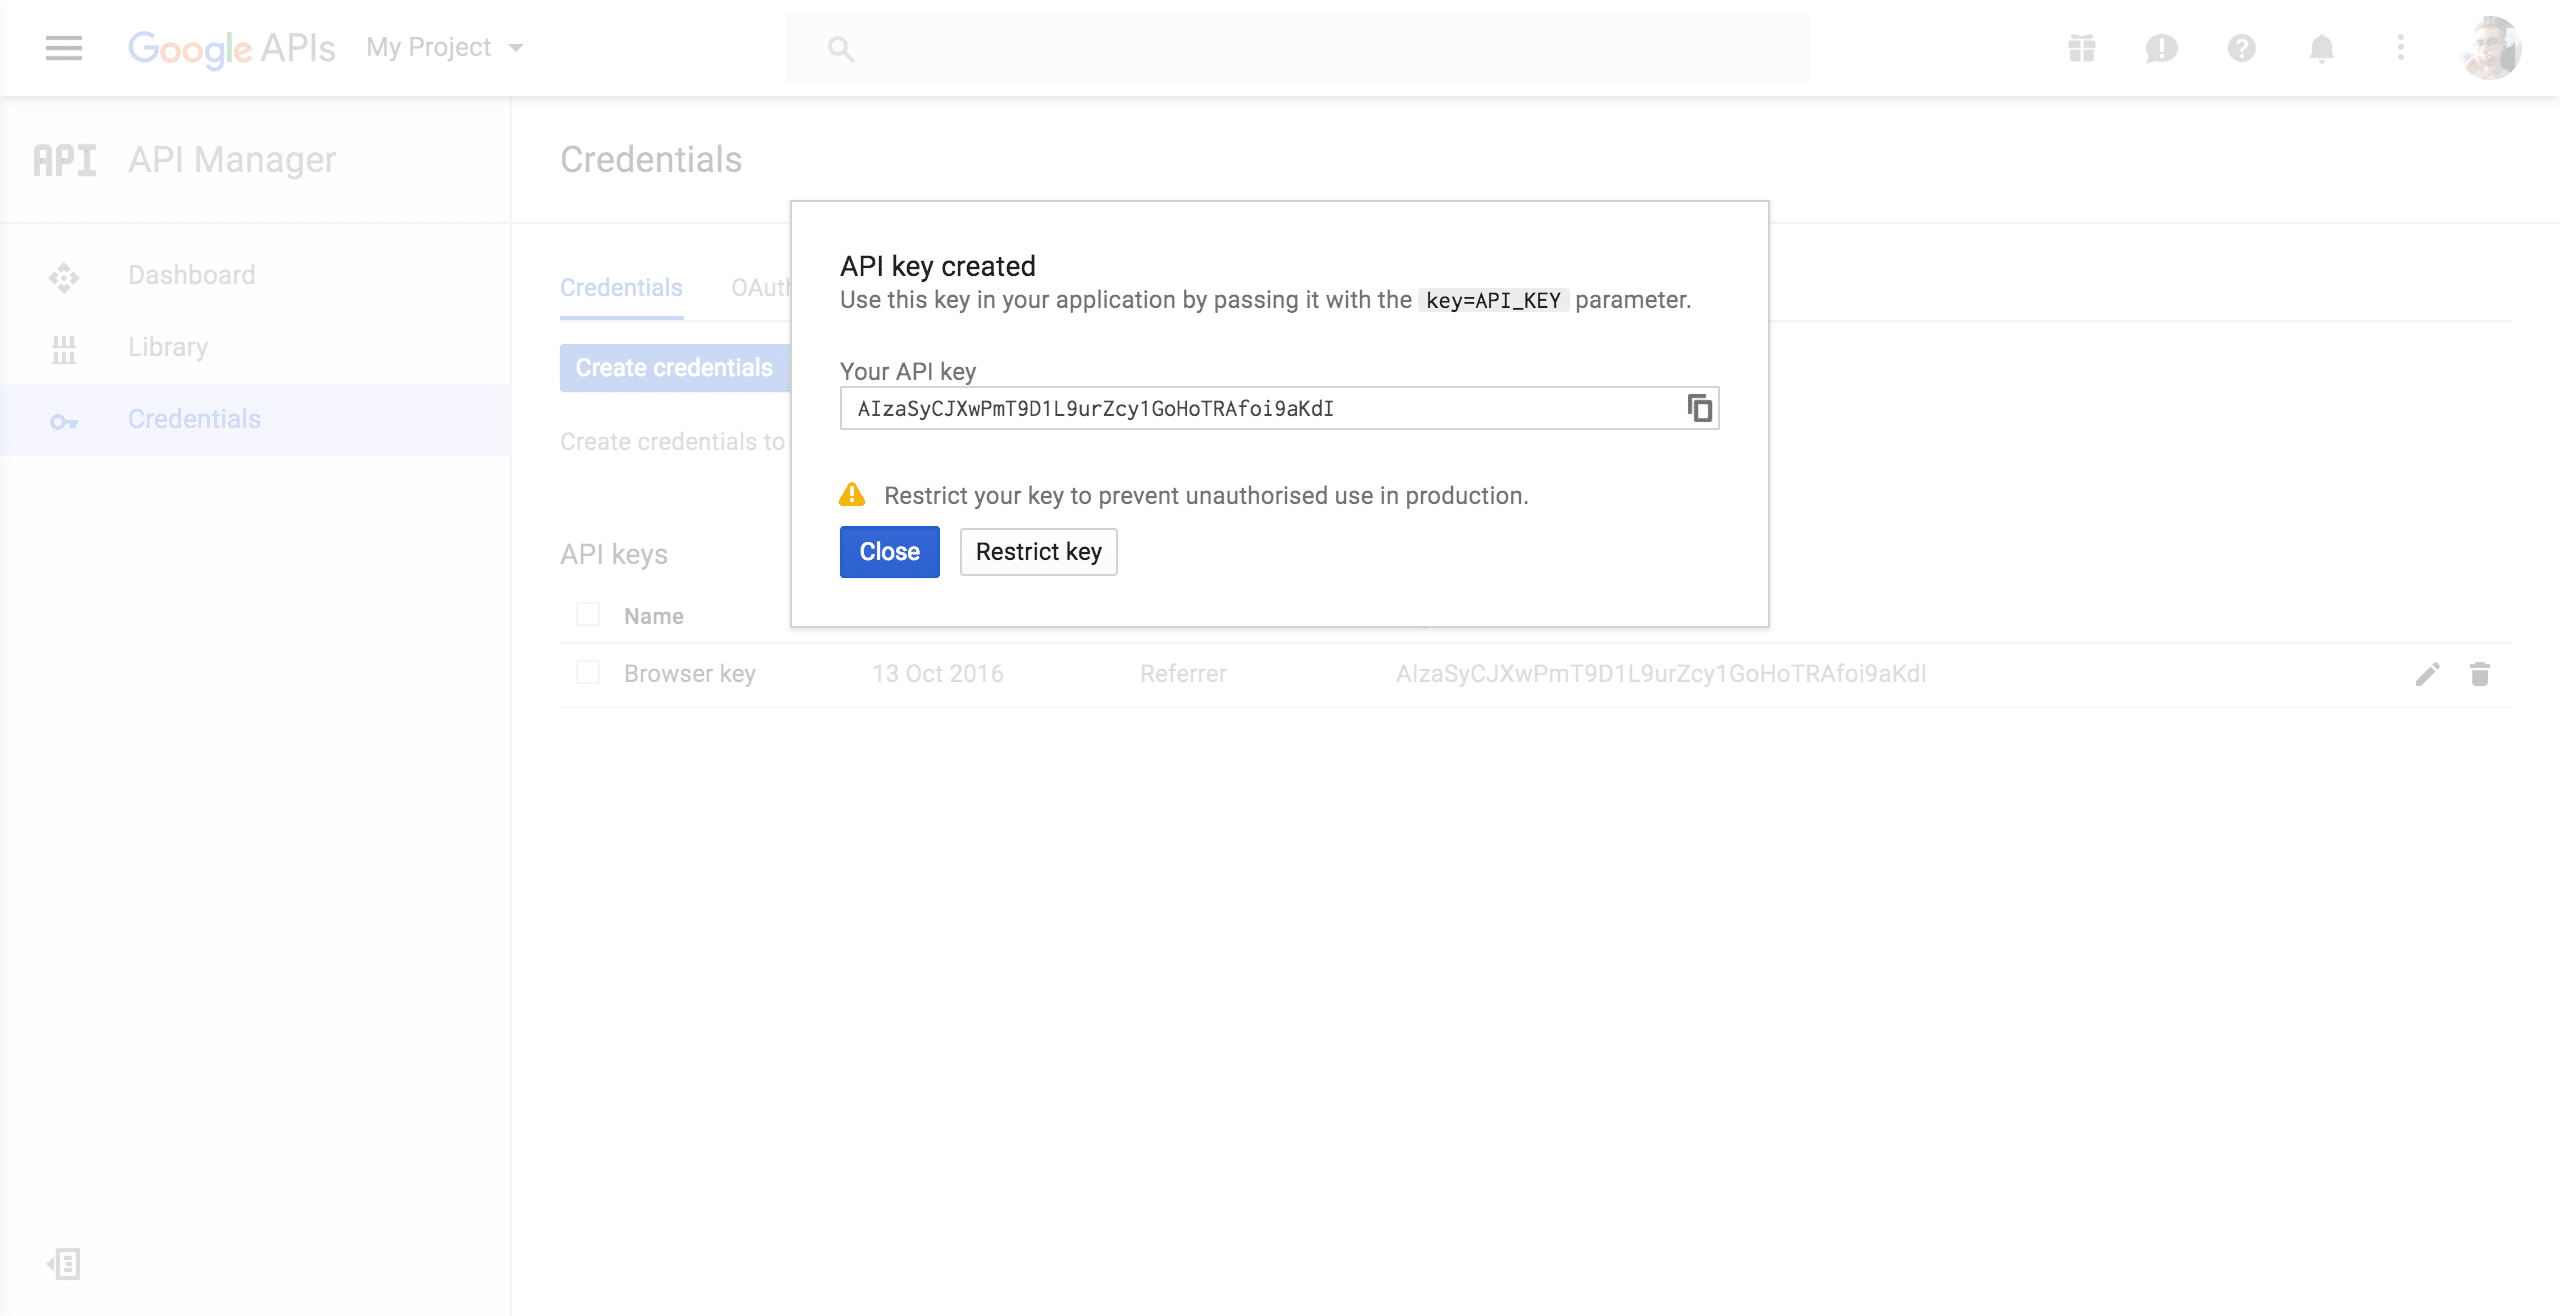
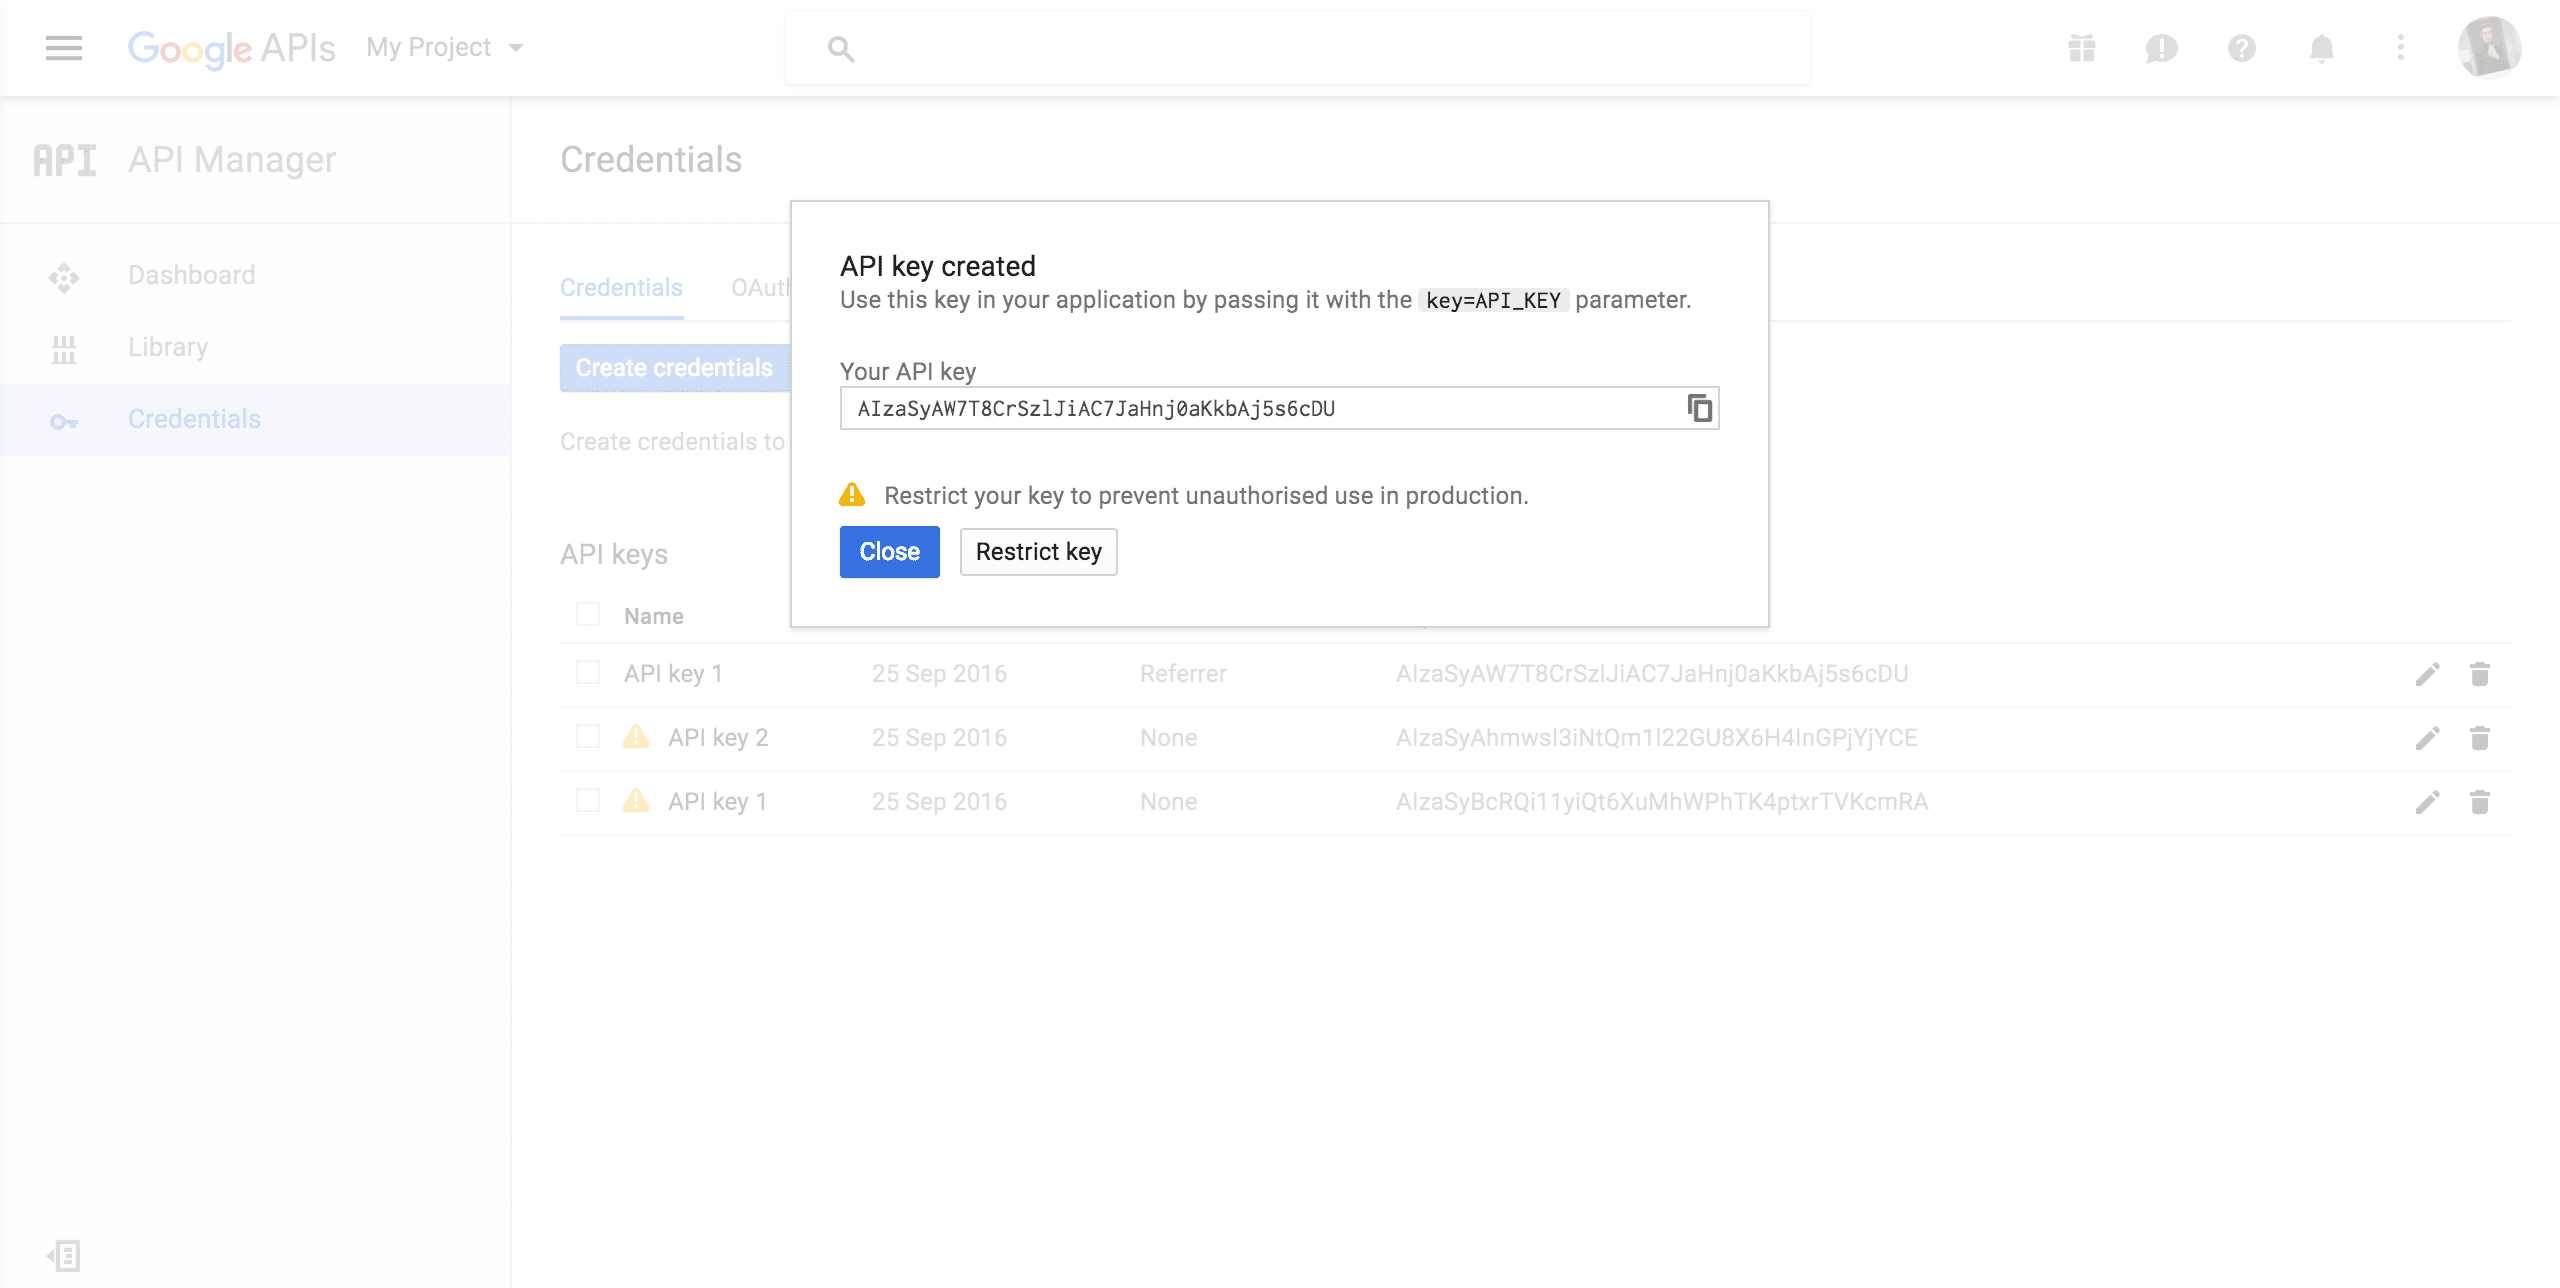
Your API key will now be generated. Click it to select it and copy it.
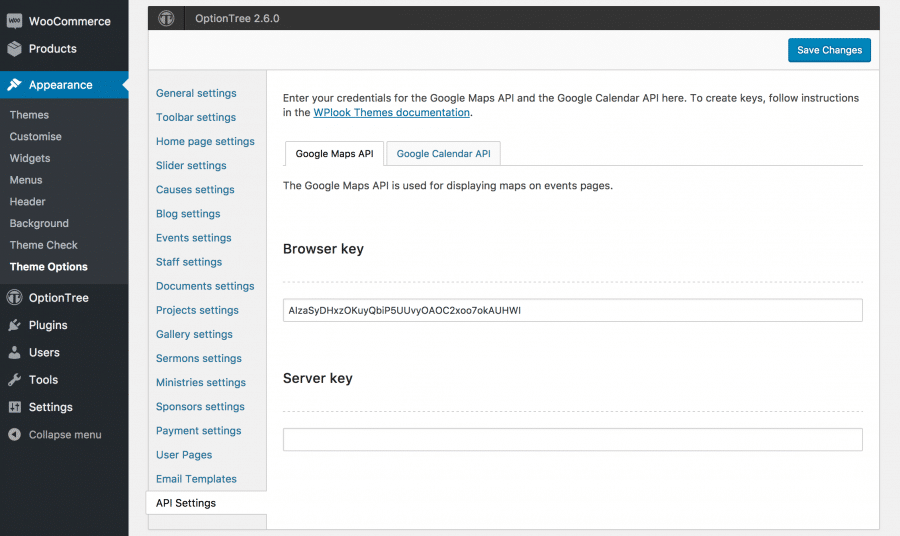
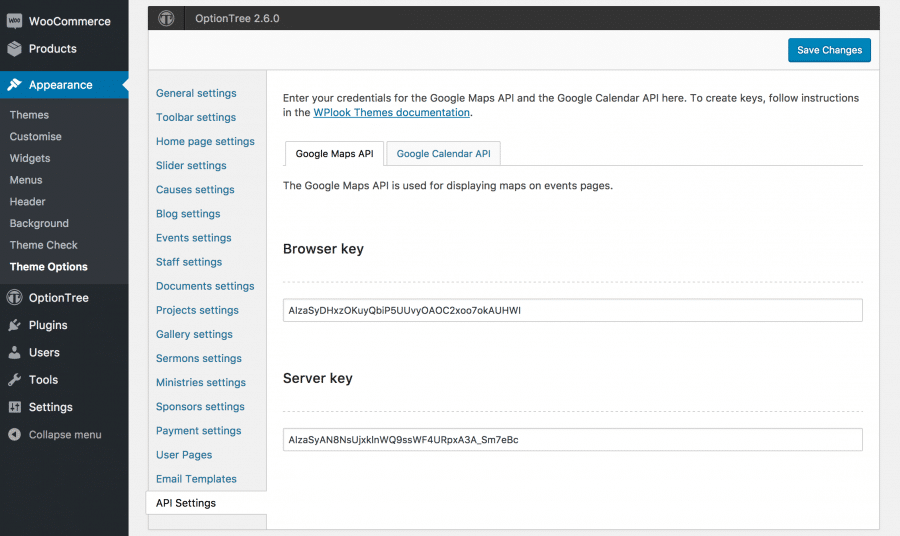
In another tab, open your site’s admin area and navigate to the Theme Options page. Across all of our themes, the API keys are stored in the Google Maps settings tab. Paste in your browser key and Save Changes.
Obtaining a server API key
Obtaining a server key is very similar to obtaining a browser key. First, click this link to get a server key. Instead of creating a new project, select the project you’ve created when obtaining a browser key.
Wait a few seconds, accessing a project might take a while. Once done, you will be asked to create an API key.
Your API key will now be created.
Just like in the last step, copy it and paste it into Theme Options. Save the changes and your maps will be ready to go!
It’s important that you do not restrict access to this key for the maps to work correctly. This is not an issue, as unlike the browser API key, this key is not visible to users of your site anyway.
Should you ever need to access your API keys in the future, they will be accessible in the Google API Console. Select your project at the top of the page and go to the Credentials tab to view them.
Google Calendar API
The Google Calendar API is used for displaying events as calendars and lists, sourced from Google Calendar.
First, you need to get a Google Calendar API (Application Programmers Interface) key. To continue, you need to log in to your Google account. If you don’t have one, you can sign up for one.
Go to Get a key. Choose to Create a project, or choose an existing project (for example, one you might have created for Google Maps) and click Continue.
Wait a few seconds, creating a project might take a while. Once done, you will be redirected to the Credentials page.
Give your API key a relevant name and in the Key restriction section, select HTTP referrers (websites) field. Enter the URL of your site, in a format like *.wplook.com/*. This will ensure that only your site can use this API key, and is an additional security measure. Remember to change this field if your site URL changes in the future. Click Create.
Your API key will now be generated. Click it and copy it. You can click Restrict key if you didn’t enter key restriction settings in the last step.
Finally, paste the API key in the Google Calendar API key field in API Settings in Theme Options.
Once you’ve set up the API keys, you can move onto setting up a Google Calendar page or a Google Calendar widget.

