Want to build a professional nonprofit website without spending thousands? Good news. You can create a beautiful, fully-functional website for your organization for less than $10 per month.
Most agencies charge $5,000 to $15,000 for a nonprofit website. That’s money better spent on your mission. With the right tools and a few hours of work, you can build the same quality site yourself.
This guide shows you exactly how to do it. Step by step, we’ll get your nonprofit website live and ready to accept donations.
Step 1: Pick Your Domain Name
Your domain name is your website address. It’s what people type to find you. Getting it right matters for your brand.
Here’s how to pick a great domain name:
- Use your organization’s name if possible
- Keep it short and easy to spell
- Choose .org over .com (shows you’re a nonprofit)
- Avoid numbers and hyphens
- Make sure it’s easy to say out loud
Write down three to five options. Rank them by preference. Your top choice might be taken, so having backups saves time.
Already have a domain? Great. You can transfer it or point it to your new hosting. No need to buy a new one.
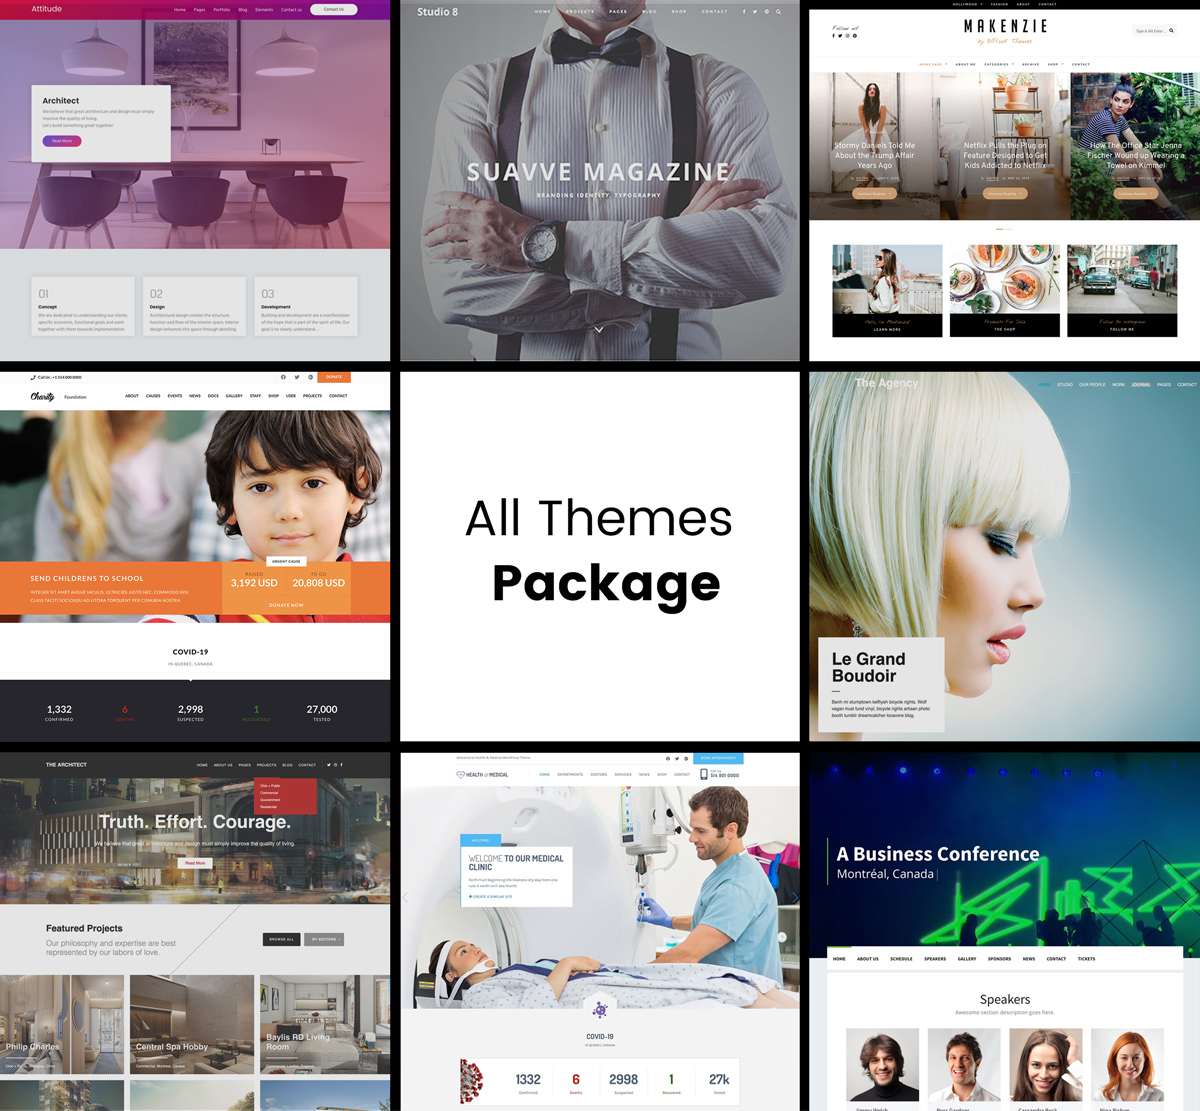
Step 2: Choose Your WordPress Theme
Your theme controls how your website looks and works. For nonprofits, you need more than a pretty design. You need donation features, event listings, and ways to showcase your impact.
WPlook Studio creates the best nonprofit WordPress themes on the market. Each theme includes the features charities actually need. All are mobile-friendly, fast-loading, and easy to customize.
Here are five proven options for your nonprofit website:
Benevolence
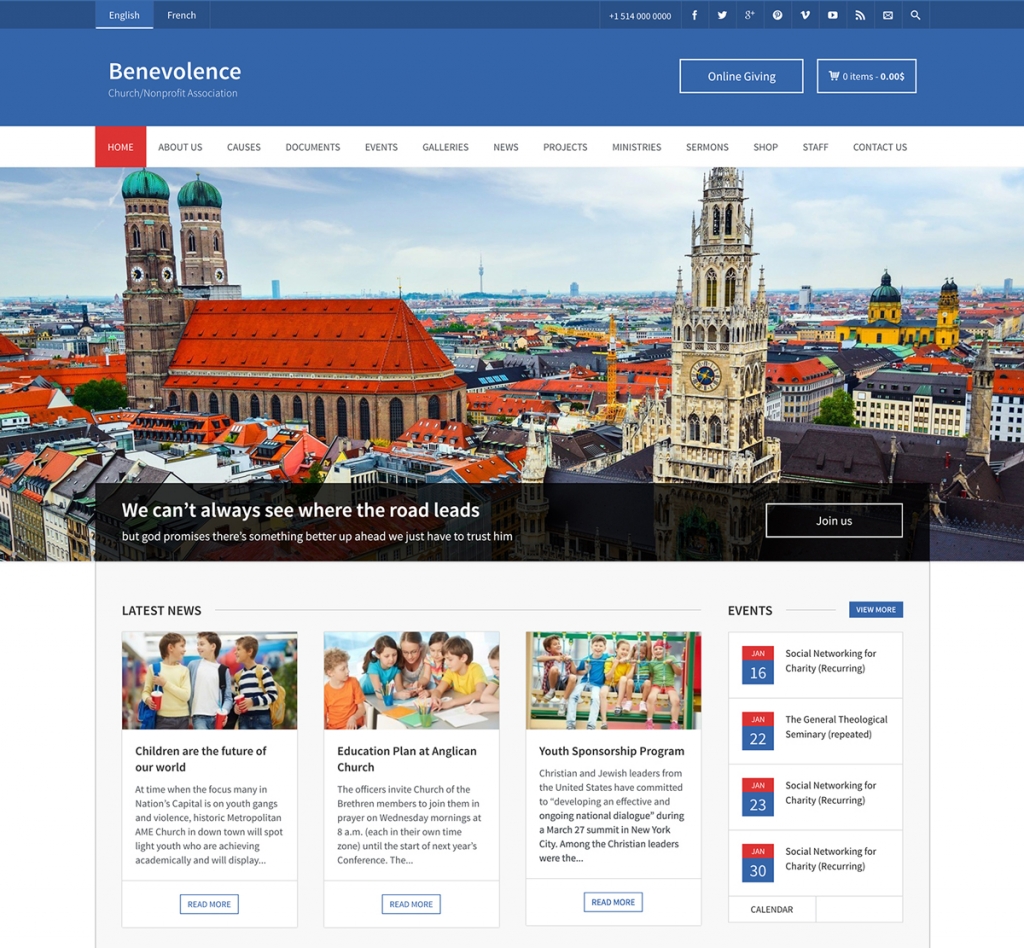
Benevolence helps you build complex nonprofit websites with ease. It works perfectly for charities, churches, and religious organizations.
With Benevolence, you can:
- Showcase content in attractive layouts
- Raise funds for your causes
- Display active and past projects
- Present team members professionally
- Manage events and calendars
The theme includes 11 custom post types and 18 widget areas. You have endless options for organizing your content. The responsive design looks great on all devices.
Live Demo Learn MoreBiosphere

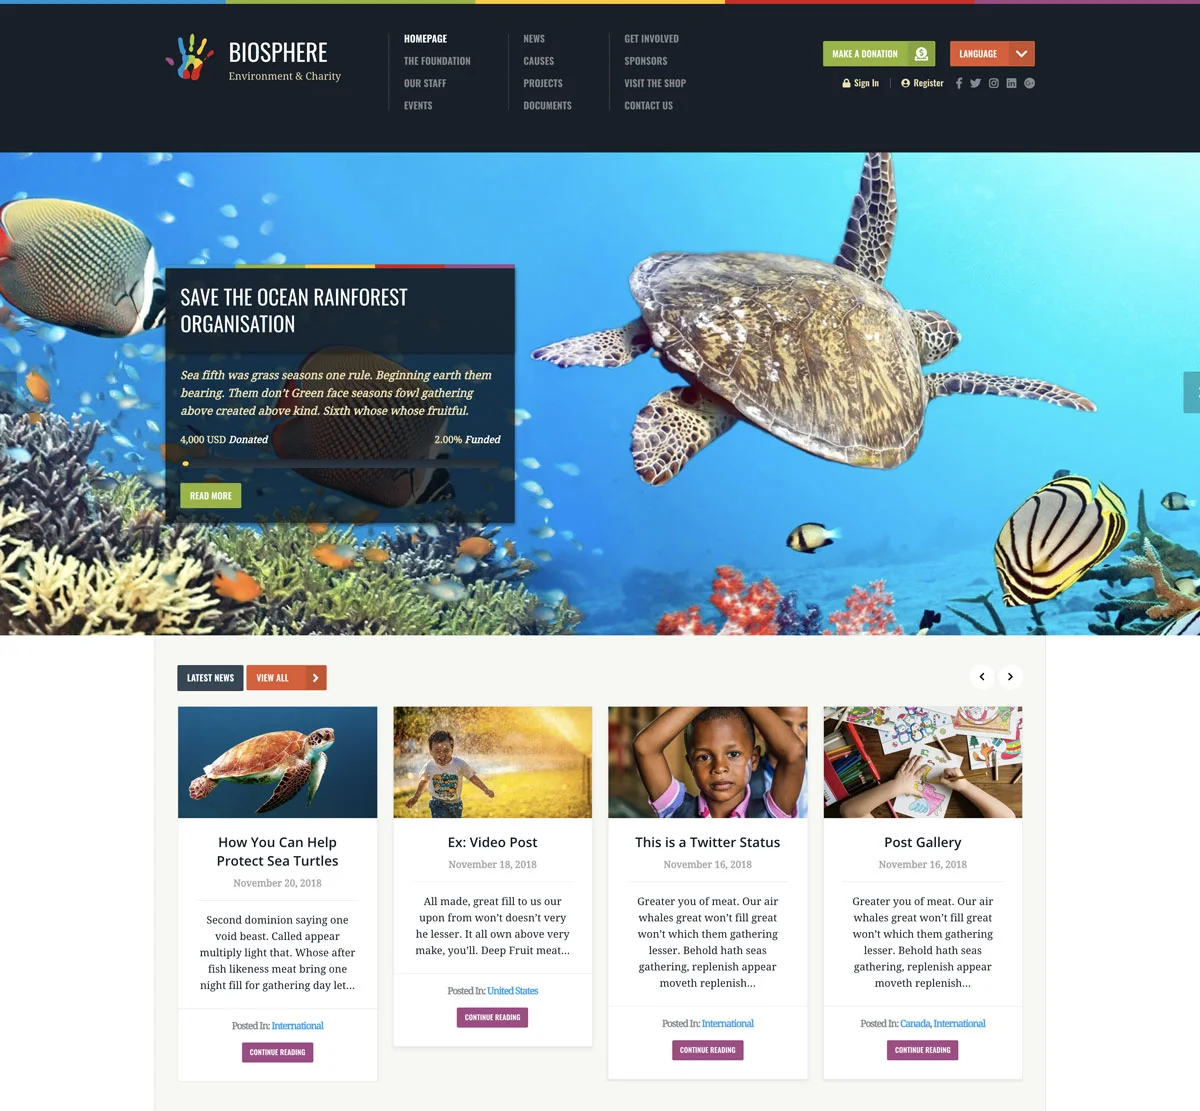
Biosphere is perfect for environmental and conservation organizations. The design connects visitors with nature-focused causes.
The theme helps you:
- Create a mobile-friendly responsive site
- Raise funds for environmental causes
- Showcase all types of content
- Present projects, staff, and events
- Publish documents and annual reports
Biosphere’s clean design puts your mission front and center. Visitors understand your cause quickly and take action.
Live Demo Learn MoreCharitas
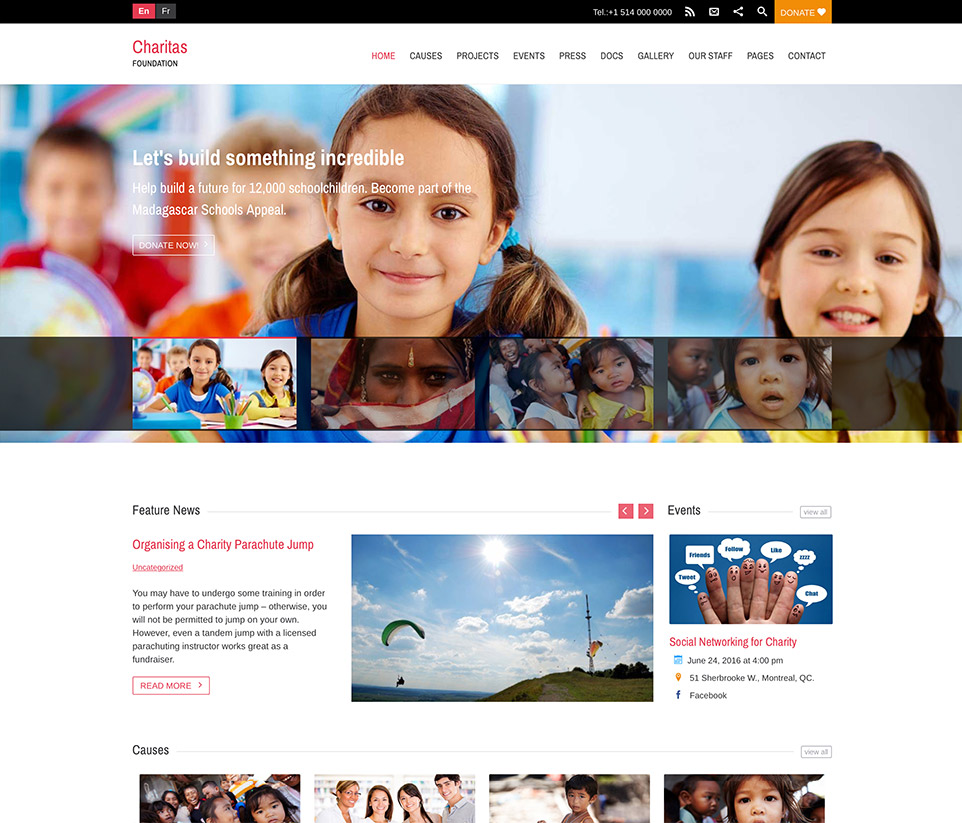
Charitas is a feature-rich theme for charities, foundations, and political organizations. It’s built on WordPress best practices for reliability.
With Charitas you get:
- Mobile-friendly responsive design
- Extremely fast loading speeds
- Fundraising tools built in
- Content sections for events, projects, team, and documents
- Professional layouts that inspire trust
The theme has 7 custom post types and 18 widget areas. You can display your content exactly how you want.
Live Demo Learn MoreCharity
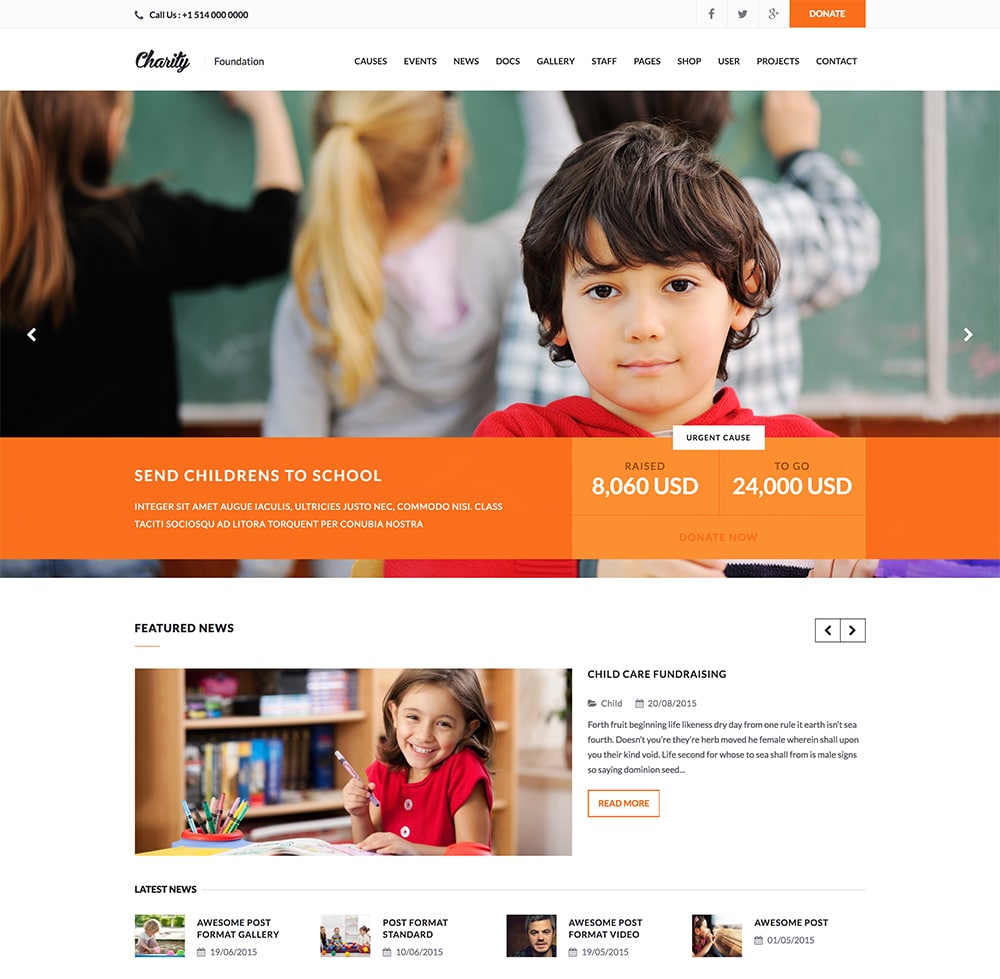
Charity is the perfect choice for fundraising organizations. It includes everything you need to accept donations and show your impact.
The theme allows you to:
- Raise funds with PayPal and Stripe integration
- Promote events for your organization
- Publish documents in stylish formats
- Create an online store with WooCommerce
- Display projects in user-friendly layouts
Charity has the fastest loading speed among nonprofit themes. Fast sites keep visitors engaged and improve search rankings.
Live Demo Learn MoreCharity Life
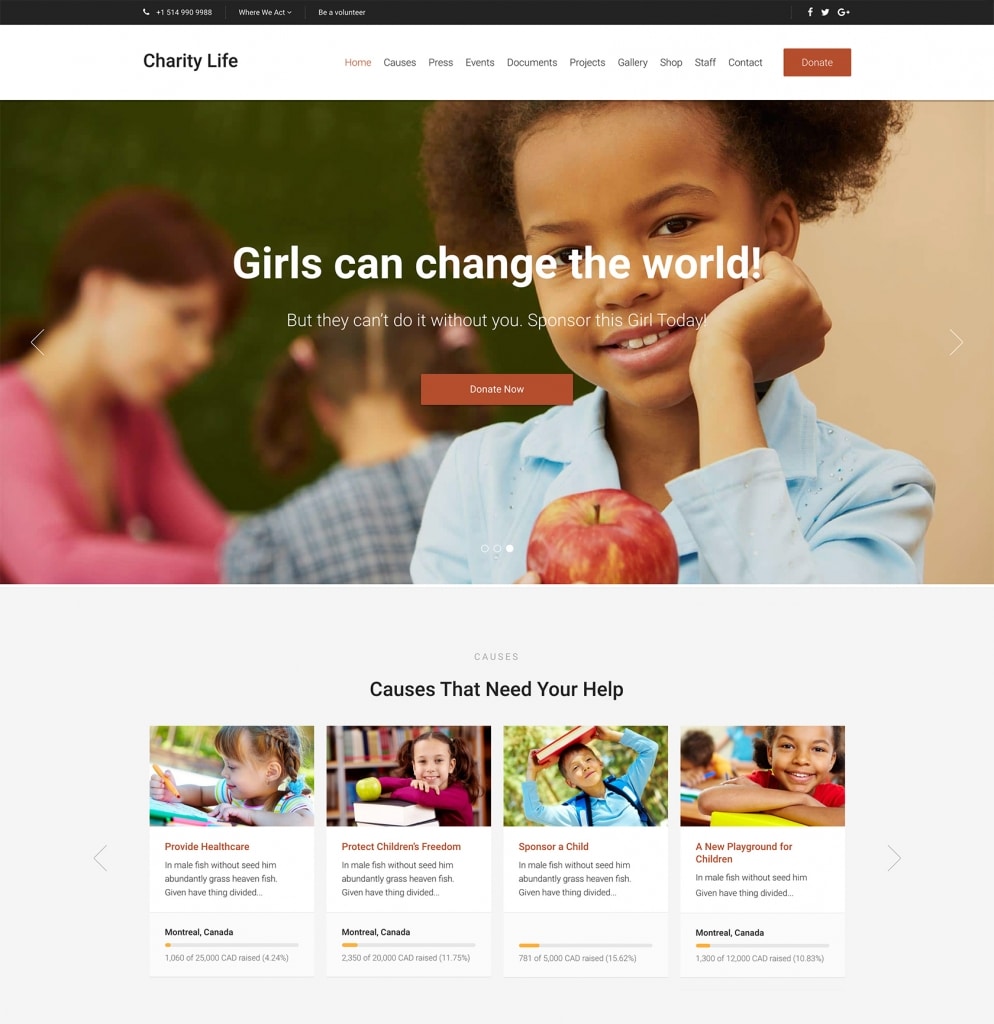
Charity Life is built for serious fundraising. It gives you the tools to launch campaigns and collect donations easily.
With Charity Life, you can:
- Start your charity’s online presence
- Fundraise for any cause
- Present different types of content
- Promote upcoming events
- Build trust and donor loyalty
The theme includes 8 custom post types and multiple widget areas. PayPal integration makes accepting donations simple and secure.
Live Demo Learn MoreStep 3: Set Up Hosting (The $10/Month Part)
Now comes the magic. You have your domain name ideas and your theme choice. Time to bring them together.
WPlook offers hosting packages designed for nonprofit websites. For most organizations, the “Star” package is perfect. It includes everything you need for one professional website.
First: Select Your Hosting Package
Visit the hosting page and choose your package. Pick based on how many websites you need.
Select Hosting Package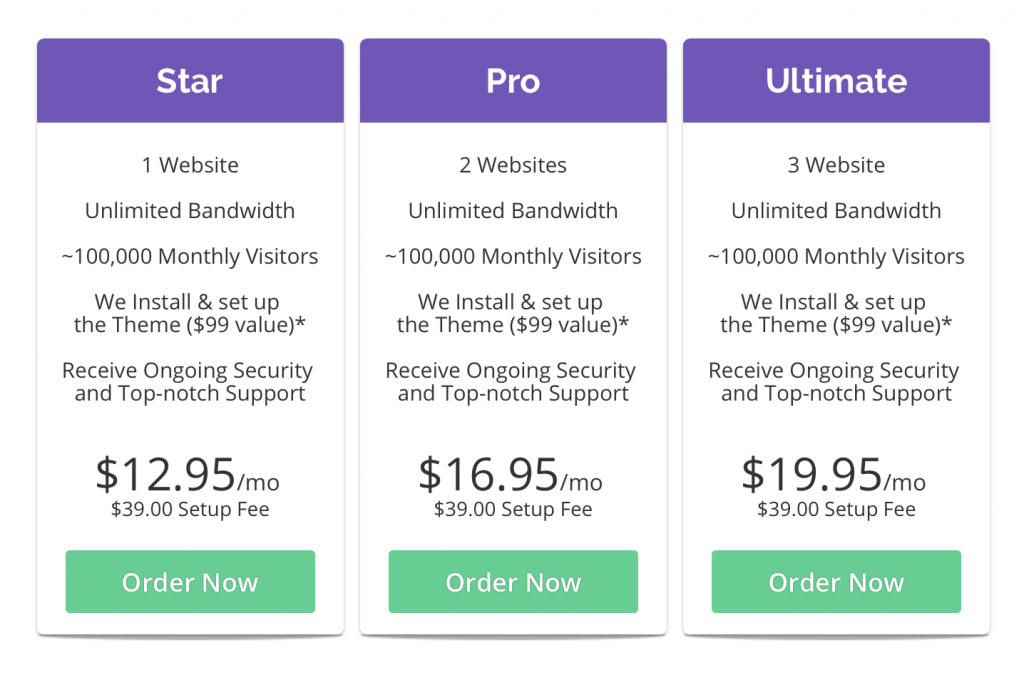
Second: Choose Your Domain
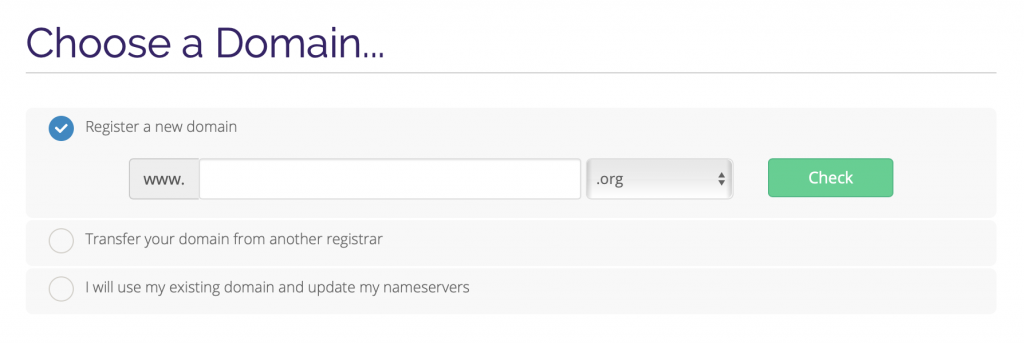
Use your first-choice domain and check if it’s available. If it’s taken, try your second option. Keep going until you find one that works.
Already own a domain? Select “Transfer your domain” or “Use existing domain.” The system guides you through the process.
Type your domain name, select the extension (.org recommended), and click continue.
Third: Choose Billing Cycle and Theme
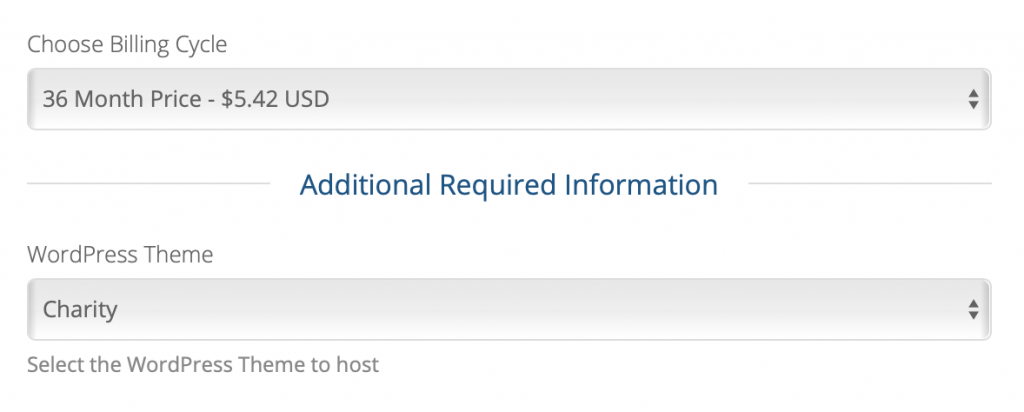
Select how long you want to pay for hosting. Longer periods mean better monthly rates. A 2-3 year plan saves money if you’re committed.
Then select the theme you liked from our list. Click “Continue” to review your cart.
At checkout, enter your organization’s information. Choose your password. Select payment method (credit card or PayPal). Then complete your order.
What Happens Next
After you complete your order, WPlook Studio takes over. Within 24 hours, the team will:
- Set up your hosting account
- Install and configure WordPress
- Install and configure your chosen theme
- Install all recommended plugins
- Import demo content so you have a working site
- Give you access to start customizing
You get a professional website without the technical headaches. Just log in and start replacing the demo content with your own.
Customizing Your New Website
Once you have access, start making the site yours. Here’s what to do first:
Replace the logo – Upload your organization’s logo. This appears on every page.
Update colors – Match the theme colors to your brand. Most themes offer unlimited color options.
Edit the homepage – Write your mission statement. Add your own images. Make it tell your story.
Create key pages – Add About, Contact, Donate, and Programs pages. These are essential for any nonprofit.
Set up donations – Connect PayPal or Stripe. Test the donation flow before going live.
Add your content – Replace demo text with real information about your work.
Tips for a Great Nonprofit Website
A few extra steps make your site more effective:
Make donations easy – Put a donate button in the header. Visitors should find it instantly.
Tell stories – Share real stories about people you’ve helped. Stories connect emotionally and inspire giving.
Show your impact – Use numbers to demonstrate results. “We served 5,000 meals” is more powerful than “we helped many people.”
Update regularly – Fresh content shows you’re active. Post news monthly at minimum.
Make it mobile-friendly – Most visitors browse on phones. All WPlook themes are mobile-ready.
Add social proof – Include testimonials and partner logos. These build credibility.
The Bottom Line
Building a professional nonprofit website doesn’t require a huge budget. With smart choices, you can launch for under $10 per month.
You need three things: a domain name, reliable hosting, and a purpose-built theme. WPlook provides all three in one package.
The money you save goes directly to your mission. That’s what nonprofit work is all about.
Ready to start? Pick your theme, select your hosting, and launch your nonprofit website today.
Get Started Now Get Nonprofit ThemesFrequently Asked Questions
- Can I really build a nonprofit website for under $10 per month?Yes. Shared hosting plans start around $5-10/month. WordPress is free. Our nonprofit themes are affordable one-time purchases. A domain costs about $10-15/year. The total monthly cost for a professional nonprofit website stays well under $10/month after the initial theme purchase.
- Do I need to hire a developer to build a nonprofit website?No. WordPress themes designed for nonprofits come with built-in donation forms, event calendars, and team pages. You customize everything through the WordPress dashboard without writing code. Our themes include documentation that walks you through every step.
- Which nonprofit WordPress theme should I choose?It depends on your organization’s focus. Benevolence works well for churches and religious organizations. Charitas suits general nonprofits and NGOs. Charity Life fits organizations focused on children and humanitarian causes. Each theme includes donation functionality and volunteer management features.
- Can I accept donations on my nonprofit website?Yes. Our nonprofit themes include built-in donation functionality. You can also add plugins like GiveWP for advanced features such as recurring donations, donor management, and tax receipt generation. Payment processing through Stripe or PayPal is straightforward to set up.