If your site needs to be available in multiple languages, you can set up a WordPress multisite installation, with each site running the theme, to make your site appear multilingual. This method is completely free, allows every language to work independently of other languages, but on the other hand, it requires more configuration, as the settings of every site are independent of the other sites.
Setting Up a Multisite Installation
- Follow the Create A Network guide from the WordPress Codex. It is recommended to set up the network using subdirectories rather than domains.
- Once you’ve set up the network, add a site for every language you want by selecting My Sites → Network Admin → Sites from the WordPress admin bar at the top of the administration panel, and selecting Add New. Use common language codes, such as
esandfrto keep your URLs short. You do not need to add a site for the default version of your site, only the alternative languages you are going to add.
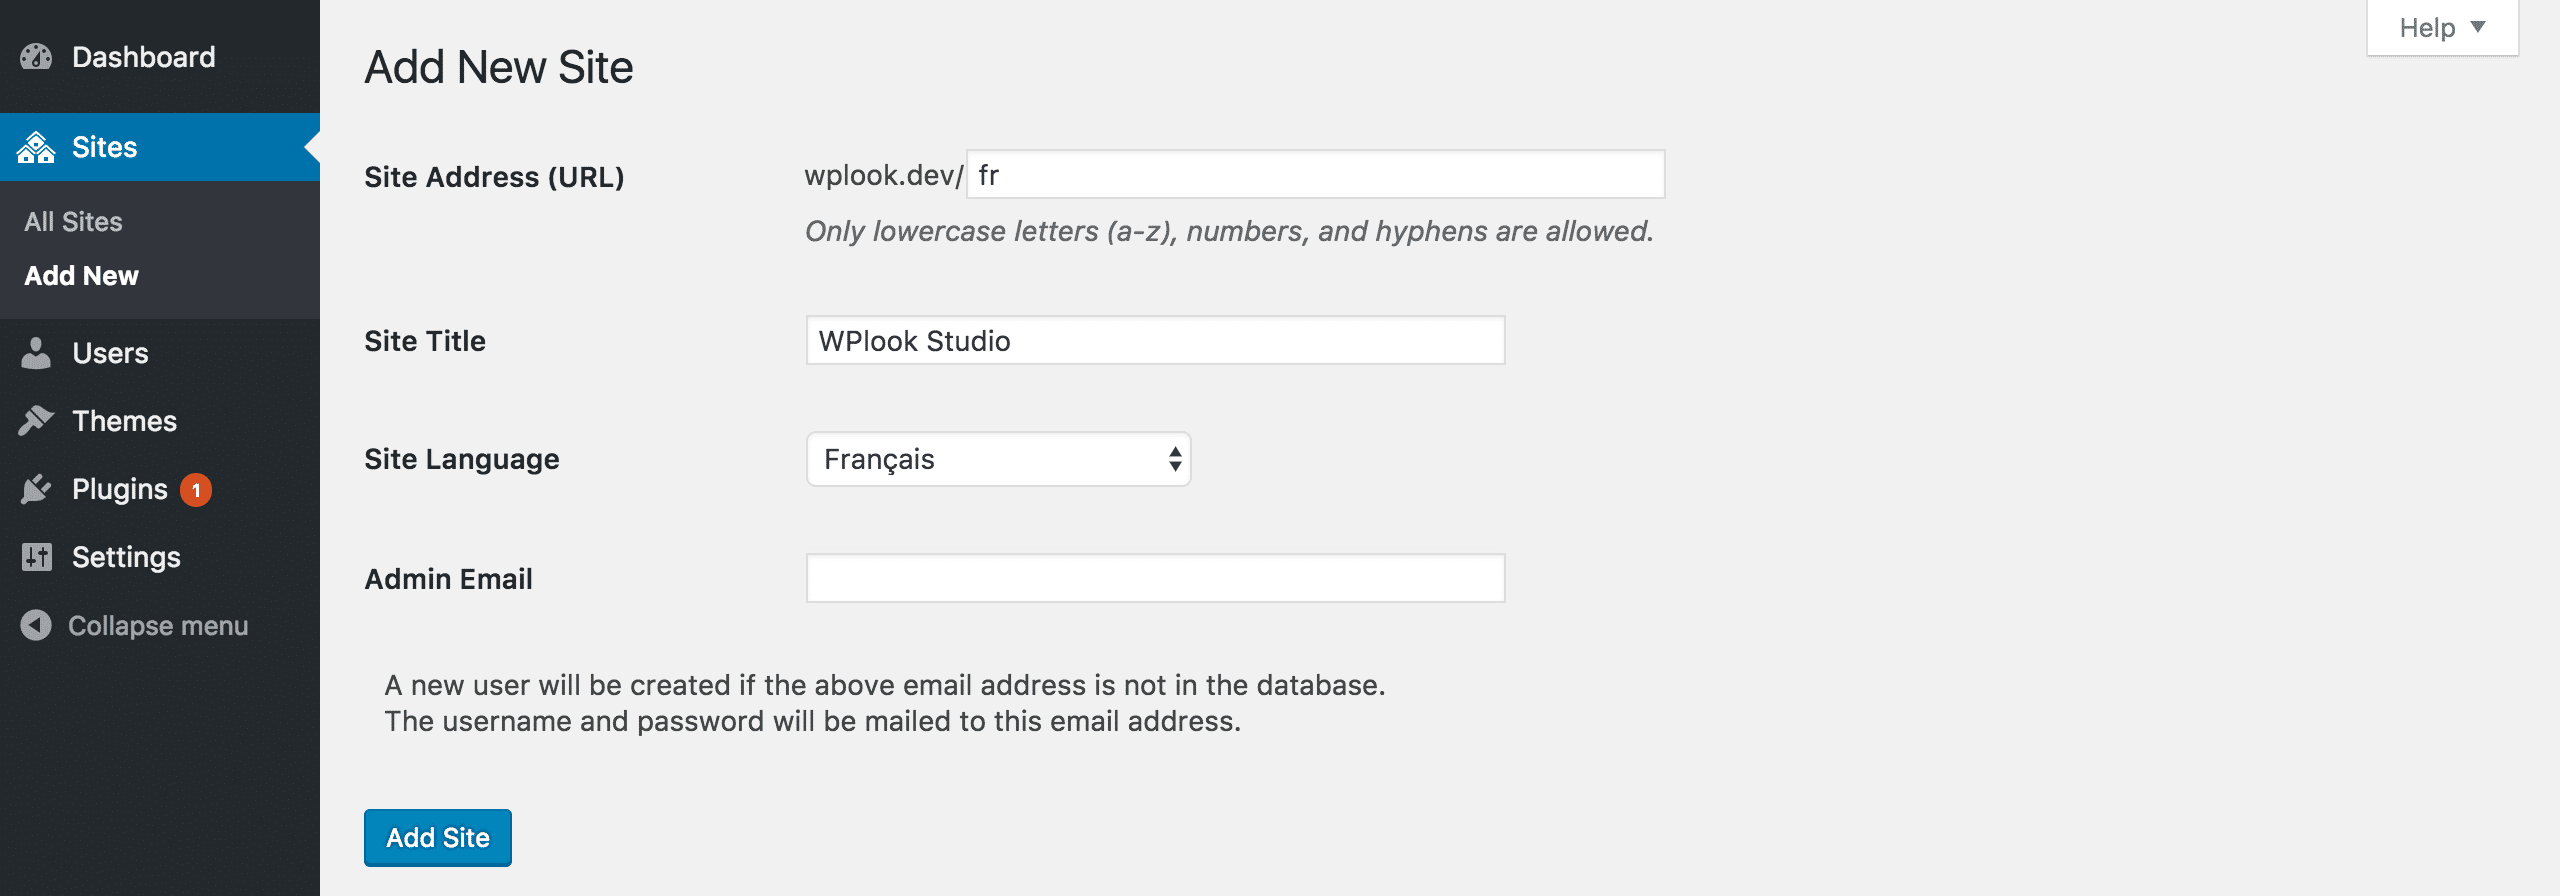
- For every site created, set up theme as you would normally. Remember to follow the Configuring Site Language instructions for every site you add, so the theme as well as your content are translated.
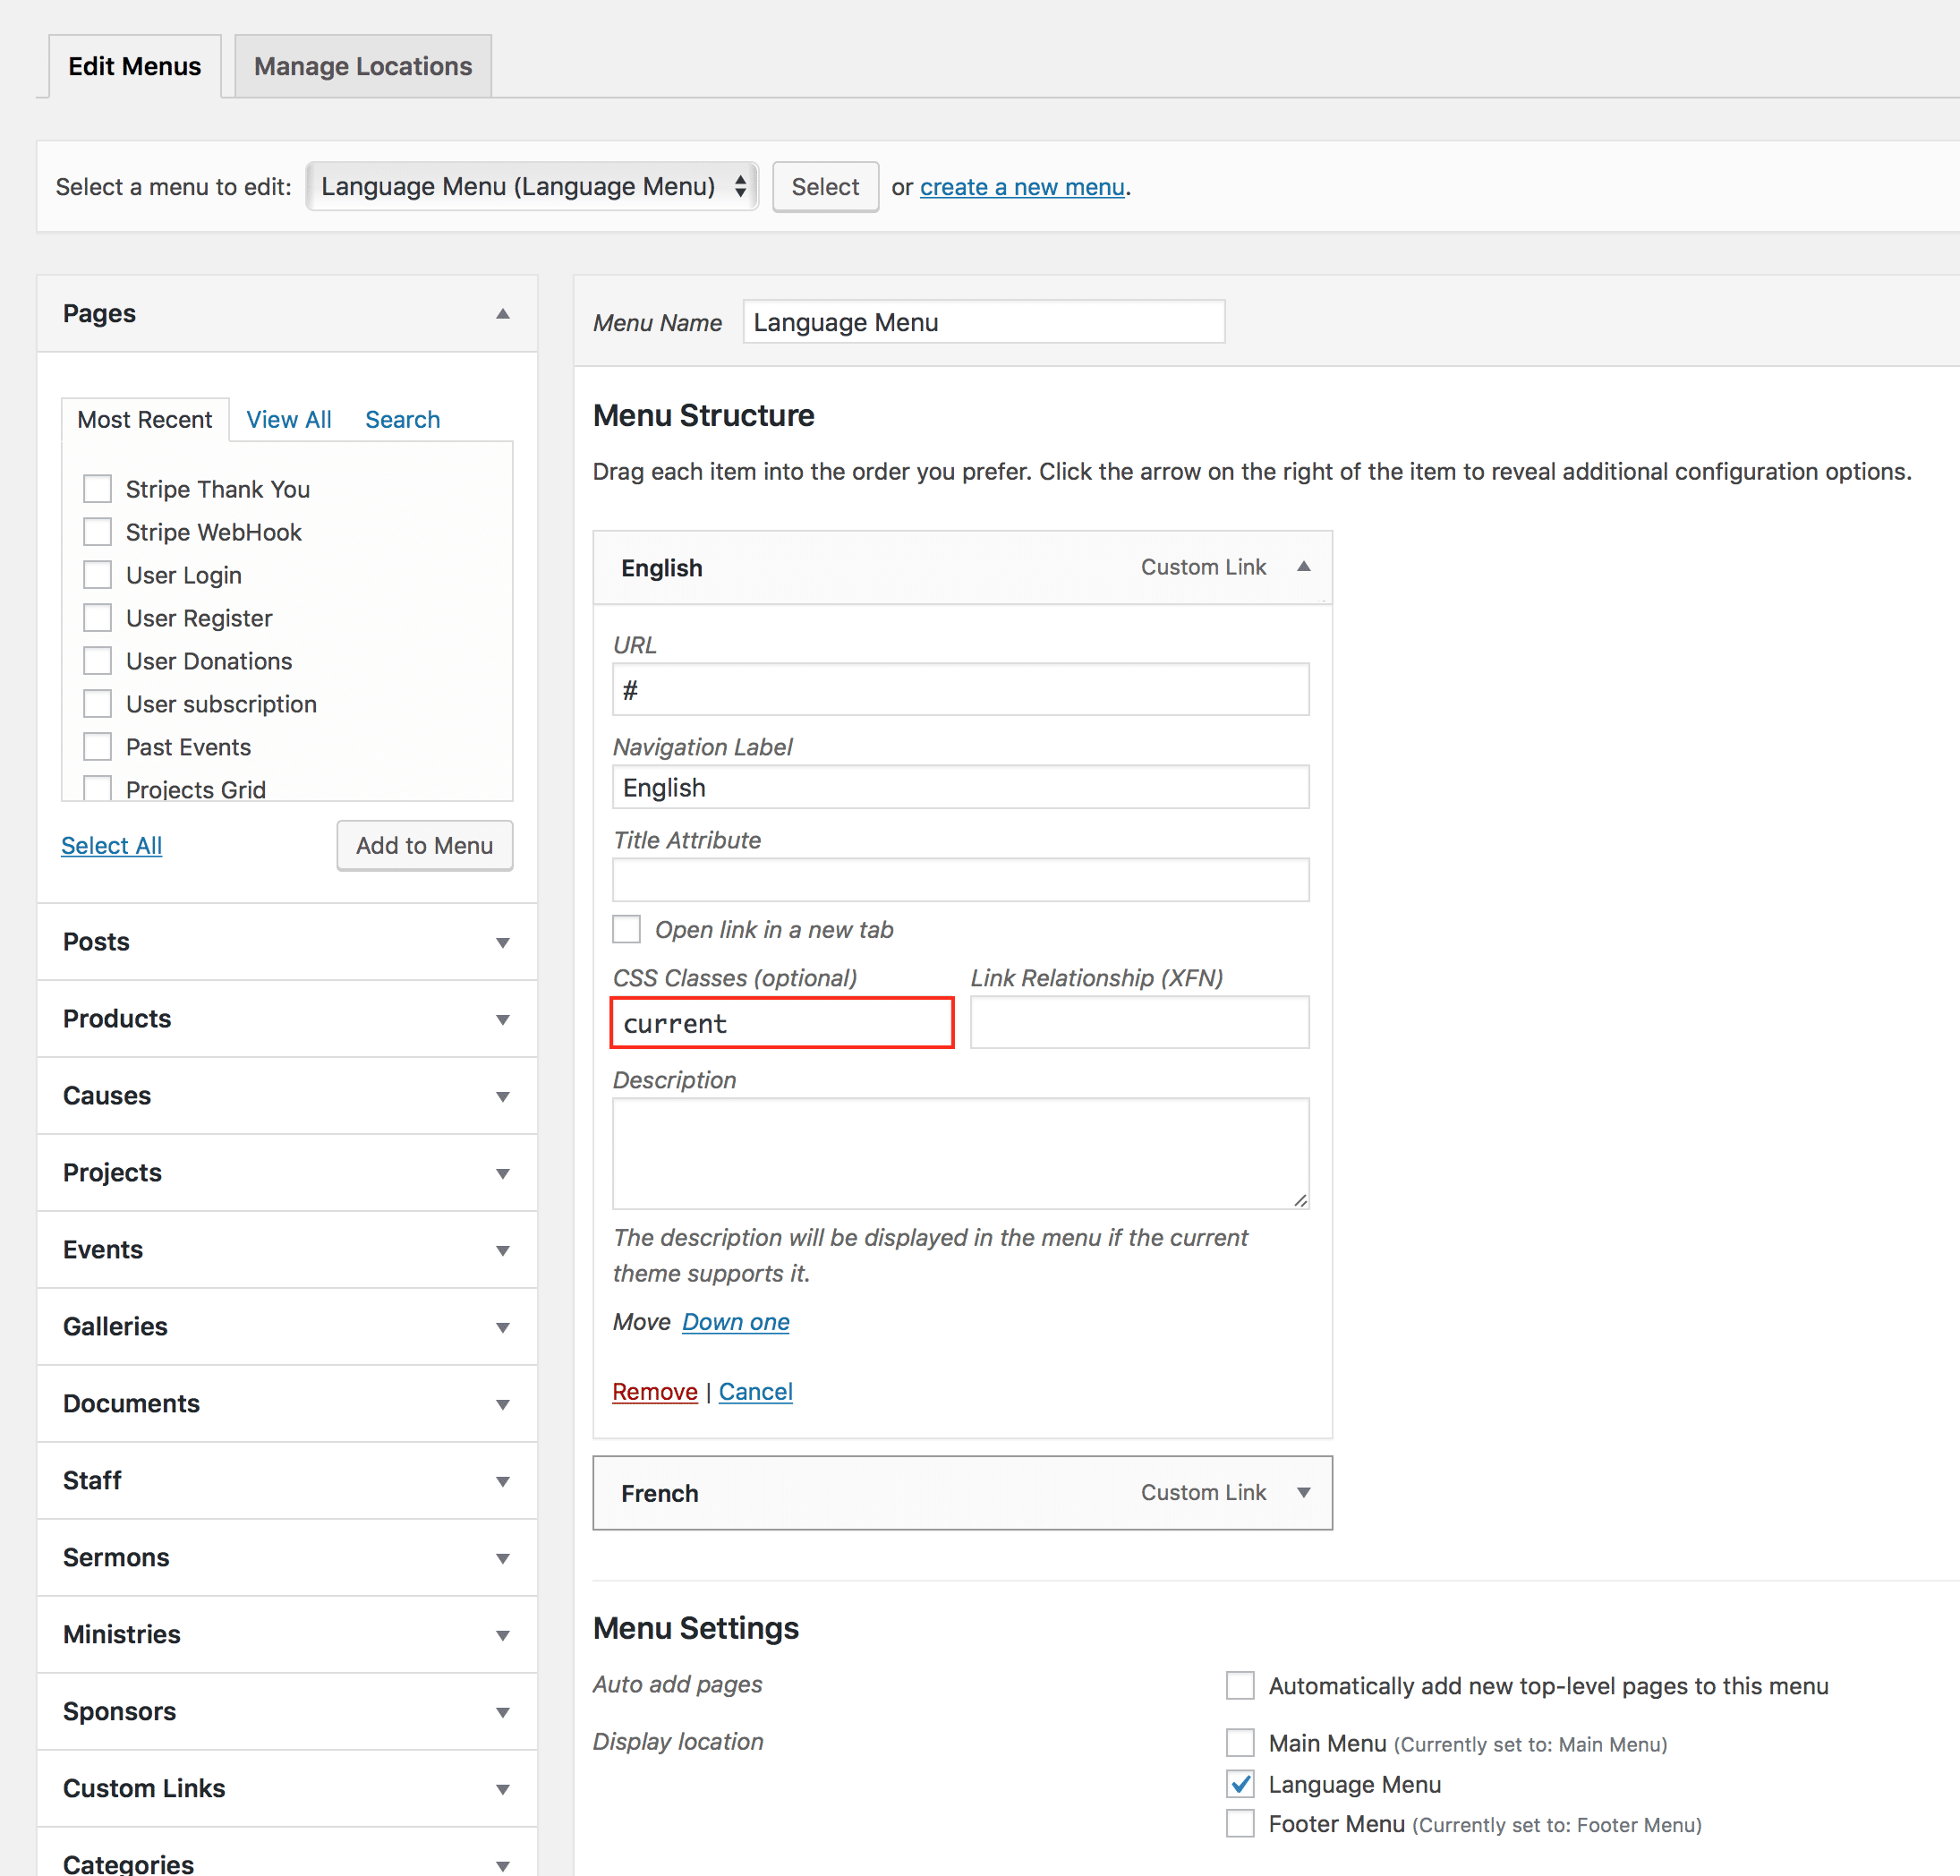
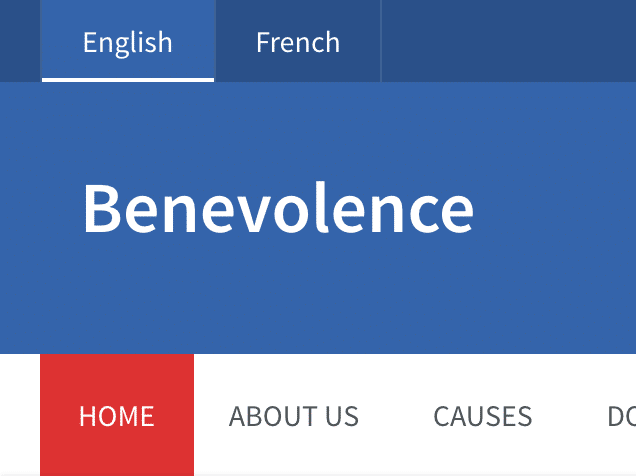
- For every site, build a language menu. Head to Appearance → Menus from the WordPress administration panel and build a menu linking to every other language site you have built. Make sure to tick Language Menu under Theme locations so the list of languages is displayed in the site header.
Using Plugins
If creating a new site from scratch for every language doesn’t suit you, a plugin which allows you to add different language versions of each post might be more suitable. Read more about them in the Adding New Languages section of the WordPress Codex.