Contact forms in WPlook Studio themes are managed using the Contact Form 7 plugin. It’s a well established plugin, with support for many languages as well as other features which make it the chosen plugin to include in our themes, such as Google reCAPTCHA support for preventing spam. Follow the instructions in Required Plugins to install the plugin.
Most shared hosting accounts on which WordPress will run won’t have any problems sending emails – but if you do experience issues, check the Setting Up Mail article.
Adding Contact Forms
Individual contact forms in Contact Form 7 are managed in the Contact screen found in the navigation sidebar in the WordPress Administration Panel. This screen lists all available contact forms.
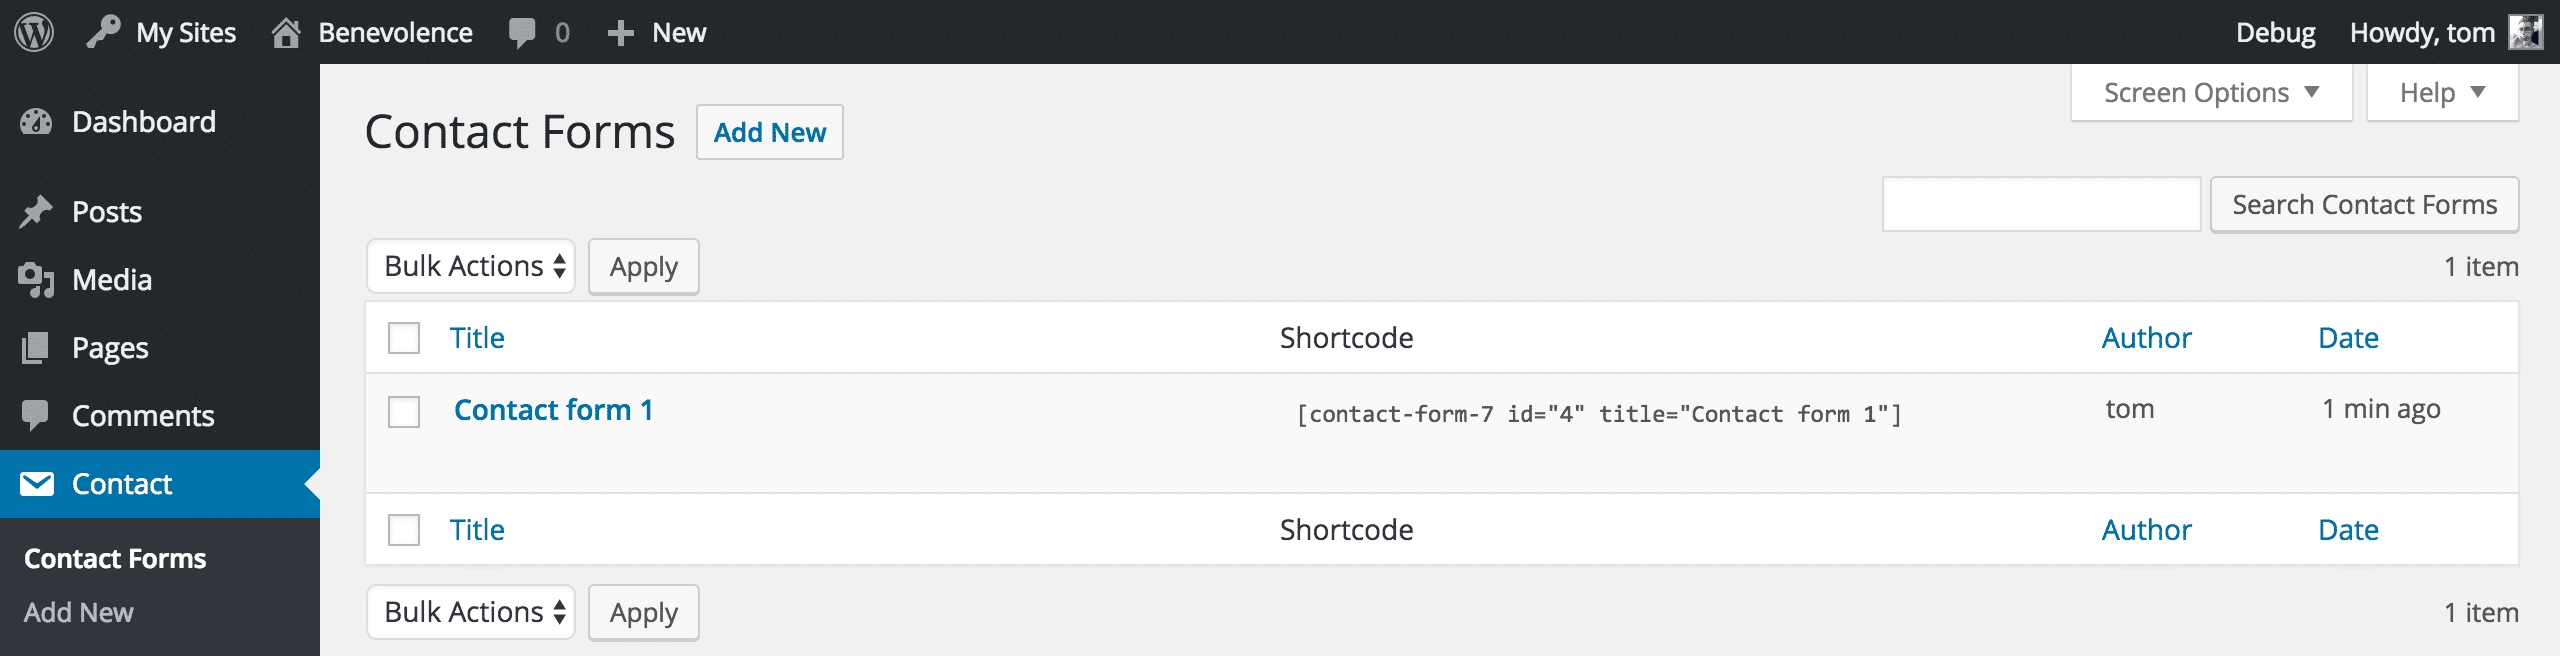
From here you can click Add New at the top of the screen to add a new form. You will be taken to the Edit Contact Form screen.
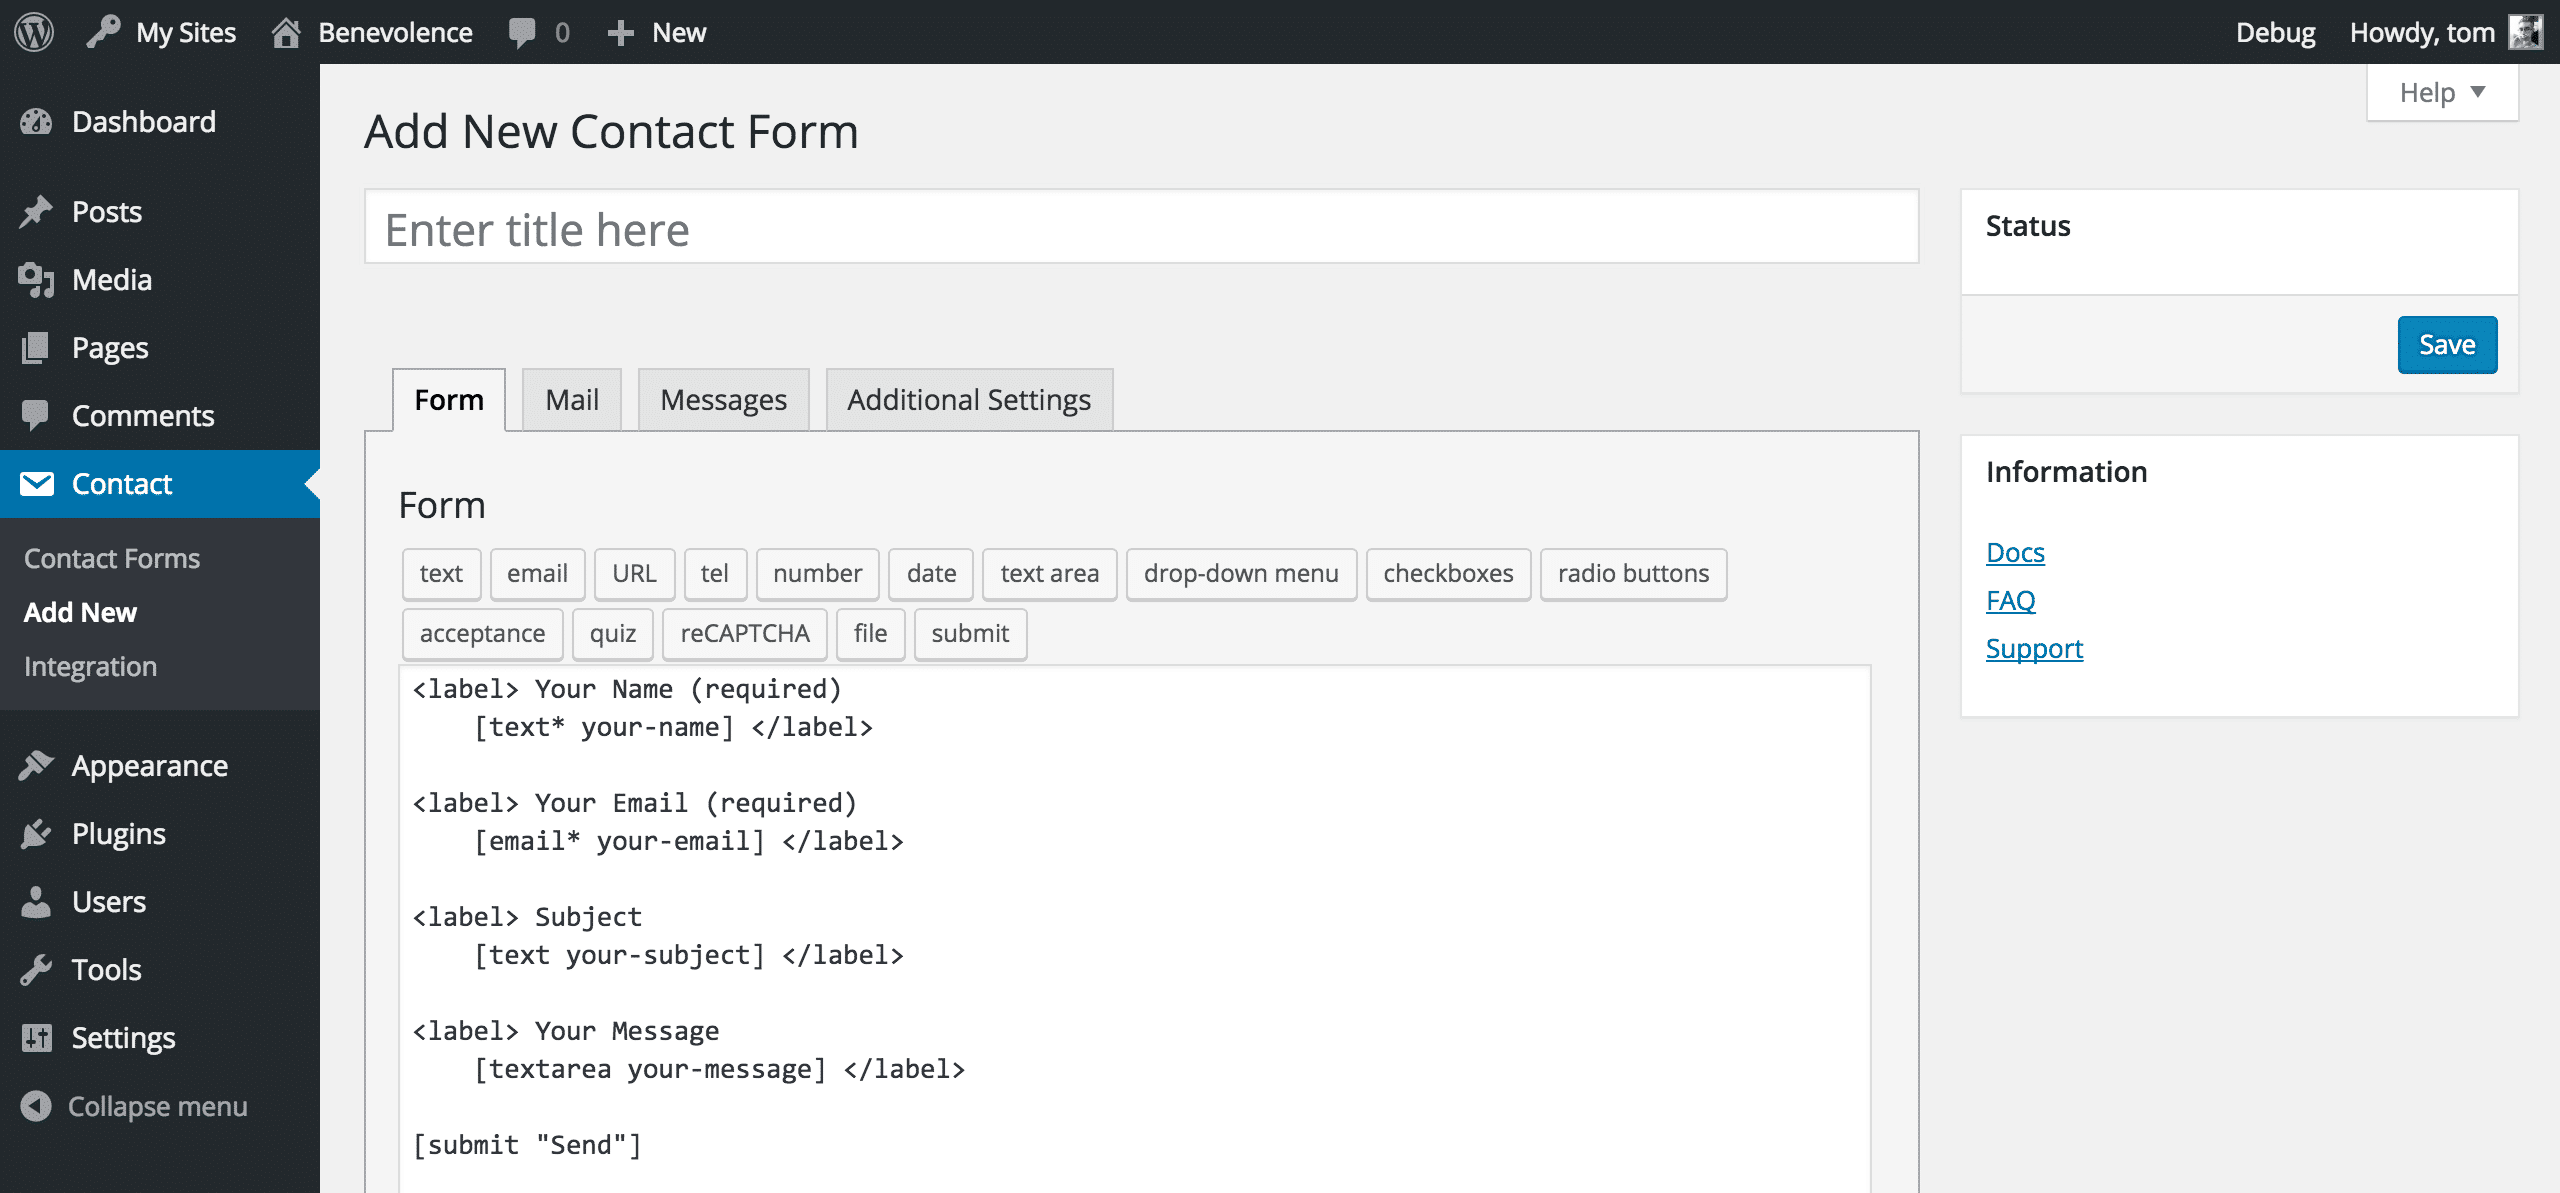
This screen is similar to WordPress’ standard Edit Post screen, however, it allows for editing forms rather than standard post content. To get started, give your new contact form a title.
Form
To add a new field to your form, enter the following at the point in the form text where you’d like the field to appear.
<label> Field Name </label>
Put the cursor just before the </label> tag, and click one of the buttons above the text area to add that type of field. The following field types are accepted:
- text: A standard, one line text input.
- email: An email field. Mobile users are given e-mail suggestions and a keyboard with e-mail specific characters and autocorrect is disabled.
- URL: A link field. Mobile users are shown a keyboard with URL specific characters and autocorrect is disabled.
- tel: A telephone number field. Mobile users are shown a number-only keyboard and phone number suggestions.
- number: A generic number field. Mobile users are shown a number-only keyboard.
- date: A date field. Both mobile and desktop users are shown a date picker.
- text area: A bigger input area for generic, longer text.
- drop-down menu: A dropdown menu with a selection of options, from which the user must pick one.
- checkboxes: A list of checkable boxes, of which the user can select multiple. Must be placed outside of the
<label>tag. - radio buttons: A list of checkable boxes, of which the user can select one. Must be placed outside of the
<label>tag. - acceptance: A checkbox for making the user accept terms and conditions.
- quiz: A single way of checking if the form submission is generated by a human or is spam. Displays an obvious question with a simple answer to it, to make sure the user is real.
- reCAPTCHA: A reliable way of checking if the submission is real or spam. Requires a Google account to create API keys for it.
- file: A file upload field.
- submit: A button for completing the form submission.
The pop-up window displayed after clicking on a button gives more options, such as whether the field will be required or not, as well as information about more specific field settings. For example, this is the window displayed when inserting a text field:
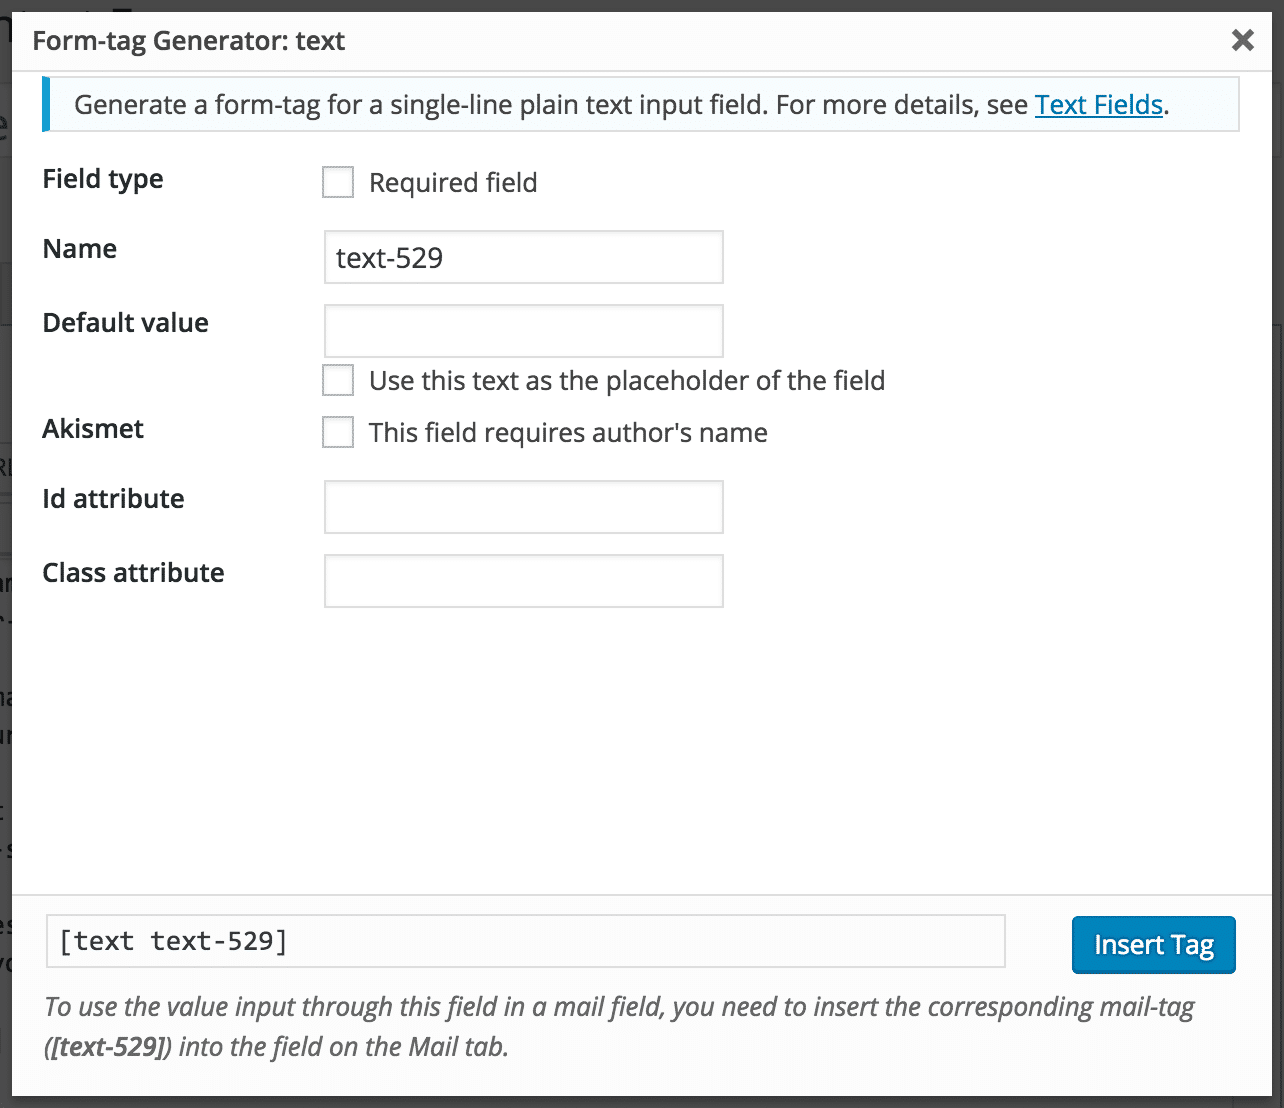
Most of the fields share common options, including the following:
- Field type: Check the box to mark this field as required.
- Name: The name of the field, used to refer to it in the email template.
- Default value: The default value of the input field. Check the Use this text as the placeholder of the field checkbox to have the text disappear once the user clicks the field.
- Id attribute: The ID of the field, used for customising the look of the field with CSS code.
- Class attribute: Space separated CSS classes of the field, used for customising the look of the field with CSS code.
The Mail section is where the settings for this form are stored. All of these fields accept the tags which are listed at the top of the section – these come from the names of the field you entered in the Form section.
- To: The recipient of the emails generated by the form. This is usually your own e-mail address.
- From: The sender of the email form, usually in the format
[your-name] <wordpress@wordpress.dev>, where[your-name]is the tag used in the Form section for the user’s name, and<wordpress@wordpress.dev>is an e-mail address on your server. Using an e-mail address in the same domain as your WordPress installation helps prevent sent e-mails being detected as spam. - Subject: The subject of the message sent.
- Additional Headers: Additional mail headers, for advanced purposes. A useful line to include here is
Reply-To: [your-email], where[your-email]is the field containing the sender’s email. This makes your email client default to responding to the sender when you reply to a message sent from this contact form. - Message Body: The content of the message. This is the place to include tags for fields set up in the Form section.
- File Attachments: A list of attachments included with this email. If you used a file field in your form, this is the place to include the tag with its’ name.
Messages
The Messages section contains strings for every possible response to the contact form – such as failures and successes. By default, they’re displayed in the language your site is set to, but you can customize them here.
Additional Settings
The area for additional code snippets used for customisation. Find out more in the Additional Settings article on the Contact Form 7 website.
Tips For Authoring Contact Forms
The default Contact Form 7 form largely does the job for most contact forms. However, here’s a few tips to keep in mind.
Make sure that unless you’re using multiple control elements, such as [checkbox], both the label and element tag are placed inside the <label></label> tags, as this aids accessibility. Doing this is demonstrated in Contact Form 7’s default form.
Also make sure to use either the [quiz] or [reCAPTCHA] elements, as these prevent your forms from being targeted by spam bots. ReCAPTCHA is the more reliable form of spam prevention, but it requires getting API keys from Google. Find out how to do this in the reCAPTCHA article on Contact Form 7’s website.
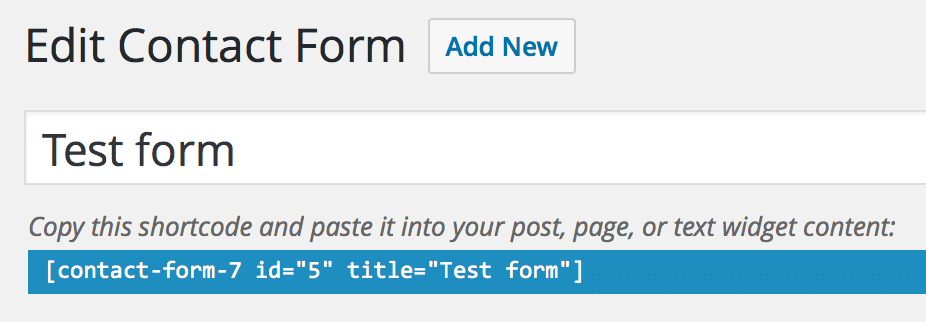
Displaying Contact Forms
To display a contact form, copy the shortcode with the blue background under the form title and paste it onto any of your posts or pages, for example, a page titled Contact.