Every post in WordPress can be filed under one or more tags. This aids in navigation and allows posts and to be grouped with others of similar content. Tags are normally displayed either around the post title or at the end of the post. They can also be featured in sidebars, for example using the Tag Cloud Widget.
Unlike categories, tags have no hierarchy so there is no parent/child relationship like that of categories. But like categories, tag names must be unique.
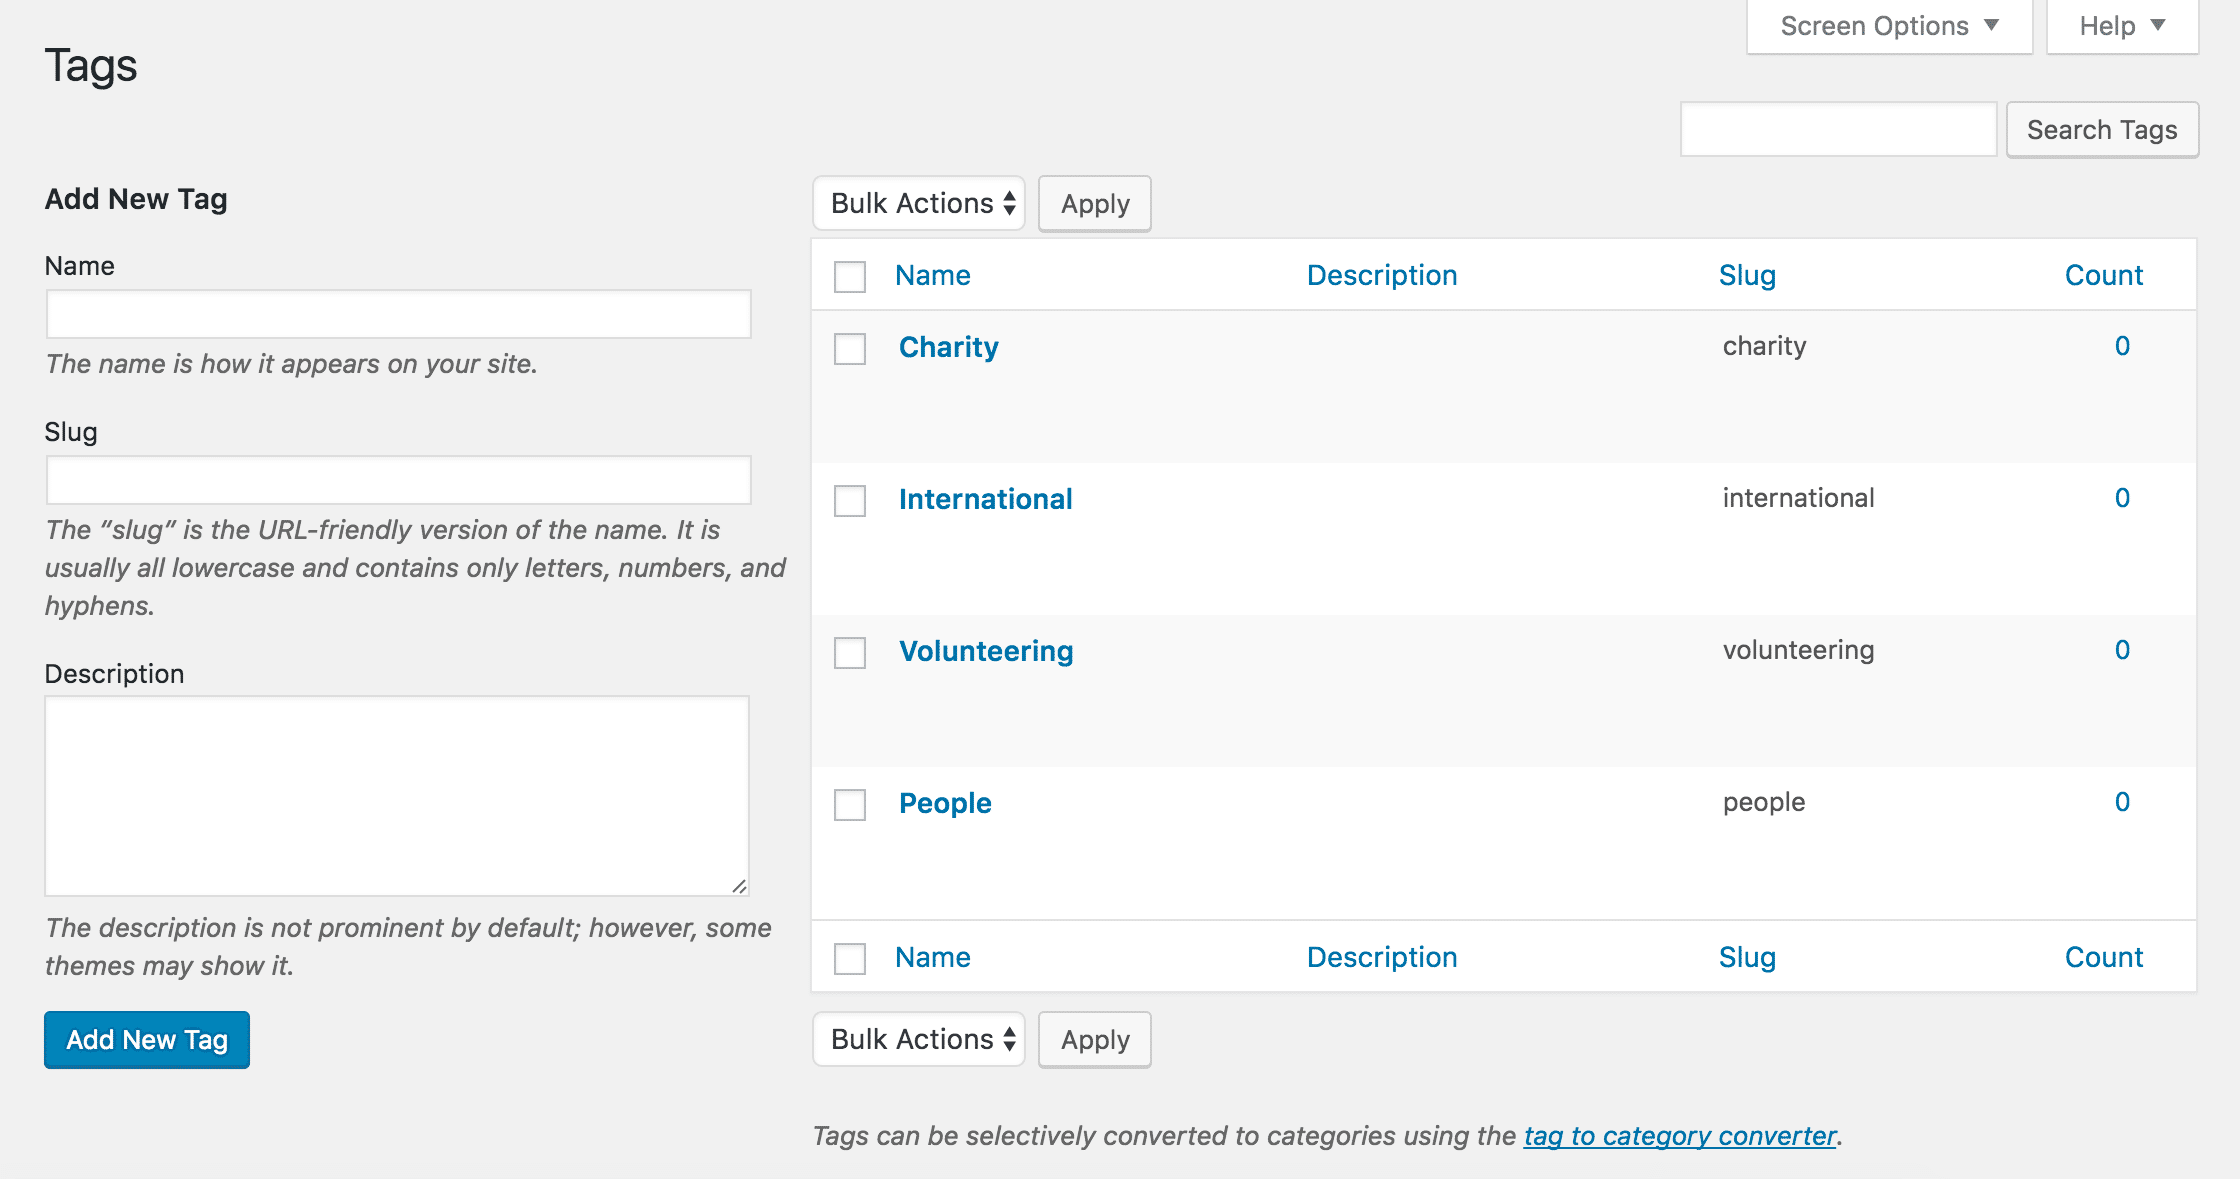
This screen allows you to create new tags, and to edit or delete existing ones.
This screen is divided into the Popular Tags, Add New Tag and Tag Table sections.
Popular Tags
In this section, a tag cloud displays the 45 most popular tags, meaning the tags that are most used on posts. With the proper capability, each tag can be clicked to edit that tag. Of course, if no tags have been assigned to posts, then this section will not appear.
Add New Tag
This part of the screen allows you to create a new tag. There are three pieces of information associated with each new tag: the name, slug and description.
Name
To reiterate, the tag name must be unique.
Slug
The tag slug must be unique. The tag slug is used in the URL for the tag. For example, setting a tag name of “Recipes” and a tag slug of “food” would show all “Recipes” posts with a URL like blog.com/tag/food/. If this field is left empty, WordPress will automatically generate a slug based on the title.
Description
Tag descriptions are optional. Benevolence does not show tag descriptions, so don’t worry about filling this in. However, you might find them useful from an administrative point of view.
Once you have entered all the information, press Add New Tag to save it. It will appear in the tag table instantly.
Table of Tags
This table lists all of your tags by row. Tags are displayed alphabetically by tag name.
The table of tags contains the following columns:
- [ ]: A checkbox that when clicked (checked), ‘selects’ that particular tag to be deleted when the delete action is applied.
- Name: The name of the tag. Remember each name must be unique. Click on the tag’s name to edit the tag.
- Description: The description of the tag.
- Slug: The slug of a tag, and must be unique.
- Count: The number of posts which have this tag assigned. Click on the number in the count column to be directed to the posts screen to manage the posts in that tag.
Screen Options
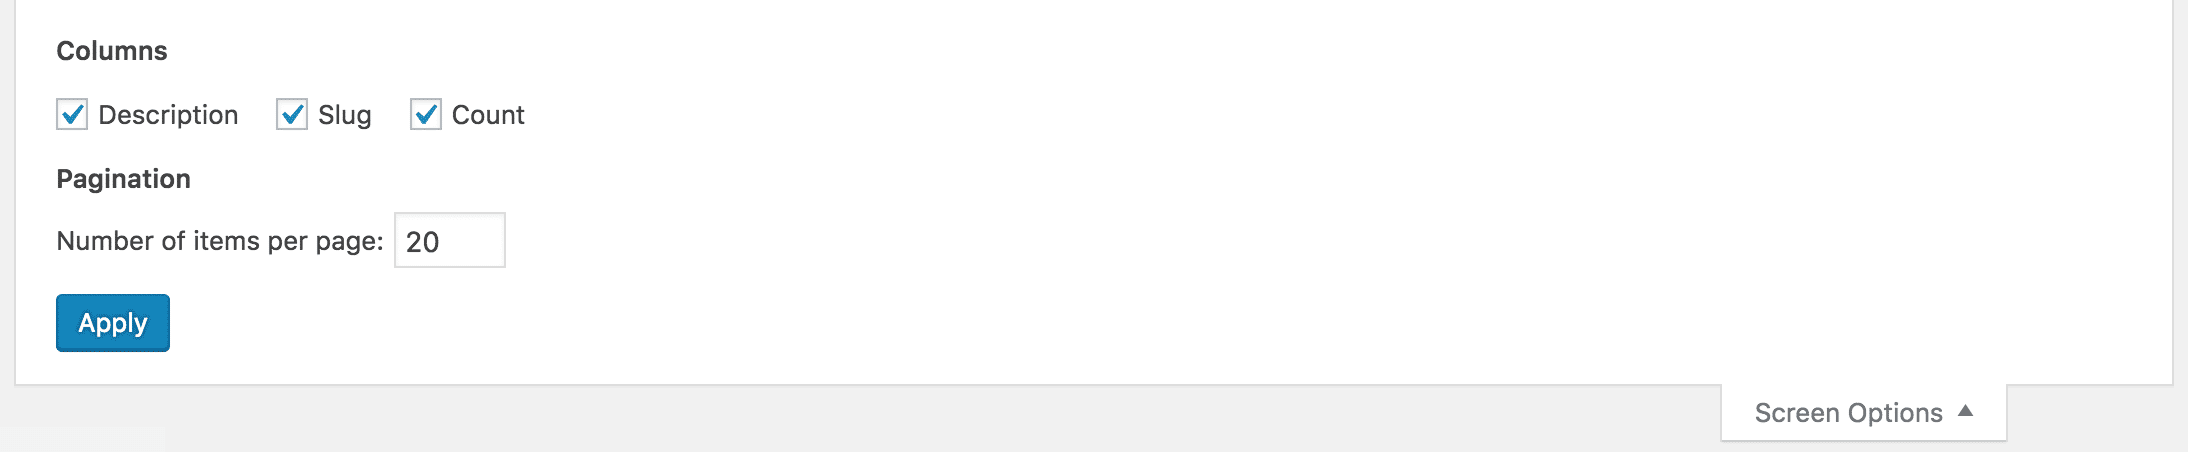
The screen options allow you to choose which columns are displayed, or not displayed, in the underlying table. Clicking on the Screen Options tab shows a list of the columns with a check-box next to each column. Check the box for each column you want displayed in the table, or uncheck the box to not display that column. In addition, the number of tags to display in the table of tags can be set. Click the screen options tab again to close the screen options.
Search
Above the table, to the right, is a search box where you can enter a word, or series of words, and click the Search Tags button to search and display all the tags meeting your search words.
Using Selection, Actions, and Apply
Selection
This section allows actions to be performed on one or more tags displayed in the table. For actions to be performed on multiple tags at once, those tags must be first selected via one of these methods:
- Select one tag at a time: To select a tag, the checkbox to the left of the tag entry must be checked (clicked). It is possible to keep selecting more tags by checking their respective checkbox.
- Select all tags in given table: All tags in a given table can be selected by checking the checkbox in the table’s title bar, or footer bar. Conversely, unchecking the header or footer title bar checkbox will cause all entries in that table to be unchecked (NOT selected).
- Reverse selection: A reverse selection means checked items become unchecked, and unchecked items become checked. A reverse selection is accomplished by holding the Shift key on the keyboard and clicking the header or footer title bar checkbox.
Actions
Actions describe the process to be performed on particular tags. There are two styles of actions that will be referred to as bulk actions and immediate actions. The following describes these actions:
- Bulk actions: These actions can be performed on one, or more tags, at one time, if those tags have been previously selected. Bulk actions are available, when appropriate, as choices in the Bulk Actions dropdown, above the table. The only bulk actions allowed is Delete. Once you have selected an action from this dropdown, click Apply to activate it.
- Immediate actions: Immediate actions are performed immediately, on an individual tag. Hovering the mouse cursor over the tag row reveals the Edit, Quick Edit, Delete, and View options under the Title column, in that tag’s row. Clicking on a tag’s title will also initiate the edit action.
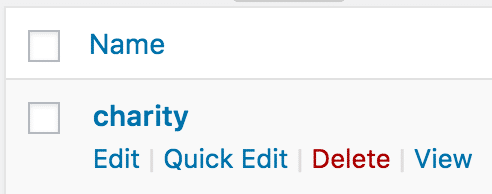
The available actions are described below:
- Edit: This immediate action, initiated by clicking on the tag title or clicking on the Edit link just below the tag title, causes the edit tags screen to display, where you can edit the name, slug and the description of a tag.
- Quick Edit: Quick Edit is an immediate action that allows a quick in-line edit of certain fields related to a tag. See the quick edit section for details on this action.
- Delete: This is available both as a bulk action, and an immediate action. This action removes the tag from the site, but doesn’t delete any posts associated with it.
- View: This action presents the tag as it appears in a single tag view on your blog. View is available only as an immediate action.
Quick Edit
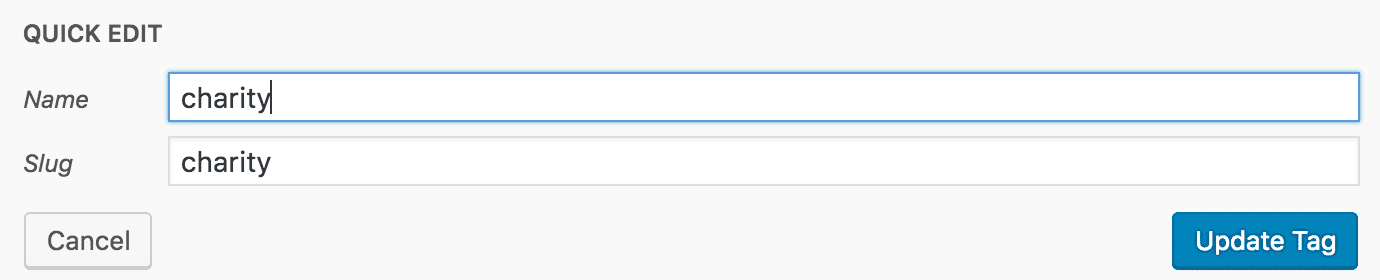
Quick edit is an immediate action performed on one tag by clicking the Quick Edit link, under the tag title. Quick edit is just an in-line edit box that allows you to change the name and the slug of a tag.
Click Cancel to abandon your changes to this tag, or Update to save them.
Edit tag
This screen is accessed by clicking on a tag name in the table of tags or by selecting Edit from immediate actions. It works analogously to the Add New Tag screen.